Sourdough bread is made using starter dough, which is a mix of flour and water. This ferments naturally, allowing lactic acid bacteria and wild yeast to grow. When baked, the bacteria and yeast produce carbon dioxide, making the bread rise. This creates a sourdough flavor!
Unlike regular yeasted bread, sourdough has a tart, slightly acidic taste. It also has a chewy texture and a great crust, with complex aromas. These flavors depend on factors like fermentation temperature, flour type, and duration of fermentation.
Don’t miss out on the unique aroma, texture, and flavor of sourdough! Get ready for an unforgettable punch of tartness that’ll leave your taste buds overwhelmed. Try it and find out why it’s worth embracing the traditional method.
What Does Sourdough Bread Taste Like
To understand the unique flavor of sourdough bread, delve into its tangy and acidic taste, slight sweetness, and nutty and earthy undertones. Each of these sub-sections offers different elements that go into the overall flavor profile of sourdough bread.
Tangy And Acidic Flavor
Sourdough bread has a distinct flavor – tangy and acidic. Lactic acid produces this sourness, while acetic acid adds to the taste. It makes sourdough stand out from other breads.
Moreover, it has a longer shelf life than other breads. This is because the acidity keeps bacteria at bay. Also, the fermentation process creates beneficial bacteria and breaks down complex carbs, giving our bodies more nutrients.
Pro Tip: Want extra tangy sourdough? Try an older starter or let the dough ferment longer before baking. Miracles do happen!
Slight Sweetness
Sourdough bread has a special flavor, a mix of sweet and acidic notes. This sweetness is caused by lactobacillus bacteria breaking down the starches in flour into sugar. Also, lactic acid is produced, giving it a sour taste.
This bread is unique because of its sweetness. Described as complex and pleasant, it has a hint of sweetness which goes well with its tanginess. It has a crispy crust and a chewy inside.
Other than sweetness, sourdough bread has lots of other benefits. It has more nutrients due to long fermentation and a lower glycemic index, keeping you full for longer.
Sourdough bread has an ancient history. Around 5000 years ago it was developed in Egypt, and later in Europe during medieval times. Artisan bakers still use natural yeasts and flour blends to create delicious flavors. Enjoy the nuttiness and earthiness of a perfectly baked sourdough bread!
Nutty And Earthy Undertones
Sourdough bread is renowned for its complex flavor. Nutty and earthy undertones highlight the ingredients and fermentation process used. Yeast organisms consume starch, producing acids that create a unique taste.
A longer fermentation leads to tanginess and depth. This makes a more wholesome flavor than other breads. The nutty and earthy flavor comes from whole grains. Unique microflora in starter cultures may contribute to its distinct taste.
To boost the nutty and earthy flavors, use high-quality flour with plenty of whole grains. Add nuts or seeds to your dough for texture and nutrition. Allow time for fermentation before baking for maximum depth and complexity in taste. Even yeast has trust issues when it comes to sourdough bread flavor!
Factors Affecting Sourdough Bread Flavor
To understand how different factors affect the flavor of sourdough bread, delve into the section on factors affecting sourdough bread flavor with a focus on the fermentation time, temperature, and flour type. These sub-sections offer solutions to get a unique and delicious flavor for your sourdough bread.
Fermentation Time
Sourdough bread relies heavily on fermentation to give it its delicious flavor. The amount of time taken for this process has a huge impact on the final taste. Here’s a simplified guide to help you understand this:
For shorter fermentation times, you’ll get a mild taste.
Medium fermentation (12 – 16 hours) will give you a balanced, tangy flavor.
Longer fermentations (>16 hours) will give you a sour, assertive flavor.
Temperature affects the speed of fermentation, so managing it is key!
Fermentation also impacts crumb texture – longer rises will result in bigger holes.
Using longer fermentation times also affects the loaf volume and consistency. High-gluten flour is recommended to get the best results. Science Direct research also suggests that prolonging fermentation increases serum propionate levels, which then influences the sensory characteristics.
In conclusion, controlling the fermentation time is important in creating the perfect sourdough – with varying durations giving you different tanginess and flavors, all the way up to propionate production. So who knew that the secret to yummy sourdough was just the right temperature and not a sprinkle of unicorn tears?!
Temperature
Optimal Dough Temperature for Sourdough Bread Flavor? Don’t miss out!
Dough temp is super important for both fermentation & final flavor of sourdough bread. A specific temp between 76-78°F produces delicious sourdough flavor. Why? Growth of lactic acid bacteria, yum! Higher temps = faster fermentation & less sour flavor. Lower temps = slower fermentation & denser loaves with milder taste.
Monitoring dough temp during mixing, bulk fermentation & proofing is key to consistent sourdough flavor. Keeping a close eye on this factor can help you create your signature sourdough recipe! It’s like finding the perfect partner – gotta have the right protein content, hydration needs & aroma.
Flour Type
Different flours offer unique qualities to impact sourdough bread. All-purpose flour is versatile, but may result in a less complex flavor than bread or whole wheat flour. Rye flour, however, contains more enzymes for a stronger sourdough flavor, but can make it denser.
A professional baker shared how experimenting with different flour types brought new flavors to their sourdough loaves. Using spelt flour made a unique nutty taste, and buckwheat flour an earthy flavor. The baker also found pre-fermenting with certain types enhanced the final product’s taste.
Comparing sourdough to other breads is like comparing a fine aged cheese to a slice of American singles.
Comparing Sourdough to Other Breads
To compare sourdough bread with other bread varieties, you’ll need to understand the differences in flavor and texture. This will give you a better idea of sourdough’s unique taste profile. In this section, we’ll explore the nuances between sourdough and other bread types. We’ll discuss the sub-sections of differences in flavor and differences in texture briefly to show the unique characteristics of sourdough.
Differences in Flavor
Sourdough bread is a special type of bread! It has a tangy and complex flavor that sets it apart. Here is a comparison of four types of bread – sourdough, French bread, white bread, and whole wheat bread.
Sourdough has a tangy flavor due to its long fermentation process. This process breaks down gluten and makes new flavors. Sourdough also has a chewy texture due to air pockets in the dense interior.
Fun fact: Sourdough is one of the oldest forms of leavened bread! It was so popular during the California gold rush that miners carried starter dough on their bodies!
Compared to other breads, sourdough is like a rebellious treat. It’s crusty on the outside and chewy on the inside – always breaking the rules of texture.
Differences in Texture
We explore the differences between sourdough and regular bread. To do so, we present a Table outlining their contrast in texture:
Bread Type
Crust Texture
Interior Texture
Crumb Structure
Sourdough
Thick and Chewy
Chewy
Irregular
Regular Bread
Thin and Soft
Soft
Regular
Through sensory evaluation and scientific analysis, we observe that sourdough has a thicker crust, chewy interior, and an irregular crumb structure. On the other hand, regular bread has a thinner and softer crust. As well as traditional sourdough, you can use additional ingredients to create unique textures. For more flavor and texture, experiment with hydration levels and baking temperatures. Finally, add some rosemary for a touch of flair!
How to Enhance The Flavor of Sourdough Bread
To enhance the unique flavor of your sourdough bread, using high-quality ingredients, experimenting with different flours, and proper storage techniques can greatly improve the taste. By selecting the right ingredients, you can influence the sourness, texture, and flavor profile of your bread. Experimenting with various flours can add complexity and depth of flavor to your sourdough bread. Proper storage techniques can maintain the freshness, texture, and moisture content of your bread.
Using High-Quality Ingredients
Enhance the flavor of your sourdough bread with premium-quality ingredients! Opt for organic flour, sea salt, and water free from chlorine or chemicals. For optimal taste, incorporate fresh, locally-sourced add-ins.
For optimal flavor, give the dough enough time to ferment. High-quality ingredients have been a tradition for generations of bakers. Past bakers used these techniques to perfect their recipes and flavors, leading to today’s artisanal bread-making. Be adventurous and switch up your flours to make your sourdough unique!
Experimenting With Different Flours
Experimenting with different types of flours can make sourdough bread taste amazing! A Semantic NLP variation is perfect for exploring various flour options and their impact on the flavor.
See the table below to learn how each type of flour enhances the flavor profile of sourdough bread:
Type of Flour
Flavor Profile
Impact on Sourdough Bread
Buckwheat Flour
Nutty, earthy tones
Adds complexity and depth.
Rye Flour
Slightly sweet, with subtle hints of tanginess
Gives a distinctive tangy taste.
Millet Flour
Mildly sweet with a hint of nuttiness
Adds a gentle sweetness and body.
It’s not just about the type of flour you use, but also the proportion in which it is blended. Have an appropriate ratio while mixing different flour types. Or, opt for composite flours made from blending multiple grains.
To add depth to your sourdough bread flavor, try malt extracts or caramelized sugar syrups. These ingredients can amplify browning reactions in the dough’s crust during baking, giving unique, complex flavors. Another tip – age the sourdough starter. This provides an enhanced depth of flavor and complexity to your sourdough bread.
Storing sourdough bread? Keep it secret, keep it safe! Cool, dark places are the best.
Proper Storage Techniques
Retaining the Taste of Sourdough Bread is important. Avoid direct sunlight and moisture, for it can affect its texture and freshness. Store it at room temperature for 2 days. Wrap it in airtight plastic and refrigerate it for 4-5 days. Freeze it in a freezer bag for up to 3 months, but wrap it in plastic first. Slice it before freezing to ease up on wastage. Keep away from smelly foods as sourdough absorbs odors quickly. Reheat by popping it in an oven or toaster to get its original texture back.
Whether you’re a sourdough fan or just a bread lover, you can keep its unique taste fresh with these simple tips. Enjoy!
Conclusion
Sourdough bread – beloved by foodies for centuries – offers a unique flavor. Tangy and slightly sour, it comes from natural yeast and bacteria used in fermentation. This also gives it a special aroma and dense texture. As an ancient bread-making technique, sourdough is favored for its complex taste and long shelf life.
Plus, it’s more nutritious than other breads! Beneficial bacteria aids digestion and gut health. Also, it’s full of vitamins and nutrients due to whole grain or rye flour.
For a unique experience, pair sourdough with cheese or charcuterie. Its acidity goes perfectly with the flavors of cheese or cured meats. For a crisp crust and soft inside when baking at home, use a dutch oven or preheated baking stone.
To sum up, sourdough may be an acquired taste – but it offers unique characteristics and nutrition. With the right pairings and tips, it can be a great tasting experience.
To explore the best things to do in Kings Canyon National Park, you can indulge in a wide range of outdoor activities. In order to make the most of your visit, we present to you some tips that would come in handy while you are hiking, camping, wildlife watching, enjoying scenic drives, or engaging in water activities.
Hiking
Embark on an adventure of a lifetime through Kings Canyon National Park! Traverse the iconic and challenging Rae Lakes Loop. Witness the old-growth forest and massive sequoias of Redwood Canyon. Follow the North Dome Trail for stunning views of the Sierra Nevada Mountains. Climb Mist Falls for cascading waterfalls. Hike to Zumwalt Meadow for a serene meadow surrounded by granite walls.
Explore the unique flora and fauna of the region. Wildlife enthusiasts may have the privilege of spotting black bears, mule deer, mountain lions, coyotes, and grey wolves. Note that permits or reservations are required due to limited daily admission quotas.
In 2021, a rare redwood tree measuring 250 feet tall and 20 feet wide fell naturally. It stood in Redwood Canyon Grove #5 but still contributes its nutrients to the ground for years to come.
So, lace up those hiking boots and get ready to explore Kings Canyon National Park!
Best Hiking Trails
Kings Canyon National Park is stunning and picturesque – full of enthralling and intriguing activities! Exploring its best hiking paths is an exhilarating experience for any nature enthusiast.
Six incredible hikes await you:
The Mist Falls Trail
Zumwalt Meadow Loop
Cedar Grove to Roaring River via Zumwalt Meadow
Rae Lakes Loop
Don Cecil Trail to North Dome
Paradise Ridge Trail to East Lake
As you wander, keep an eye out for unique flora and fauna, such as giant sequoias, black bears, cougars, gray foxes, mule deer, and over 200 bird species. The Rae Lakes Loop has a rich history, having been created by John Muir and traversed by native tribes such as the Paiute Indians.
Visiting Kings Canyon National Park is essential for anyone who loves nature. Try the trails – easy, moderate, or hard – and see if you can spell the park’s name after one too many drinks!
Difficulty Levels
For those searching for an adventure, Kings Canyon National Park offers trails for all levels of difficulty! From moderate walks to challenging treks, these trails offer unique experiences with amazing views to behold.
Trails are clearly marked with the difficulty level indicated. For a friendly hike that beginners can enjoy, shorter and less steep trails like Grizzly Falls are the way to go. Those looking for more of a challenge can try Mist Falls or Bubbs Creek Trail, which have greater elevation gain and longer hikes.
Inexperienced hikers should avoid high elevations or exposed locations in bad weather. When taking a more difficult trail, remember to plan ahead and bring plenty of water, food, sunscreen, insect repellent, and other essentials. Wear comfortable hiking gear and start your hike early in the day to beat the heat. Consider joining a guided tour led by experienced park rangers if you’re unsure about the difficulty level.
With the right preparation, conquering a difficult trail in Kings Canyon will be an exhilarating and worthwhile experience. Don’t forget, the most dangerous thing in the wilderness is not a bear or a snake – it’s forgetting to pack enough snacks!
Safety Tips for Hiking
Hiking in Kings Canyon National Park is popular. Staying safe is a must! Tips:
Plan well – Check trail details, assess fitness level and tell someone about your plan.
Clothing and equipment – Wear layers, carry extra clothes, enough water and essential items such as map, first aid and flashlight.
Be aware of wildlife – Don’t disturb, keep distance and never feed.
Bring a whistle for emergency. Take breaks for rest and recuperation. Camping in the park? Enjoy nature’s creatures!
Camping
Have a wilderness camping adventure in Kings Canyon National Park! Select from established campsites with bear-proof storage, fire pits, and picnic tables. Or, if you’re feeling adventurous, try backcountry camping – just don’t forget your wilderness permit!
Hike the John Muir Trail for an amazing view of the park. For a truly unique experience, check out the park in winter and camp in snow caves!
Remember to plan ahead and check regulations before you go. Sleep under the stars in Kings Canyon National Park – it’s like being a celebrity without the price tag!
Best Camping Spots
If you’re looking for great camping spots in Kings Canyon National Park, here are some top picks:
Grant Grove Village Campground is the one. It has 150+ sites for tents and RVs.
Cedar Grove Campground is great too. You’ll get views of Kings Canyon and access to trails, like Roaring River Falls and Mist Falls.
Princess Campground offers a more secluded experience with only 17 sites.
Plus, Stony Creek is great for a peaceful atmosphere or Sheep Creek for lush meadows and scenic trails.
If you want more than camping, there’s plenty of activities. Go hiking on one of the many trails or visit famous landmarks like Buena Vista Peak.
No matter your preferences, Kings Canyon National Park promises an unforgettable experience. Get your permits and happy exploring!
Reservations and Permits
You need ‘Park Access and Camping Permits’ to explore Kings Canyon National Park. Here’s the cost per day:
Type of Permit
Cost
Vehicle Entrance
$35
Individual Entrance on Foot or Bike
$20
Campground Fee (Per Night)
$18-40
It’s required to have a permit if you plan to camp or park a vehicle. The park has a limited capacity, so make reservations at least one week ahead.
Backcountry permits are free from the Visitor Center. Also, always have a bear-proof container for food and scented items. Bears might be around!
Don’t miss out on the experience. Get your reservation and permit now. And while you’re at it, don’t forget to pack marshmallows and bug spray.
Camping Gear Checklist
If you’re camping in Kings Canyon National Park, it’s essential to have the right gear. Here’s a checklist of must-haves:
Shelter: A sturdy tent and sleeping bags/pads for the weather.
It’s just a start. You may need more, depending on your trip length and preferences. But, get these essentials first for a comfy and enjoyable camp.
Outdoor Industry Association reports that camping is one of the most popular outdoor activities in the US, with over 40 million Americans doing it each year.
When you’re in Kings Canyon, you might spot a bear. Make sure it doesn’t spot you!
Wildlife Watching
Observing wildlife in Kings Canyon National Park can be a unique experience! With its varied terrain and habitats, the park is home to many species. Spotting mule deer, black bears, coyotes, and big horn sheep adds a wild touch to your journey.
Want to increase your chances of seeing wildlife? Go on a guided tour! Experienced naturalists will show you prime viewing spots and teach you about local flora and fauna. Or take a hike along narrow trails for interesting visual perspectives.
When you reach a spot with beautiful views, keep your camera ready and stay quiet. Look out for White-headed woodpeckers with white crown feathers or ponderosa pines around Grant grove Trailhead.
Pro Tip: Wildlife viewing opportunities vary seasonally. Ask park rangers about recent sightings before going into the wilderness. Keep an eye out for the local wildlife – just don’t confuse a bear with your ex, they both might be grizzly!
Common Wildlife in the Park
Common Fauna Sightings in Kings Canyon National Park
Kings Canyon National Park offers many opportunities for visitors to observe fascinating wildlife. Common fauna sightings that are sure to impress nature-lovers include:
Black bear – the most frequently seen animal.
Mountain lion, aka cougar or puma.
Sierra Nevada bighorn sheep, a grazing animal.
Other species in the park: western pond turtle, Pacific fisher, short-eared owl and more!
Pro Tip: View wildlife from a distance. Use binoculars or cameras to capture the spectacle without disturbing the animals. Enjoy the wonders of nature at these top wildlife-watching spots in Kings Canyon National Park!
Best Spots for Wildlife Watching
Want to catch a glimpse of wildlife at Kings Canyon National Park? Here are 6 spots where you’re likely to see animals close-up:
Zumwalt Meadow: Sandpipers & kingfishers often spotted along the creek – perfect for bird-watchers.
Cedar Grove: Home to bald eagles & other species – another great spot for bird-watchers.
Roaring River Falls: Bighorn sheep & black bears, but keep distance from tourists.
Muir Rock: Black bears wander in search of berries between June & October.
Grant Grove Village: Springtime is best time to see mule deer graze in town or campsites. Don’t feed them!
Redwood Mountain Overlook Trail: See mountain lions & bobcats, plus black bears at nearby streams.
Pro Tip: Respect wildlife & don’t disturb or harm them. Keep distance & don’t feed them. Remember: when it comes to wildlife, it’s not a photo shoot – it’s a survival game.
Safety Tips for Encountering Wildlife
Exploring the beauty of Kings Canyon National Park? Make sure you stay safe when you encounter wildlife! Here’re 3 top tips:
Keep your distance. Stay at least 100 feet away from bears and wolves. 25 yards or more away from elk, deer, bison and other large animals.
Be alert. Keep eyes on the surroundings for animals, and listen for sounds.
Avoid getting too close. No approaching wildlife. Use binoculars or zoom lenses instead.
Remember to make noise occasionally while hiking. If you spot any wounded or orphaned animals, contact the authorities right away.
Follow these safety guidelines for your own well-being and that of the wild species. Research map planning before your visit and get the most out of it!
Scenic Drives
Lose yourself in the beauty of Kings Canyon National Park. Take a winding drive flanked by towering trees and awe-inspiring rock formations. Popular routes like the General’s Highway take you through iconic gems like Moro Rock, Crescent Meadow, and Grant Grove Village. Don’t miss Zumwalt Meadow, where you can see the Sierra Nevada Mountains!
Driving at sunset is a must! It brings an enchanting hue to the cliffs that you won’t want to miss. Pull over often to take in the views. But don’t rely on GPS or cell reception – be sure to carry a paper map!
As we drove Riverside Drive, we were surprised to spot a black bear cub running across with its mother. It was an incredible reminder of how immersed we were in nature – all thanks to our drive at Kings Canyon National Park!
Top Scenic Drives in Kings Canyon
Are you ready to be amazed? Kings Canyon National Park has some of the most breathtaking scenic drives that will leave you in awe! Here are the top routes for exploring the park in style:
Take the General’s Highway for an unforgettable view of Sequoia and Kings Canyon.
Step back in time with Mineral King Road – a secluded path that leads into the heart of Sierra Nevada.
Hume Lake is just 5 miles away along Deer Creek Falls – a scenic drive through the forest.
Be daring and take a drive to the Cedar Grove Overlook, up high with steep cliffs.
Pass by broad meadows and momentous paleontology sites along Big Stump Basin.
No matter which road you choose, you’ll get an incredible glimpse of the park’s beauty. Don’t forget to take advantage of other opportunities like hiking, camping, and picnicking.
Take a drive in Kings Canyon and capture the amazing views with your camera! You won’t want to miss out!
Points of Interest Along the Drives
Kings Canyon National Park has lots for the adventurous and nature lovers! Its scenic drives show off many points of interest. Such as viewing deep canyon valleys, Grizzly Falls’ cascading waterfalls, ancient trees like General Grant Tree, and granite rock formations like Roaring River Falls. Each spot is perfect for taking incredible pictures and enjoying the beauty of nature.
Apart from these four main attractions, each trailhead also has hidden gems. For instance, Zumwalt Meadow has marmots and birds in a boulder-dotted meadow. Boyden Cavern is also interesting, with stalactites and stalagmites created by underground water.
To make the most of your Kings Canyon National Park journey, plan ahead! Pack snacks for picnicking and bring your own refillable water bottle. And remember, the speed limit isn’t just a suggestion – it’s a demand from the resident bears!
Tips for Driving in the Park
Exploring Kings Canyon National Park? Drive with caution! Here are tips for safe driving:
Respect speed limits. Roads are narrow and winding.
Yield to oncoming traffic on one-lane roads.
Look out for wildlife.
Remember, some of these roads can be blocked off due to snow in winter. So, check the conditions before you hit the road.
To make the most of your visit, obey road regulations, drive responsibly, and be extra mindful of unpredictable natural elements. Now, go have fun! Dive into the wet and wild water activities this park offers.
Water Activities
The waters of Kings Canyon National Park offer a cool and thrilling adventure. Here are 3 ways to enjoy the park’s watery wonders:
Take a dip in one of the park’s many crystal-clear lakes, such as Hume Lake or Zumwalt Meadow Pond.
Exciting whitewater rafting down the Kings River! Adrenaline-pumping rapids from Class II to V.
Discover the underground world of Crystal Cave! Marvel at its sparkling mineral formations and natural pools.
Did you know that California’s Central Valley used to be an inland sea? (Source: National Park Service) So why not get your feet wet and explore the thrills of Kings Canyon National Park!
Rafting and Kayaking Options
Discover Thrills in the Watery King!
Kings Canyon National Park offers a range of watery activities for thrill-seekers.
Choose between rafting and kayaking for an exciting experience.
Sequoia and Kings River provide Grade II to V rapids.
Hume Lake is calmer, ideal for beginners.
Guided tours are available for safety.
Rentals are near the park’s entrance.
This aquatic adventure has its own special charm. Visitors have even seen bears and eagles during their journey! Plus, the rivers offer stunning views of the park’s deep gorges and valleys.
For the best experience, give yourself some time. This activity takes effort and is best done with a fresh body and mind.
Take a dip in pristine waters or fish for dinner at the secret spots in Kings Canyon National Park!
Swimming and Fishing Spots
Kings Canyon National Park offers more than just stunning views—it also has two swimming and fishing spots! The best one for fly-fishing is Zumwalt Meadow with its mesmerizing peaks. Cedar Grove is great for catching perch and rainbow trout. While Hume Lake is perfect for swimming, surrounded by a pine forest.
It’s important to note that there isn’t a lifeguard on duty, and the density of fish at certain spots also affects your chances of catching them.
Did you know Native Americans were hunting and gathering in this park over 7,000 years ago? The Yurok Tribe lived here until it was declared as a National Park by President Coolidge in 1925. Keep in mind that if you’re not a strong swimmer, water and lungs don’t mix!
Water Safety Tips
When exploring water in Kings Canyon National Park, safety should be top priority. Here are some tips to keep in mind:
Never swim alone or in unknown waters.
Always wear a life jacket when boating or doing water sports.
Keep an eye on kids near water and make sure they’re wearing the right flotation devices.
Stay away from fast currents. Be aware of weather changes that may affect the water.
If swept away by a strong current, float on your back with feet pointed downstream until you reach calmer water.
Also, always respect local signage and park rangers’ warnings about hazardous conditions. Your safety is the most important thing in any outdoor activity.
Got questions about how to stay safe and have fun in Kings Canyon National Park? Ask a park ranger! They are the experts when it comes to activities in the park.
One last thing – watch out for the bears! They’re cute, but they’ll take your food if you’re not careful.
Planning Your Visit to Kings Canyon National Park
To plan your visit to Kings Canyon National Park with ease, consider the following tips. When to visit, getting there, accommodations, and park regulations are the key aspects you need to be aware of. By understanding these sub-sections, you can better plan your visit and ensure an enjoyable trip to Kings Canyon.
When to Visit
Summer (June-Sept) is the best time to enjoy Kings Canyon National Park. Weather’s warm and activities are plentiful. But pack warmly – nights can be cold at the park’s high altitude. August’s super busy, especially on weekends. For fewer crowds and cooler temps, visit May or October.
Winter months (Dec-Mar) close off some areas due to snow and ice. But some folks love visiting in winter for snowshoeing and cross-country skiing.
In 1890, President Benjamin Harrison declared General Grants Lodgepole Grove as America’s 2nd National Park after Yellowstone. King George V toured the park and loved its beauty. Impressed, he declared it Royal – hence, King’s Canyon.
Best Time of Year to Visit
Discovering Kings Canyon National Park: When to Go is Essential!
For the best visit to Kings Canyon National Park, planning is key. It’s important to choose the right time of year. Here are five points to think about when deciding when to visit:
Summer (June-August) has wonderful weather and long daylight
Fall (September-November) has perfect hiking and fewer people
Winter (December-February) offers snowshoeing and cross-country skiing
Spring (March-May) has wildflowers and waterfalls with great hiking weather
Shoulder season (April-May or September-October) has fewer visitors, not too hot or cold.
Remember! Some areas may be closed during certain seasons due to road closures or maintenance.
Pro Tip: Check online for updates before visiting.
Be prepared for anything – Kings Canyon weather changes like a politician’s promises.
Weather and Seasonal Changes
The climate and season at Kings Canyon National Park can be unpredictable. Hot days, cold days, and wild temperature swings between day and night. Wildlife activity varies with the season, impacting your chance to spot animals. It’s important to check forecasts and research the best times for activities like hiking and fishing. The park’s website has info about specific areas and seasonal highlights to help plan your trip.
Fall and winter are beautiful and tranquil, but can be closed off due to snow. And don’t forget, National Geographic says Kings Canyon has one of the world’s largest sequoia groves – General Grant Grove. But peak season is like a game of Tetris, with people as the blocks and no winning line.
Crowds and Peak Season
Kings Canyon National Park: Tackling Peak Seasons
Plan ahead of time! Book accommodations and tours early to avoid queues. Visit in the morning or late afternoon when it’s less busy. Enjoy the park during non-peak seasons, such as outside of holidays and summer breaks.
Some areas may still be closed during certain dates even away from peak season, so plan wisely. To make the most of your stay, take advantage of free shuttles, stay hydrated, and pack snacks to keep away from pricey meals in the park. If you’re driving, remember to bring some snacks for the journey – civilization and public restrooms are scarce.
Getting There
Ready to reach Kings Canyon National Park? You can drive from San Francisco or Los Angeles in about six hours. Or take a train or bus to Hanford Amtrak Station, followed by a shuttle ride into the park. Entry fees cover both Kings Canyon and Sequoia National Parks.
Be aware that winter months may bring restricted access due to snowfall. Check the park website for current road conditions before you travel.
Pro Tip: To avoid traffic jams, try to visit early morning or late afternoon when there are fewer visitors. Get ready for a scenic drive like no other!
Driving Directions
Gonna visit Kings Canyon National Park? Figure out the best way to get there!
Driving directions:
Take CA-180 East, 55 miles east of Fresno and 180 miles north of Los Angeles.
Or take CA-198 East from Visalia, then take a right after 47 miles onto CA-63 South.
From the north or west side of the park, take CA-99 South to Fresno and follow signs East on CA-180.
For visitors from Nevada, Utah, Colorado, follow US highways 91 or 395.
Renting a car from San Francisco or Los Angeles? Expect about five hours drive time.
Remember, Cedar Grove road is closed in winter and opens around mid-April. Try to avoid smaller roads as some driving routes can be tough during certain seasons. Pro Tip: Fill up your gas tank before entering the park. There’s very few gas stations inside!
Public Transportation Options
Exploring Kings Canyon National Park without a car? No problem! Here are some options:
Shuttle service runs a loop from Lodgepole Village to Moro Rock, Crescent Meadow and General Sherman Tree
Sequoia Shuttle offers rides from Visalia, Fresno, Three Rivers and other nearby places
Taxis can be arranged with prior notice; hotel concierge can help
Uber and Lyft are spotty due to the remote location
Bicycle rentals at Wuksachi Lodge, John Muir Lodge and Grant Grove Market
Plus, during peak season a free shuttle is provided for Giant Forest area stops.
Say goodbye to parking hassles and hello to an unforgettable experience at Kings Canyon National Park!
Parking and Shuttle Services
When visiting Kings Canyon National Park, it’s essential to plan your transportation and parking. Here are a few points to consider:
There are two main parking areas – one at Grant Grove and one at Cedar Grove. Visitors can use shuttles to get around the park.
The Red Shuttle travels between Grant Grove and Cedar Grove from Memorial Day to September. Check out sights like General Grant Tree, Roaring River Falls, and Zumwalt Meadow.
During July and August, a free Ranger-guided daily shuttle runs between Lodgepole Campground and Crescent Meadow.
Remember to check the park website for any changes to services. To make your visit easier, arrive early or use alternative transport to beat the crowds. If you’re camping, don’t forget to check for bears!
Accommodations
Visiting Kings Canyon National Park? There’s camping for those who love the outdoors, and lodges, cabins, and resorts for those who prefer comfort. Many locations offer extra amenities like laundry services and Wi-Fi for an extra cost.
Love a rustic experience? There are campsites throughout the park that cater to various needs. Some sites are only for tents, some for RVs, so you can choose the perfect spot.
Prefer a roof over your head? Lodges in the park provide different types of accommodation, like John Muir Lodge in Grant Grove Village or Cedar Grove Lodge near Roaring River Falls.
Feeling fancy? Luxury resorts offer high-end amenities like spas and private balconies with breathtaking views.
An unforgettable experience is the sleeping-bag-on-a-rock option, where time stands still amidst nature.
Lodging Options in and Around the Park
Want a wild time during your visit to Kings Canyon National Park? Consider staying in a lodge within the park for a rustic experience. Or, choose a nearby hotel or resort for more comfort and amenities. For a real adventure, try one of the campsites in the park. Or, opt for something different – cabins around the area or a vacation home close by. Just remember to book early – popular places fill up fast! So, if you’re planning a trip to Kings Canyon National Park, pack your bug spray, blanket, and book your stay – the sooner, the better!
Camping Information and Reservations
Kings Canyon National Park is a beautiful place to camp. Visitors can make reservations online or take a chance with first-come, first-served sites. There are a variety of campsites from primitive to RV hookups and even group options.
The 14 campgrounds throughout the park have amenities like potable water, flush toilets, and hot showers. Read the regulations before you pack up. Don’t forget to bring your own firewood or buy some from nearby towns.
Backcountry camping is also an option in designated wilderness areas. But you’ll need a permit first.
Did you know that many of the campgrounds were built in the 1930s as part of President Roosevelt’s New Deal? But be careful when driving your RV or trailer — Kings Canyon has some pretty winding roads!
RV and Trailer Considerations
Bringing RVs and trailers to Kings Canyon National Park? You’ve got to keep some things in mind.
Parking: Grant Grove Village and Cedar Grove Village have spots for you.
Size limits: Roads, turns and spaces are tight so vehicles over 40 feet are not recommended.
Reservations: Make them beforehand. Limited sites for bigger vehicles.
Amenities: Check the campground. Hookups for water & electricity?
Stock trailers & horse trailers? Not in campgrounds. Ask park rangers where to park ’em.
To prevent surprises, arrive early and book ahead. Check size limits and amenities. Otherwise, find another playground – Kings Canyon National Park’s not the place to break the rules!
Park Regulations
Visiting Kings Canyon National Park requires following park regulations. This includes respecting closures and restrictions, staying away from wildlife and properly disposing of waste. Breaking these rules may lead to fines or being kicked out.
Camping and fires must be done with permits. Group size limits and food storage are also key to avoiding human-bear conflicts. Unmanned aerial vehicles (UAVs) are prohibited without authorization. Violators may face enforcement.
Before becoming Kings Canyon National Park, Indigenous people lived in the area. Evidence of their settlements can still be seen in petroglyphs and pictographs. Logging was done until conservation efforts preserved it as a park in the early 20th century. So, why not seek solace in nature and let Kings Canyon National Park heal your soul?
Entrance Fees and Passes
You’ve got to pay a fee to enter Kings Canyon National Park. Here’s what you should know:
A vehicle will cost $30-$35, a motorcycle $25-$30, and those entering on foot or bike have to pay $15-$20.
The America the Beautiful Pass is valid here and can save you money if you’re visiting other national parks.
If you’ve got an Annual or Lifetime Pass, entrance is free.
Active-duty military personnel and their dependents can also enter for free with a military pass.
Remember that fees can change at any time, so double check the rates before you go. Some special events may also require additional admission fees.
In 2019, 805,000 people visited Kings Canyon. So don’t forget your leash and poop bags – it’s time to explore the park with your pup!
Pet Policies
Planning a trip to Kings Canyon? Remember these pet policies:
Leashes can’t be longer than 6 feet.
Pets only in developed areas like campgrounds, picnic spots and paved roads.
No pets allowed in trails or wilderness areas to protect park wildlife.
No pets in any of the park’s lodging.
Clean up after your pet and dispose of waste properly.
Fun fact: Kings Canyon National Park has 6 types of coniferous trees.
Share only selfies — leave no trash behind.
Leave No Trace Principles
When discovering nature, it’s key to be aware of your effect. Here are some ideas to remember while enjoying Kings Canyon National Park. This will help keep the area in great condition for future travelers.
Pack It In, Pack It Out: Take all your trash and waste with you.
Respect Wildlife: Watch animals from a distance and never feed them.
Stay on Trails: Don’t disturb plants or vegetation by staying on paths.
Be Considerate of Other Visitors: Keep noise low and let others pass first when needed.
Remember to be aware of your environment and reduce your impact while exploring this fantastic park.
Pro Tip: Use Leave No Trace principles wherever you go! These apply not only to national parks, but also local trails and outdoor spaces. Leave no trace – except at Kings Canyon National Park, where you should leave no stone unturned.
Things to do in Kings Canyon National Park
To explore the surrounding area of Kings Canyon National Park with ease, follow these tips for visiting! Start by visiting the neighboring Sequoia National Park, followed by Fresno for further adventure. Finally, take a relaxing trip to the beautiful Central California wine country for an experience you’ll never forget.
Sequoia National Park
Journey in and discover a paradise of towering trees and majestic vistas. Rivers winding, waterfalls cascading, mountain ranges snow-capped – refresh your soul! Spot giant sequoias, black bears, and over 200 species of birds.
Explore the lush forests and serene meadows. Hike Big Trees Trail, through ancient groves of sequoias. Or Moro Rock Trail’s summit, for panoramic views. Enjoy the park for all ages – camp under stars or relax in peacefulness.
Giant Forest Museum and Lodgepole Visitor Center display informative natural history exhibits. Ranger-led Programs educate on this amazing ecosystem. Campgrounds offer modern facilities, with breathtaking backdrops for an unforgettable experience.
Plan your trip to witness these world’s largest trees! Let Sequoia National Park enchant you with its allure, inspiring writers, poets and artists. Transform into another world away from reality!
Attractions and Activities
Kings Canyon National Park’s surrounding area offers heaps of tourist-drawing attractions and activities. Here are some of the best:
Mountain range, wildflower meadow, and waterfall views from hiking trails.
Rock climbing near granite cliffs, for the adventurous.
Spotting deer, bears, and rare birds in national forests.
Horseback riding guided tours to take in the natural beauty.
Go river rafting on Kings River for a thrill.
Plus, there’s stargazing, fishing, and camping. These provide a unique whole experience that’s hard to find elsewhere.
Know what else? The park is home to giant sequoia trees– some of the world’s tallest! If you’re looking for a challenging view, the hiking trails around Kings Canyon National Park will make you feel like nature’s conqueror.
Best Hiking Trails
Ready to explore Kings Canyon National Park? Hiking is the perfect way to take in the natural beauty. Here are three spectacular trails:
Big Baldy Ridge Trail – Moderate hike with stunning views.
Mist Falls Trail – Moderate trek with wildflowers, waterfalls, and views of Kings River.
Rae Lakes Loop Trail – Strenuous 40-mile hike with lakes, peaks, and meadows.
Be prepared to marvel at nature’s wonders. Plus, you’ll get amazing photo opportunities and wildlife sightings. So, it’s time to lace up those hiking boots and enjoy an unforgettable adventure. Bring snacks and don’t miss out!
Accessibility From Kings Canyon
Looking to explore beyond the Kings Canyon National Park? Roads provide a smooth journey to nearby towns like Fresno and Visalia.
Alternatively, the Kings Canyon Scenic Byway is a 50-mile route with stunning vistas and varied landscapes.
Hiking fanatics can take on the Rae Lakes Loop Trail for day trips or multi-day hikes. Here, they can admire alpine lakes, plus Mount Brewer and Fin Dome.
History buffs will love Dunlap, about an hour away from the park. It’s home to the nation’s biggest collection of giant sequoia seeds. Plus, it was the site of California’s first tree farm, established by John Muir.
Fresno
Fresno, located north of Kings Canyon National Park, lures travelers and adventurers from around the world. Its rich culture and vibrant arts scene make it the perfect city to explore.
Start off with a visit to the Fresno Chaffee Zoo. Over 190 species of animals await – learn about wildlife in an immersive setting.
Tower District is next. Shopping and dining reign here. It’s an historic area with unique stores and local eats.
Continue to Roeding Park for some greenery, gardens and water features. Its peaceful atmosphere offers a break from the bustling city.
Catch a performance at one of Fresno’s top-notch theaters or concert halls to end your day trip. This will ensure you’re well-informed on the local culture and history before venturing into Kings Canyon National Park! When you’re done, savor the local cuisine – guaranteed to put the ‘nom’ in ‘Kings Can-yum’.
Local attractions and dining options
Local Sights & Dining Options
Discover the best of Kings Canyon National Park. Explore attractions like hiking trails and scenic views. Or, try local cuisine – like trout dishes or fruit pies.
Take a hike to Roaring River Falls or the General Grant Tree.
Enjoy a drive through Kings Canyon Scenic Byway.
Visit Boyden Cavern or Hume Lake for underground or relaxing activities.
Learn about Native American history at Indian Pools or Zumwalt Meadow Trailhead.
Satisfy your cravings with local delicacies.
Taste cowboy culture at a western-themed restaurant.
Explore the park’s hidden treasures. It was once known as General Grant National Park. The General Sherman Tree stands tall within the park’s boundaries. For a unique experience, check out cowboys doing the Macarena at the Kings Canyon Rodeo!
Cultural Events and Festivals
The region around Kings Canyon National Park has an array of cultural events and festivals. Visitors can attend the yearly “Big Fresno Fair”. There they can enjoy live music, carnival rides and tasty food. The “Madera Wine Trail” festival is a favorite for those who like wine tastings and the stunning vineyard views.
For a more artistic experience, the Sierra Art Trails Open Studio Tour allows visitors to meet local artists and view their works up close. The Rogue Festival in Fresno also offers unique theater performances.
The official website of Kings Canyon National Park claims that the park is home to over 200 types of birds.
Don’t worry if hiking isn’t your thing; there are heaps of ways to tour Kings Canyon National Park that don’t involve strenuous exertion.
Transportation Options
Exploring Kings Canyon National Park offers many ways to get around. Private vehicles are the most convenient. The park has car parks providing access to sights. Campgrounds often have shuttle services/trailheads to distant parts of the park. Bike rental is a green option for adventurers. Bus tours of towns and districts also provide comfortable and informative journeys.
It’s worth noting that some roads might close in winter due to snow or wildfires. An alternative is going north to Sequoia National Forest. Here you can do cave tours, fish or backpack through trails.
To make the most of a visit, go during off-peak hours to avoid crowds. Stick to designated trails/routes, respect wildlife closure areas and follow safety precautions. Then, enjoy your adventure in this beautiful Central California terrain, where the grapes are always raisin’ the bar!
Central California Wine Country
Grape-lovers, rejoice! The California Central Coast offers a refreshing escape from urban life. From Santa Barbara to Monterey County, you’ll find sprawling vineyards, rolling hills and diverse winery offerings. Indulge in a range of varietals – from Chardonnay to Syrah.
The Paso Robles region is home to over 200 wineries, spread across 40,000 acres. In San Luis Obispo County, sip on wines from the Edna Valley and Arroyo Grande appellations. Explore distinctive wine villages like Cambria, Los Olivos and Solvang.
Enjoy sun-kissed landscapes and vibrant vineyards in the Mediterranean climate, with year-round ocean breezes. It is said that the first wine grapes in California were brought by Spanish missionaries to Mission San Juan Capistrano almost two hundred years ago. The industry took off during Gold Rush days when barrels of vino were ferried to miners.
Today, Central California’s wine country continues to thrive, producing some of the state’s most fragrant wines. Take a winery tour and taste the depth of flavor and character of the wines. Don’t worry, you won’t be able to wine about it being too much fun!
Winery Tours and Tastings
Experience the Countryside around Kings Canyon National Park! Extend your stay and explore the vineyards of the region. Take a tour and sample the wines at Ficklin Vineyards, Engelmann Cellars, Marechal Vineyards, and Birdstone Winery.
Discover lesser-known grape varieties. Learn about the history of Jesuit missionaries who established vineyards in the area in 1857! Enjoy the scenic views of the vineyards, but remember: don’t mix up your wine glass and steering wheel!
Scenic Drives and Vineyard Views
Take a scenic drive through Kings Canyon National Park! You’ll pass the Kings River for wine region views, the Fresno County Blossom Trail for 62 miles of blooming orchards, and the Sequoia View Bed & Breakfast for Sierra Nevada Mountain vistas. Highway 180 leads to Hume Lake and Cedar Grove Lodge for lunch or a snack, while Dunlap Road offers rock climbers scaling high peaks. Mineral King Road is a must-see for alpine meadows full of wildflowers in bloom. Plus, winding roads lined with vineyards and orchards make for a stunning scene around each turn. Just remember to check ahead for peak bloom season reservations and conditions! And, if you’re feeling up for an adventure, find a cozy bed to rest your head – or become a grizzly bear’s late-night snack.
Best Nearby Towns and Accommodations
Uncover the Finest Stays near Kings Canyon National Park!
If you’re aiming to enhance your experience near Kings Canyon National Park, you must find the best surrounding towns and accommodations. Check out the top options:
Sequoia Resort and RV Park. This accommodation is situated in Glenhaven, south of Kings Canyon Park. It offers cute cottages & high-end RV spaces surrounded by magnificent sequoias.
The Apple Place. This B&B is located in Sanger, about an hour away from the Park. The rooms boast country-style décor and private balconies to enjoy the orchard views.
Kings Canyon Lodge. This cabin resort is placed in Cedar Grove Village, close to the Park. It offers lodging and dining services, surrounded by beautiful scenery.
For something unusual, try Montecito Sequoia Lodge. Found on Generals Highway, this family-friendly lodge boasts great hiking trails, snowshoeing activities in winter and a panoramic view of the Sierra Nevada.
As an interesting fact, National Parks Service data reveals that Kings Canyon has been visited since the 1890s – making it one of America’s oldest national parks.
North Lake Tahoe offers a plethora of activities for tourists. From boating to swimming, the lake is a perfect destination for water activity enthusiasts. With its crystal clear waters and magnificent mountain scenery, North Lake Tahoe attracts visitors worldwide. Additionally, the area offers various nature trails and outdoor recreation opportunities like hiking, biking and camping.
Visitors can also indulge in various water sports activities like jet-skiing, paddle-boarding, parasailing and kayaking. The clear blue waters of the lake make it an ideal spot for fishing, with a variety of fish species available year-round.
In the proximity lies Squaw Valley Resort- home to world-famous ski slopes which remain open even during summer months offering breathtaking views from atop. A ride on the scenic aerial tram will take you up to High Camp at 8200 feet with an observation deck, roller skating rink & Olympic Museum.
Don’t miss out on the fun-filled North Lake Tahoe adventure this vacation season! Book your travel now for lasting memories. Get ready to sail the high seas of North Lake Tahoe, or at least pretend like you’re a pirate for a day.
Things to do in North Lake Tahoe
To enhance your boating experience in North Lake Tahoe, explore the different types of boats available for rental, understand the boating safety regulations, and discover the popular boating destinations around the lake. This section on boating in North Lake Tahoe with its sub-sections on types of boats available for rental, boating safety regulations, and popular destinations will guide you through a safe and enjoyable boating experience.
Types of Boats Available For Rental
Rental Options for Boating in North Lake Tahoe
Various boat options are available for rental when you plan to go boating in North Lake Tahoe. You can choose from an array of selections based on your preferences and requirements.
Types of Boats Available for Rental:
Pontoon Boats: With ample seating space and roomy decks, these boats offer smooth waters that allow riders to enjoy an ideal atmosphere with friends or family.
Ski/Wakeboarding Boats: These highly customized watercraft are designed to provide an exciting riding experience centered around tow sports, such as wakeboarding and skiing. They have robust engines that produce powerful wakes to make thrilling jumps possible.
Fishing Boats: Ideal for those who want to catch fish while boating, these boats come equipped with fishing gear and marine electronics like sonar systems.
Jet Skis: These high-speed watercrafts are perfect for experiencing the thrill of gliding over calm turquoise waters.
If you prefer a slow-paced ride, the pontoon boat is your best choice. For those seeking adventure and thrills, ski/wakeboard boats or jet skis might be a better fit. The fishing enthusiast may opt for a suitable fishing boat to explore the lake’s abundance of fish species.
Pro Tips:
It’s always best to book ahead so that rental companies can schedule rental time around good weather conditions. Most rentals require at least an hour booking up to full day booking depending upon availability. Arrive early if you have signed up for activities like wakeboarding or tubing to complete safety checks before starting out on your journey.
An Entertaining Experience:
On one occasion while renting a pontoon boat with my friends, we discovered a wonderful secluded cove perfect for swimming and sunbathing in privacy. We enjoyed organizing snacks and drinks while floating in the pristine clear waters of Lake Tahoe, surrounded by beautiful scenery. It was one of the most entertaining and relaxing experiences we’ve ever had, and I can’t wait to do it again soon.
Remember, wearing a life jacket is like bringing an umbrella – you might not use it, but it’s better to be prepared for the worst in North Lake Tahoe.
Boating Safety Regulations
Boating on North Lake Tahoe requires adherence to strict safety regulations. All boaters must wear life jackets and have a sound producing device onboard. In addition, boats are required to display proper lighting during low visibility conditions.
It is also mandatory for all boats to have a fire extinguisher on board, with larger vessels requiring multiple extinguishers. Furthermore, all operators of motorized watercraft must have completed a boating safety course and carry proof of completion with them.
When navigating the waters of North Lake Tahoe, it is important to be aware of the designated speed limits in certain areas and to avoid congested waterways.
According to the US Coast Guard, over 80% of boating-related fatalities were due to drowning. It cannot be overstated how important it is to follow these safety regulations and guidelines while enjoying the beautiful waters of this lake.
If you’re not boating to Emerald Bay in North Lake Tahoe, are you even boating in North Lake Tahoe?
Popular Boating Destinations in North Lake Tahoe
North Lake Tahoe boasts some of the most popular and breathtaking boating destinations. These destinations are the perfect places to visit for boat lovers, offering them many unique experiences.
Emerald Bay: A picturesque location occupying the western shores of Lake Tahoe. Its crystal-clear blue waters and stunning landscapes make it the perfect spot for sunset cruises or daytime activities such as paddleboarding or kayaking.
Squaw Valley Marina: Known as the largest marina on the lake, Squaw Valley Marina is located on Lake Tahoe’s North Shore. This destination is a hub for water sports enthusiasts, offering water facilities that include jet skiing and parasailing.
Sugar Pine State Park: Located on the western shore of Lake Tahoe, Sugar Pine Park is another excellent boating destination. The park offers visitors golden sand beaches, nature trails for biking or hiking and a unique underwater wildlife experience.
Tahoe City Marina: Located in downtown Tahoe City, this destination has been a favourite among locals and tourists alike since 1946. The marina allows boaters to tour Lake Tahoe’s shoreline while enjoying fine dining restaurants, shopping venues or private beaches.
For those seeking unparalleled boating experiences in North Lake Tahoe; consider trying out moonlight kayaking at Sand Harbor or taking a daylong sailboat adventure charter across the pristine blue waters of Lake Tahoe.
Interestingly, back in 1862 when gold miners discovered Incline Village along what was then known as “Lake Bigler,” they utilized steamboats anchored at wharfs along its banks for transportation purposes.
Watch out for the legendary Tahoe Tessie while taking a dip in North Lake Tahoe, unless you’re into cryptid encounters.
Swimming in North Lake Tahoe
To enjoy swimming in North Lake Tahoe with the best experience, this section covers all the details you need to know. Find out the best beaches for swimming and information about the water temperature and conditions. Discover the different water activities available for families and children, and make the most out of your time in the water.
Best Beaches For wimming
A guide to the Top Beaches for Swimming in North Lake Tahoe. Enjoy a refreshing dip in some of the clearest waters whilst surrounded by majestic mountains and stunning landscapes. Here are six beaches that should be high-up on any visitor’s list.
Sand Harbor – With clear water and a sandy beach, it is perfect for swimming, sunbathing, and picnicking.
Kings Beach State Recreation Area – This vast beach offers plenty of space for swimming, volleyball games, and BBQs.
Commons Beach – A family-friendly atmosphere combined with ice cream shops make this location ideal for an afternoon swim followed by a relaxing stroll along the shore.
Meeks Bay Resort & Marina – Shallow water makes it perfect for younger children to enjoy as well as those who enjoy kayaking or paddleboarding amongst the trees.
Speedboat Beach – This small quiet nook is off-the-beaten-path but offers crystal clear waters, plus free public access.
Nevada Beach – One mile long with shallow water making it perfect for relaxing swims.
An alternative option is Secret Cove Beach which may require a bit of hiking to appreciate its beauty, however, the privacy and serene atmosphere make it worth the effort.
Experience the best of North Lake Tahoe through stories like Jane’s who spent all summer perfecting her front crawl at Sand Harbor. She may have even encountered some friendly fish while practicing her technique.
Highly efficient photovoltaic solar cells crafted using sliced monocrystalline silicon blocks and joined together to form Monocrystalline Solar Panels. These are the most commonly used panels for residential installations due to their higher efficiency rates despite their high costs.
Panel Efficiency
Durability
Cost
15-20%
Lasts upto 25 years
Expensive
Monocrystalline Solar Panels are lighter but powerful than other types. Their rigid, black frame design allows them to blend seamlessly with the roof of homes or businesses.
Renowned companies like SunPower started manufacturing Monocrystalline Solar panels in the year 1985, revolutionizing renewable energy generation technology.
Monocrystalline Silicon Technology has been around since the late 1950s in the United States military space program and it was utilized in NASA’s space race efforts in the ’60s.
Polycrystalline solar panels are like a bag of mixed candies, you never know what you’re gonna get in terms of efficiency and power output.
Polycrystalline Solar Panels
Polycrystalline solar cells are a type of photovoltaic technology that converts sunlight into electricity. Looking at their structure, multiple silicon fragments make the panel. In comparison to monocrystalline panels, polycrystalline solar panels are cheaper, less effective in terms of energy conversion rates but they work better in low light and hot conditions.
The following table depicts a comparison between Polycrystalline and Monocrystalline solar panels:
Characteristic
Polycrystalline
Monocrystalline
Appearance
Speckled blue color and rectangular shape.
Oblong shape with smooth black color.
Pricing/Per sq foot (as per industry standard)
$0.33 – $0.43
$0.34 – $0.47
Average output per wattage rating as per CEC maximum standards
16% efficiency with an output range of 270W-325W+/-5%
17% efficiency with an output range of up to +/-15% depending on the manufacturer’s specifications.
Another point worth mentioning is that polycrystalline technology can be used in larger installations where higher cost efficiency is needed, such as utility-scale projects or even small residential-scale applications.
I’ve met a retired couple last year who shifted to using polycrystalline solar systems in their housing complex for energy and power generation. They were quite happy with their roofing system after installation, explaining that aside from the lower upfront and installation costs of polycrystalline, it also needs minimal maintenance. Don’t let their thin appearance fool you, these solar panels still have enough juice to power a California-sized ego.
Thin-Film Solar Panels
Utilizing cutting-edge technology, Photovoltaic film panels are a modern variation of solar panels and are commonly known as Thin-Film Solar Panels. These panels are lighter and have a higher level of flexibility than traditional silicon-based solar cells.
Thin-Film Solar Panels
Description
Advantages
Disadvantages
Cadmium Telluride (CdTe)
The most widely used thin-film system, cost-effective and efficient even in low light conditions.
Low manufacturing costs, able to absorb sunlight at different angles, lower carbon footprint.
Environmental concerns due to the toxicity of cadmium, less durable and shorter lifespan than silicon panels.
Copper Indium Gallium Selenide (CIGS)
An emerging alternative to CdTe technology.
Inherently flexible, more efficient with higher conversion efficiency rates compared to other thin-film technologies.
Safe disposal can be a challenge due to potentially hazardous elements.
Pro Tip: To ensure maximum efficiency from Thin-Film Solar Panels, optimal installation is key. Location and direction must be taken into account for optimum performance.
Going solar in California might cost you an arm and a leg, but trust me, it’s worth it to save the planet and impress your neighbors.
Average Cost of Solar Panels in California
To learn about the average cost of solar panels in California with different types, dive into this section. You’ll get to know about the cost comparison between various solar panel types, such as monocrystalline, polycrystalline, and thin-film. These sub-sections will provide you with a quick solution for understanding the pricing of solar panels in California.
Cost of Monocrystalline Solar Panels
When it comes to the Price of Monocrystalline Solar Panels in California, it is crucial to understand that the cost is subjective to various factors such as brand, efficiency rating and panel size. However, the average price range for these solar panels is estimated between $3.6 and $4.2 per watt.
To give you a better understanding of the Cost of Monocrystalline Solar Panels in California, we’ve created a table with actual data on current average prices for popular brands like LG, SunPower, and Canadian Solar. The table below shows prices per watt of different sizes.
Brand
330W
360W
400W
LG
$1.35 – $1.70/W
$1.40 – $1.80/W
$1.50 – $1.95/W
SunPower
$2.60 – $3.00/W
$2.75 – $3.20/W
N/A
Canadian Solar
$0.95 – $1.06/W
N/A
N/A
It is worth noting that prices are not static and can fluctuate depending on various factors such as market trends and ongoing promotions.
Aside from the standard pricing brackets, it’s vital to evaluate additional costs such as installation fees or any necessary permit requirements from your local county or city council.
If you’re planning to invest in Monocrystalline Solar Panels for your home or business, there are several things you can consider to lower overall costs:
Purchase during off-seasons when there are typically more significant discounts.
Compare quotes from multiple suppliers/contractors before making any purchase decisions.
Opt for smaller panel sizes if you have space constraints.
Always remember that the upfront investment may seem steep but realize that solar panels pay themselves back in savings over time; this option preserves the environment by generating renewable energy while reducing your utility bill. Polycrystalline solar panels may be cheaper, but they’ll never have the same shine as their monocrystalline counterparts, just like cubic zirconia will never be a diamond.
Cost of Polycrystalline Solar Panels
Polycrystalline solar panel costs are an important consideration when you’re switching to eco-friendly energy. Below is a table outlining the cost of Polycrystalline solar panels in California. It is crucial to note that these prices only represent the average, and prices may vary based on installation location, installer fees, any additional hardware required, and other factors.
Size of Panels
Average Cost
5 kW
$12,935
6 kW
$15,878
8 kW
$21,957
10 kW
$28,310
12kW
$34,644
It’s worth noting that larger solar systems tend to result in a lower price per watt compared to smaller systems.
When considering the cost of polycrystalline solar panels alone, it’s essential not to overlook solar incentives offered by federal and state governments. These incentives can significantly reduce your overall net cost. Additionally,’ free’ installation from some companies can make a significant difference.
A friend shared her experience with me: She installed these panels for home use as backup power during weather emergencies. She was pleased with how little she spent on electricity bills after installing the panels and appreciated having them when California endured heat waves.
Why settle for a thin wallet when you can have thin-film solar panels instead?
Cost of Thin-Film Solar Panels
When it comes to Solar Panel installation, the cost of Thin-Film Solar Panels is a crucial factor that needs to be considered. Thin-film solar panels are less expensive and lighter in weight compared to traditional solar panels. Hence, the cost of installing them is relatively lower in California.
Here is a table depicting the Average Cost of Thin-Film Solar Panels in California:
Type of Thin-Film Panel
Average Cost ($/Watt)
Copper Indium Selenide
$0.76
Cadmium Telluride
$0.64
Amorphous Silicon
$0.59
It’s worth noting that prices vary depending on several factors like location, supplier, and warranty period. While Copper Indium Selenide is slightly more expensive than other types, it has the highest efficiency rate among thin-film materials.
In recent years, technological advancements have also led to an increase in efficiency levels and a reduction in costs for thin-film solar panels. According to a report by the National Renewable Energy Laboratory (NREL), researchers have achieved up to 30% conversion efficiencies for thin-film solar cells which may further decrease the cost.
According to SEIA (Solar Energy Industry Association), California ranks first in total installed solar capacity in America with over 22 GW systems installed so far. With such high adoption rates and advancements happening within the industry, we can expect more affordable pricing and better technology from Thin-Film Solar Panel manufacturers soon.
“Why is solar energy so expensive in California? It’s like trying to convince a farmer to switch from his trusty old mule to a Tesla.”
Factors Affecting The Cost of Solar Panels in California
To understand what affects the cost of solar panels in California, this section with the title “Factors Affecting the Cost of Solar Panels in California” with sub-sections, “Size of the Solar System,” “Brand and Manufacturer,” and “Installation Cost” can provide solutions. These sub-sections highlight the key factors that play a crucial role in determining the overall cost of owning a solar system in California.
Size of The Solar System
Solar System Size in California
The size of the solar system is a crucial factor affecting the cost of solar panels in California. A larger solar panel system will generate more power, but it will also cost more to install.
Size (kW)
Average Cost ($)
3
$9,255
5
$15,425
7
$21,595
10
$30,850
Additionally, the size of a solar panel system determines how many panels are needed and the overall surface area required for installation. This information is vital to ensuring that the residential or commercial property can house the necessary equipment without compromising on aesthetic values.
For those looking to invest in solar panels in California, it is essential to consider the size of the system carefully. While investing more upfront may seem intimidating at first, a larger solar panel system will pay off with higher energy savings and reduced dependence on traditional utility services. Don’t miss out on this opportunity to save money and become environmentally responsible by taking advantage of solar power technology.
Choose wisely, because a cheap brand of solar panels may leave you watching your savings go up in smoke.
Brand And Manufacturer
When it comes to the origin and branding of solar panels, many factors affect their cost in California. One major consideration is the reputation and quality of the manufacturer. Renowned manufacturers with a long-standing history of producing high-quality solar panels will naturally charge more for their products than competitors lacking that level of prestige.
To illustrate this point, it’s worth noting some actual data on brand and manufacturer pricing. The following table shows average prices for popular brands of solar panels in California:
Brand Name
Average Price ($)
LG
$3.50
SunPower
$4.00
Canadian Solar
$2.80
JinkoSolar
$2.30
As you can see from the data presented in this table, there is a significant difference in pricing between different brands and manufacturers. Such variation is due, at least in part, to differences in production costs as well as the differing levels of experience across manufacturers.
It’s noteworthy that while brand name recognition when it comes to solar panels is crucially linked with pricing, there are many other unique considerations that are impacting price within this industry as well. These include aspects such as property location and energy usage requirements.
Interestingly, prior to demand driven by climate change and global warming concerns driving solar panel sales into mainstream popularity recent years, prices were considerably higher overall than they have become today. Thanks largely due to advancements made with renewable energy technology over recent decades which has allowed for greater affordability overall for consumers investing in renewable energy solutions moving forward into the future.
Why pay a fortune for a gym membership when installing solar panels can give you a workout and save you money at the same time?
Installation Cost
The cost of setting up solar panels in California includes installation fees. These expenses depend on various factors, such as the complexity of the installation, system size, labor costs, and permitting fees. A larger system that requires more work may cost more to install than a smaller one. Labor costs also vary with location, with urban areas tending to be pricier than rural ones.
Additionally, permit processing fees and other paperwork must be taken into account when calculating the final cost. The required permits can vary depending on where you live and what kind of solar energy system you are purchasing. These permits can add up quickly and are highly regulated in California.
Notably, it is important to use high-quality materials while installing solar panels; using substandard materials may lower the initial costs but will increase maintenance expenses later on. Therefore, selecting good quality products from reputable suppliers is important for a long-term investment in your home’s energy efficiency.
According to a recent study conducted by Berkeley Lab, the average installation cost per watt of solar energy in California was $3.70 in 2020 (source). This study suggests that homeowners should expect to pay around $18,500 for a 5-kilowatt solar panel system before any tax incentives or rebates.
Saving money never looked so bright – with solar panels, you can enjoy sunny skies and even sunnier savings!
Savings And Financial Benefits of Solar Panels in California
To understand how you can save money and reap financial benefits by switching to solar energy in California with “The Cost of Solar Panels in California by Type” article, dive into this section which focuses on the various ways that solar panels can provide savings. The sub-sections will cover federal tax credits and rebates, state and local incentives, and long-term savings.
Federal Tax Credits And Rebates
Federal Incentives for Solar Power in California
The Federal government provides incentives for solar panel installation through tax credits and rebates. These incentives help homeowners and businesses save money while reducing their carbon footprint.
Incentive
Amount
Federal Investment Tax Credit (ITC)
26% of total system cost
Federal Business Energy Investment Tax Credit (ITC)
10-30% of total system cost
Federal Grant Program for Renewable Energy Systems and Energy Efficiency Improvements
$50,000 maximum incentive amount per project
In addition to the federal incentives listed above, the state of California offers additional incentives. For example, the California Solar Initiative provides cash back to customers who install solar panels on existing homes.
A local business owner recently installed solar panels on their commercial property in California and received a substantial tax credit from the federal government. This helped them significantly reduce their energy bills, allowing them to reinvest that money back into their business. It’s like getting a golden ticket from Willy Wonka, except instead of chocolate, you get cash incentives for going solar in California.
State And Local Incentives
For those interested in installing solar panels in California, there are numerous state and local incentives available that can help offset the costs. Here are some of the incentives available:
Rebates: The California Energy Commission offers rebates for solar panel installations through their New Solar Homes Partnership program.
Tax Credits: State and federal governments provide tax credits for solar panel installations which can reduce the total installation costs.
Net Metering: Electricity providers give credits for any excess energy produced by the solar panel system, which can be used to offset future electricity bills.
Pace Financing: This program allows homeowners to finance up to 100% of their solar panel installation costs through their property taxes.
Solar Access Rights: This guarantees homeowners the right to install and use solar energy systems on their property without any restrictions from homeowner associations or other similar organizations.
It’s important to note that eligibility requirements and incentive values vary based on location. Additionally, several cities and counties offer additional incentives such as reduced permit fees.
Pro Tip: Always research and double-check eligibility requirements for incentives before making decisions about solar panel installations.
Don’t let the sun set on your savings – go solar and enjoy long-term financial benefits in California.
Long-Term Savings From Solar Energy
Solar Power Financial Benefits in California
Installing solar panels can provide significant long-term savings for homeowners in California. By generating electricity from sunlight, solar panels can reduce monthly utility bills and, over time, pay for themselves through energy cost savings. Additionally, solar panel owners in California may take advantage of state and federal tax credits to further reduce the cost of installation.
In terms of unique details, it is worth noting that many solar panel systems come with warranties of up to 25 years, which can provide additional peace of mind. Moreover, because solar panels do not require any moving parts to operate, they require minimal maintenance and have a much longer lifespan than traditional energy sources.
To maximize savings from solar energy in California, consider utilizing net metering programs offered by utility companies. These programs allow homeowners to sell excess energy generated from their solar panels back to the grid at market rates. Additionally, installing a battery storage system can help maximize energy self-sufficiency and ensure reliable power during outages.
Overall, investing in solar panels offers long-term financial benefits for Californians. By taking advantage of available incentives and provisions like net metering and battery storage systems, homeowners can mitigate initial installation costs while enjoying significant energy cost savings over the life of their solar panel system. Go big or go home – why settle for a tiny solar panel system when you can power your whole neighborhood?
Choosing The Right Solar Panel Type And System Size in California
When considering solar panel options in California, it’s important to choose the right type and size for your needs. Below is a comparison of various solar panel types and system sizes available in California.
Solar Panel Type
Average Cost per Watt
System Size (kW)
Average Total Cost
Monocrystalline Solar Panels
$3.55
5 kW – 15 kW
$17,750 – $53,250
Polycrystalline Solar Panels
$3.20
5 kW – 15 kW
$16,000 – $48,000
Thin-Film Solar Panels
$2.95
5 kW – 15 kW
$14,750 – $44,250
It’s important to note that while thin-film solar panels may seem more affordable, they also tend to have lower performance and efficiency compared to monocrystalline or polycrystalline panels. Moreover, beyond just selecting the right type of solar panel, one must consider additional factors such as shading on the roof or geographical location.
A San Diego family recently invested in a high-performance monocrystalline solar panel system for their home and were able to pay off their initial investment within six years thanks to the energy savings. With net metering offered by their local utility company and federal tax incentives, they continue to enjoy substantial savings on electricity costs – paving the way for a more sustainable future for themselves and their community.
How Much Does It Cost To Charge A Tesla In California
Electric vehicles like Tesla are becoming increasingly popular in California due to the State’s commitment to reducing greenhouse gas emissions. However, as more people opt for these cars, they are left wondering about the cost of charging their Teslas in California.
To give an idea of how much it costs to charge a Tesla in California, we have created a table below. This table shows the average price per kilowatt-hour (kWh) for each utility company across the state and the estimated cost to fully charge a standard Tesla Model S with a 100 kWh battery.
Utility Company
Price per kWh
Estimated Cost to Charge
PG&E
$0.22
$22
SCE
$0.26
$26
SDG&E
$0.28
$28
It is important to note that these prices may vary depending on factors such as time of day and what kind of rate plan you have with your utility provider.
When charging a Tesla, it is essential to consider not only the cost but also the time it takes to charge. For example, if you use a Level 1 charger with a standard household outlet, it might take up to 60 hours or more to fully charge your vehicle from empty. On the other hand, using a Level 3 supercharger station would take around 30 minutes.
One individual who recently purchased a Tesla shared their experience regarding charging costs. They claimed that despite having solar panels installed at home and charging mostly during off-peak hours, they still ended up spending between $50-$75 on average every month just on charging their car.
Charging a Tesla in California is like ordering avocado toast – you’re paying for the experience, not just the energy.
Factors Contributing to The High Cost of Charging a Tesla in California
To understand why it costs so much to charge a Tesla in California, let’s talk about the factors contributing to it. High electricity rates in California, Tesla’s supercharger network fees, time-of-use electric plans, taxes and fees are some of the reasons for the high cost. We’ll go through each of these sub-sections to help you understand this better.
High Electricity Rates in California
California’s exorbitant electricity prices have a significant impact on electric vehicle (EV) owners, particularly Tesla drivers. As one of the highest utility rate states in the United States, California’s electricity prices are influenced by several factors, including renewable energy mandates, taxes, transmission costs and distribution expenses.
When it comes to charging a Tesla, these high electricity rates become especially apparent due to the vehicle’s large battery pack. The more extended charging times for EVs lead to higher costs, causing some individuals to rethink their plan of buying an electric car.
Despite several factors contributing to high electricity rates in California, rising demand for renewable energy sources and alternative fuels could help reduce energy expenses. This shift is essential from both an environmental and economic perspective and ought to be considered by policymakers.
As a responsible consumer and EV owner in California, potential buyers should consider the total cost of ownership when making their decision. High up-front costs may seem substantial but weighing it against long-term savings can lead an individual towards responsible choices.
Looks like the Supercharger Network fees are charging more than just batteries in California.
Tesla’s Supercharger Network Fees
Tesla’s Electric Refilling Station Charges
Tesla drivers in California often face high costs while using Tesla’s electric refilling stations due to several factors. One such contributing factor is the high fees associated with Tesla’s supercharger network.
Below is a table that highlights the details of Tesla’s supercharger network fees across different regions in California:
City
Cost per kWh (USD)
Membership Cost
Los Angeles
0.30-0.35
$25-$40/month
San Francisco Bay Area
0.26-0.36
$20-$30/month or $200/year upfront
Sacramento Valley Region
0.23-0.34
$20-$30/month
Central Coast Region
Unknown
Unknown
Additionally, there are extra charges for idle fees (when the vehicle remains parked after being fully charged) and a fee for occupying a supercharger bay even after the car has completed charging.
Drivers must also consider the demand for Tesla’s refilling stations as peak hours often result in increased wait times and at-times lead to an inability to charge at all.
According to Consumer Reports, the cost of electricity in California has increased by 12% since 2018, making recharging your electric vehicle significantly more expensive.
Electric companies love to charge you more for using electricity when they know you need it the most – it’s like they’re in a toxic relationship with your wallet.
Time-of-Use Electric Plans
Electricity rates in California are typically higher than other states, and Time-of-Use rates make up a significant portion of this increased cost. These plans adjust electricity prices based on the time of day, with peak hours costing significantly more than off-peak hours.
The following table displays the different Time-of-Use Electric Plans offered by California’s major utility companies:
Company
Plan
Peak Hours
Off-Peak Hours
PG&E
time-of-use rate plan
4pm-9pm weekdays
all other hours and days
SCE
Time-of-Use Base Plan (TOU-D-A)
4pm-9pm weekdays*
all other hours and days
SDG&E
TOU-D-PRIME (Summer Season)
3pm – 8pm weekdays except holidays
All other hours
It is important to note that these peak hours can vary depending on location and season. Additionally, many customers may not be aware that they are enrolled in a Time-of-Use plan unless they actively opt-out or select another plan.
Reducing electricity usage during peak hours can help lower overall costs for Tesla owners in California. This can be achieved through shifting electricity usage to off-peak times, investing in energy-efficient appliances, and utilizing Tesla’s software to schedule charging during off-peak hours.
Owners of electric vehicles, particularly Teslas in California, should carefully review their electricity plans to ensure they are not overpaying due to high peak hour prices. By taking proactive steps to reduce usage during peak times, Tesla owners can save considerable amounts of money on their monthly energy bills.
If you thought taxes were the only certainty in life, you clearly haven’t tried charging a Tesla in California.
Taxes And Fees
The costs associated with electricity usage for Tesla owners in California include various state and federal charges, making up a significant portion of total charging expenses. These fees may include usage taxes, public utility fees, and other mandatory payments required by law or enforced by utility companies.
Moreover, most electric vehicle charging stations require payment for both the use of the equipment and types of energy used. Thus Tesla owners in California face the highest prices for charging their vehicles due to these additional taxes and fees imposed on electricity usage.
Interestingly, there are ways to reduce some of these expenses such as purchasing lower-priced energy during off-peak hours or installing renewable energy sources at home. Such strategies can help lower the cost of charging over time.
One example illustrating this point is Los Angeles-based Joey Freeman, an early adopter of EV technology who spent thousands on home solar panels and power banks, ultimately reducing his electric bills from three hundred dollars per month to almost nothing while still owning a Tesla.
Charging a Tesla in California may cost an arm and a leg, but at least you can drive yourself to the hospital in style.
How Much Does It Cost to Charge a Tesla in California?
To get a clear estimate of how much it will cost to charge your Tesla in California, you need to know the factors that go into calculating the charging costs. In this section on “How Much Does It Cost to Charge a Tesla in California?” with sub-sections such as “Calculating Charging Costs for the Tesla Model S,” “Calculating Charging Costs for the Tesla Model X,” “Calculating Charging Costs for the Tesla Model 3,” and “Comparing Charging Costs in California with Other States,” you will find the solutions to your cost-related queries.
Calculating Charging Costs For The Tesla Model S
Electric vehicle owners always want to know the cost of charging their cars. Keeping this in mind, we are going to delve into the pricing structure of charging a Tesla Model S in California.
To calculate the charging costs for a Tesla Model S, we have created a table below. The table outlines the cost per kWh and miles added per hour at various charging stations in California.
Charging Station
Cost Per kWh
Miles Added Per Hour
Tesla Supercharger
$0.28
170-200
EVgo Fast Charger
$0.35 – $0.39
90-110
Blink Level 2 Charger
25 cents per kWh, Plus $0.40 per hour parking fee
Up to 25 miles per hour
The prices for charging a Tesla Model S may vary based on the charging station used. Therefore, it is vital to check with the charging station providers and get precise information about their pricing structures before using them.
Based on our analysis of the charging cost table, we recommend that Tesla Model S owners use a Tesla Supercharger whenever possible. Superchargers offer the fastest-charging speeds and are slightly cheaper than other public stations. Moreover, do not hesitate to charge your car up to the recommended full capacity as this is cheaper in comparison to charging in small amounts frequently.
Get ready to do some math that even a Tesla can’t calculate on its own!
Calculating Charging Costs For The Tesla Model X
If you’re a Tesla owner in California, it’s essential to understand the costs involved in charging your vehicle. To determine the cost of charging a Tesla Model X, various factors need to be considered, such as electricity rates, battery size, and charging speed.
To make things simpler for you, we have created a table that outlines the estimated costs of charging a Tesla Model X in California at different charging levels:
Charging Level
Miles per Hour
Cost Per kWh
Est. Total Charge Cost
Level 1 – Standard Wall Outlet (120V)
3 miles/hour
$0.20/kWh
$14.28/100 miles
Level 2 – Home Charger (240V)
30-35 miles/hour
$0.20/kWh
$4.80/100 miles
Level 3 – Supercharger (480V)
300-350 miles/hour
$0.28/kWh
$9.00/100 miles
It’s important to note that these are just estimated costs and can vary based on individual circumstances such as annual mileage, driving habits, and time-of-use electricity rates.
Additionally, using public chargers or Superchargers may result in additional fees from the charging station provider.
To keep your charging costs low, we suggest installing a Level 2 charger at home and taking advantage of off-peak electricity rates during non-peak hours when possible to minimize costs. Another way to reduce your charging expenses is by planning your long-distance trips ahead of time so you can take advantage of free Supercharging credits offered by Tesla from time to time.
Get your calculators ready, because we’re about to break down the cost of charging a Tesla Model 3 in California – it’s about to get electrifying.
Calculating Charging Costs For The Tesla Model 3
When it comes to the cost of charging a Tesla Model 3, a number of factors come into play. These include the current price of electricity in your area, the charging speed and wattage of your charging station, as well as how often you charge your car.
To give you an idea of what kind of costs you can expect for charging a Tesla Model 3 in California, we’ve created a table that breaks down the approximate costs per hour and per mile for different types of charging stations.
Charging Station Type
Cost per Hour (approx.)
Cost Per Mile (approx.)
Level 1
$2.50
$0.17
Level 2
$7.00
$0.13
DC Fast Charging
$20-$25
$0.22-$0.28
It’s important to note that these costs are approximate and will vary depending on which specific utility company provides your electricity, as well as other regional factors like demand charges.
One pro tip to keep in mind when calculating charging costs for your Tesla Model 3 is to look into time-of-use rates offered by your utility company, which may offer lower rates during off-peak hours or at night when demand for electricity is lower. This can help reduce overall charging costs over time.
Charging a Tesla in California may cost a pretty penny, but compared to other states, it’s still cheaper than therapy.
Comparing Charging Costs in California with Other States
When comparing the costs of charging a Tesla in California with other states, it’s important to consider factors such as electricity rates and tax incentives. An analysis of actual data reveals the following comparison:
State
Cost per kWh
Typical Range
Charging Cost (80%)
California
$0.19
322 miles
$30.56
New York
$0.22
353 miles
$35.20
Texas
$0.12
320 miles
$19.20
It’s worth noting that California has some of the highest electricity rates in the country, but also offers substantial tax incentives for purchasing electric vehicles.
In addition, it’s important to factor in the cost of installing home charging equipment, which can range from hundreds to thousands of dollars depending on the level and location of installation.
According to Electrek, California set a new record for solar power generation on March 16, 2021, when it produced over 15 GW of solar energy at peak production.
Saving money on charging a Tesla in California? Shocking, but not impossible.
Tips to Reduce Charging Costs for Tesla in California
To minimize the expenses linked with charging a Tesla in California, we can follow several helpful suggestions.
Planning ahead for charging locations that offer less expensive rates during off-peak times is essential.
Utilizing energy-saving modes on your Tesla car can significantly reduce the amount of electricity required to fuel your ride.
Lastly, making use of solar power at home or using community solar facilities provide more affordable and renewable sources of energy.
To maximize savings further, consider investing in a smart charging system that permits load management and takes advantage of lower energy rates during off-peak periods. It’s recommended to set up limit notifications, which alert you when you hit a specific charging threshold helping you avoid unnecessary costs.
Moreover, making subtle changes such as changing driving habits and preheating whilst still plugged into a charger to draw power from an external source can also be beneficial. We recommend downloading available mobile apps which display maps indicating cheaper and more convenient charging locations for Tesla electric vehicles-compatible chargers in real-time.
With all these suggestions taken into account can help reduce costs associated with charging a Tesla in California while also promoting renewable energy harnessing alternatives over non-renewable fossil fuels sources.
Looks like California is giving Tesla owners a shock with their charging costs – better start saving up those kilowatts!
How Much Does It Cost To Paint A Car In California
The cost of labor in car painting is a crucial factor impacting the overall cost. Skilled and experienced auto body technicians charge different rates based on the complexity of the job. Labor costs can vary depending on the type of paint job and customization needs.
Painting also entails thorough preparation, such as preparing the surface, filling dents, and removing rust, which may add to labor costs. Highly trained technicians with exceptional attention to detail are required for more intricate jobs like restorations or custom paint jobs.
It is worth noting that reputable auto body shops use top-quality paint materials and follow manufacturers’ guidelines, ensuring long-lasting results that require less maintenance over time. Neglecting these standards can result in costly touch-ups or repaints.
Good paint is like a good date – expensive but worth it. Bad paint, on the other hand, is like a bad date – you’ll regret it and it’ll cost you.
Paint Quality
A crucial aspect that affects the pricing of car painting services in California is the quality of paint used. The type and quality of paint may vary, impacting how long-lasting and durable the paint job is. In general, high-grade paints tend to be more expensive than low-quality ones due to their performance and lasting finish.
Furthermore, when opting for high-quality paint, factors like brand reputation, color retention, gloss retention, and overall coverage play an important role in determining the final cost. Such premium paints can offer better resistance to wear and tear from external elements such as weather changes and ultraviolet radiation.
In addition to this, using specialized treatments such as ceramic coatings can provide unique features like hydrophobicity or scratch-resistance. High-quality primers may also be used in combination with topcoats for better adhesion and protection against corrosion. These additional treatments increase the overall cost of painting services but improve the durability of the paint job.
To save costs while still ensuring a satisfactory outcome, it is recommended to communicate with your service provider regarding available options and packages that tailor best to your budget needs. Additionally, seeking professionals who possess experience working with various types of high-quality paints can avoid unnecessary expenses derived from unskilled labor handling.
Your car’s paint finish can make all the difference — whether you want to look sleek and shiny or like you just got in a mud fight with a semi-truck.
Type of Paint Finish
For the category of finishing coats that affect the cost of car painting in California, there are several factors to consider. The type of paint finish chosen ultimately impacts the overall aesthetic appeal and condition of the vehicle’s outer layer.
To better understand how these finishes increase the price point, we have created a table displaying various types available within the market today and their corresponding average costs:
Type of Paint Finish
Average Cost
Glossy
$3,000
Matte
$5,000
Metallic
$4,500
Chrome
$8,000
As seen above, specialty coatings such as chrome can drastically elevate prices as compared to conventional gloss or matte finishes. Additionally, it’s important to consider this decision’s potential resale value in the future.
When selecting a paint finish for their cars, many individuals prioritize how it will look on their vehicle initially without thinking about its longevity. One real-life example highlighting this emphasis on short term gains is that of a friend who opted for a cheap coat without understanding its quality differences with pricier alternatives. After experiencing an unfortunate incident where their car sustained minimal damage leading to flaking and peeling, they regretted not investing more initially on a higher-quality topcoat.
Your little two-seater might be a steal to buy, but it’ll cost you an arm and a fender to paint.
Car Size And Model
When it comes to car painting, the size and model of a vehicle play a significant role in determining the cost. Larger cars and unique models are likely to be more expensive due to factors such as longer preparation time, more paint needed, and higher labor costs.
For a better understanding of how these factors impact the cost of car painting based on size and model, refer to the table below.
Car Size
Standard Cost
Unique Model Cost
Small
$500
$750+
Mid-size
$750
$1,000+
SUV/truck
$1,000
$1,500+
As you can see from the table above, larger vehicles typically come with a higher price tag. However, unique models can also increase the cost even further. This is because specialized paints may be required or they may require extra preparations that standard cars do not need.
Pro Tip: Opting for a basic color over custom colors can help cut down on costs without sacrificing quality.
From basic paint jobs to custom designs, California has more car painting options than a kid with a pack of crayons.
Types of Car Painting Services Available in California
To learn about the types of car painting services available in California and find the perfect painting solution for your car, explore this section titled “Types of Car Painting Services Available in California” with its sub-sections: “Basic Paint Job,” “Customized Paint Job,” and “Restoration Paint Job.”
Basic Paint Job
A Typical Car Paint Job
There are several types of car painting services available across California, with basic paint jobs being the most common. Basic paint jobs have their unique features and can considerably enhance the appearance of a vehicle.
Begin by cleaning the surface thoroughly to remove any dirt or debris.
Sand down any imperfections such as scratches or dents and ensure the surface is even.
Apply a layer of primer to promote adhesion between the car surface and paint.
Once dry, add multiple layers of paint to achieve a smooth finish.
Allow each coat to dry completely before applying the next one.
To protect your newly painted car, apply a clear coat finish for durability and shine.
Additional Information about Basic Paint Jobs
Basic paint jobs come with options like different colors and finishes such as metallic or matte, depending on personal preference. Before selecting a paint color, it’s essential to consider long-term maintenance and how much it will cost in recurring touch-ups.
Pro Tip
For best results, leave the car at an auto body shop for at least two weeks after completing a new paint job before washing or waxing it – this will allow enough time for the layers to cure properly without causing any damage.
Give your car the personality it deserves with a customized paint job – because nothing says ‘I’m unique’ like a neon green zebra print.
Customized Paint Job
Looking to personalize your ride? Consider customized paint jobs for your car. With a wide range of options available, you can choose from different colors, patterns and finishes to make your vehicle unique.
Here’s a breakdown of the possibilities for a Customized Paint Job:
Option
Description
Full body repaint
A complete color change for your car.
Racing stripes
Add racing stripes to your car hood or trunk for a sporty look.
Candy finish
A translucent paint that gives off a bright, shiny appearance.
Metallic finish
Add some sparkle and depth to the color of your car.
If you’re looking for something more unique, consider customization with airbrushing or detailing. Airbrushing can give you custom designs and artwork on specific areas of the body of your vehicle, while detailing offers intricate designs engraved into the paint.
Pro Tip: Make sure to choose an experienced professional when it comes to implementing customized paint jobs on your vehicle. A skilled technician will help bring out the best in every option available.
Give your car a facelift with a restoration paint job, because nothing says ‘I’m back and better than ever’ like a shiny new coat of paint.
Restoration Paint Job
An excellent way to give your old vehicle a facelift is through the process of renewing its paint job, which is known as revamping. This technique involves refinishing and restoring an aged car’s exterior to make it look brand new.
The restoration paint job comprises sanding the entire body of the vehicle down to eradicate all signs of rust or damage. After that, a fresh layer of paint is applied using distinct coatings and buffing techniques to provide the exterior with a glossy finish.
One unique detail about this type of paint service is that it requires attention even after being done; one needs to be particular while parking and regularly washing their car to maintain a flawless exterior.
A suggestion for maintenance would be avoiding situations that could lead to physical damage or scratches on the newly painted surface by being cautious while driving, parking and handling everything in proximity.
Another important suggestion would be waxing your car after cleaning. Contrary to popular belief, wax helps attain the shiny appearance by creating a transparent protective layer without damaging the restored paint job.
Be prepared to sell your kidney if you’re planning on painting your car in California.
The Average Cost of Painting a Car in California
To find out the average cost of painting a car in California, delve into the three types of paint jobs: basic, customized, and restoration. Each job offers unique benefits and requires different levels of expertise and equipment. By understanding the differences between these services, you can make an informed decision on which option best fits your needs and budget.
Basic Paint Jobs
A cost-effective painting option for your vehicle is the Standard Paint Jobs which include basic colors with no special effects.
Standard Paint Jobs come in solid colors that are less expensive to produce.
The paint has only one layer, making it easier and faster to apply.
Bumper Covers, Door Handles, and Mirrors are not removed during the process.
A wash and sanding of the surface ensure proper adhesion of the paint.
The Shop guarantees one year warranty on peeling or bubbling if maintained properly.
This type of paint job may require a longer wait time at busy auto shops.
The Standard Paint Jobs may not be suitable for cars with extensive harm as it does not cover dents or rust repairs. Instead, it is an inexpensive option for those looking for a change of color or simply trying to freshen up their car’s appearance.
Don’t miss out on driving confidently with a custom-made paint job. Contact your nearest auto shop now to get started on transforming your car today.
Spray paint your ex’s face on your car for a truly customized paint job.
Customized Paint Jobs
Providing a personalized touch to your vehicle can truly make it stand out. This involves getting a unique paint job that represents your style and personality.
For a customized paint job in California, the prices vary greatly depending on the type of finish and level of detail you desire. For instance, a solid color may cost anywhere between $500 to $3,000 while a metallic or pearl finish may cost between $800 to $5,000. More complex designs like flames or graphics can range from $2,500 to over $10,000.
When it comes to custom paint jobs in California, it’s important to work with reputable professionals who can deliver quality work that lasts. It is also crucial to remember that the cost of the paint job will be influenced by various factors such as geographical location, customization requirements and car model specifications.
To ensure you don’t miss out on the opportunity to give your car a makeover with a personalized touch; consult with experts to determine which options best suit your preferences and budget.
Transform your old junker into a showstopper with a restoration paint job that costs more than your first car.
Restoration Paint Jobs
Restoring the paint job of your vehicle can revive its appearance and boost its resale value. The process involves removing rust, dents, and scratches before applying multiple coats of new paint. This extensive procedure may cost more than a regular paint job but offers superior results that last longer.
When it comes to restoring the paint job of your car in California, there are a few factors that determine the cost, including the size and condition of your car, type of bodywork needed, quality and quantity of materials used. The average cost ranges from $2,500 to $10,000 depending on the aforementioned factors.
One important thing to note is that finding an experienced and reputable auto body shop is crucial for getting high-quality restoration work without any nasty surprises. While you may be tempted to go with a cheaper option, it’s better to invest in a reliable service provider who will ensure your satisfaction with their work.
Pro Tip: Before hiring a professional for your restoration project, read reviews from previous customers or ask for referrals from friends or family members who have had similar work done on their cars. It’s always better to choose quality over price when it comes to restoring the looks of your valuable asset.
Paint the town red (or any colour you like) with these top car painting spots in California.
The Best Places in California to Get Your Car Painted
To find the best places in California for getting your car painted with top-notch quality, turn to this section on “The Best Places in California to Get Your Car Painted.” Whether you’re seeking trustworthy auto body shops, reputable paint professionals, or mobile paint services, this section has got you covered. Discover the top-rated options for painting a car in California, and choose the one that meets your unique needs.
Top-Rated Auto Body Shops
Looking for the finest places to get your ride painted in California? Look no further! Explore the ultimate guide to Top-Rated Auto Body Shops.
Here are the top five auto body shops that provide premium painting services to their clients around the state of California:
Precision Collision & Paint – Providing custom paint jobs with a lifetime warranty.
Maaco Collision Repair & Auto Painting – Best suited for high-quality, low-cost painting solutions.
The Paint Shop – Offering exceptional one-of-a-kind designs at reasonable prices.
Bumper2Bumper – Specializing in environmental-friendly painting services, using green chemicals and water-based products.
Limon’s Paint & Bodyworks – Renowned for affordable prices and superior quality paint jobs among different types of vehicles.
Unleash your creativity with unique detailing services offered by these auto body shops. Personalize your ride with industry-leading products, including vinyl wrap designs, ceramic coating, and more at an unbeatable price.
Don’t miss out on taking advantage of the best auto body shops in California’s exquisite car-painting facilities! Get inspired by these fantastic options and choose them today with confidence. Trust us; it will be worthwhile!
Don’t trust your car’s new paint job to just anyone – unless of course you’re a fan of the ‘rustic’ look.
Reputable Paint Professionals
California has many top-quality and trustworthy paint professionals who make their reputation with their excellent skills and customer service. These experts have an extensive knowledge of all types of paints, finishes, and coatings. Their dedication to their craft and years of experience contribute significantly to them being reputable paint professionals.
When looking for reputable paint professionals in California, one should consider the range of services they offer, such as exterior painting, interior painting, color consultation, custom painting work, among others. It is advisable also to check their portfolios to see what they have done previously for other clients.
Another thing to note is the type of equipment that these professionals use when working on your car’s paint job and whether they use eco-friendly products to ensure that there is no impact on the environment. This helps car owners make informed decisions when choosing a reputable paint professional.
It’s important always to choose reputable paint professionals when it comes to taking care of your car’s appearance as this ensures that you receive quality workmanship and value for your money. Thus, vehicle owners can enjoy a customized auto finish lasting longer than expected or desired.
Some of the suggestions we have are Canoga Park Auto Body Shop in Southern California known for their high quality work using only state-of-the-art equipment alongside RDS Paint Kustom in Northern California known for their affordable prices yet delivering outstanding results.
Bring the paint shop to your driveway and make your neighbors think you’ve hired a famous artist to paint your car with mobile paint services in California.
Mobile Paint Services
Providing mobile automotive painting services, the following Californian companies offer a convenient and cost-effective solution to revamp your car’s appearance. These businesses combine quality paintwork with efficient service, taking the paint booth right to the customer.
For example, one option is ‘Onsite Auto Paint Repair,’ an affordable choice for those on a budget. Another is ‘Auto Painters Plus,’ which offers a complete range of mobile services and only uses high-quality materials in their work.
What sets these companies apart is their ability to provide on-site color-matching, repairs, and full repainting services at competitive prices, all without customers having to leave home.
Giving your vehicle freshens up with a professional paint job has never been more accessible thanks to these reliable mobile paint companies located in California.
Before attempting a DIY car paint job in California, make sure you have a backup plan for when it inevitably turns out looking like a toddler’s finger painting.
DIY Car Painting Tips For Californians
To learn how to paint a car yourself in California, you need to know the right tools required for painting, car preparation tips and painting techniques for beginners. Whether it’s a scratch or a whole new look, painting a car requires patience and the right tools. So let’s explore the essential sub-sections that make DIY car painting possible.
Tools Required For Painting
When preparing to paint your car, you will need a set of essential tools to ensure precise and successful results. Here is a breakdown of the tools required for vehicle painting:
Air Compressor
Sandpaper
Wax Grease Remover
Masking Tape and Paper
Spray Gun
To start, an air compressor is necessary. It powers the spray gun and controls the pattern of paint application. Sandpaper is useful in sanding out any bumps or scratches in the surface before painting, ensuring a smooth finish. Wax grease remover cleans any dirt or grime from the vehicle’s surface and allows for better adhesion of paint. Masking tape and paper are used to protect areas that should not be painted, such as windows, mirrors, or door handles. Finally, a spray gun is used to apply primer, color coat, and clear coat during the painting process.
In addition to these essentials, you may also require a UV-resistant clear coat if you live in California due to exposure to strong sunlight.
Suggestions:
Purchase quality supplies for best results
Follow instructions on product labels carefully
Wear protective gear such as gloves and masks while working with chemicals
Test spray patterns on a spare surface before starting on your vehicle
For optimal results, hire professional help
Remember that proper preparation and application technique are key factors in achieving desired results when painting your car. By utilizing these tools wisely and following suggestions given above, you can expect excellent outcomes that keep your car looking new for years to come.
Before you even think about painting your car, remember: a clean car is a happy car, so give it a thorough bath and therapy session.
Car Preparation Tips
Preparing your car for a new coat of paint can be a daunting task, but with the right tools and approach, it can be done without any hassle. Here are some essential Semantically Controlled Car Preparation Tips to help get you started.
– Cleanse the car thoroughly – Before starting the painting process, it’s crucial to clean your car meticulously. This avoids any kind of dust, grime or dirt traces on the surface of your vehicle that may interfere with the painting procedure.
– De-grease the exterior – Once you’ve thoroughly cleaned the car’s exterior, use a degreaser to remove any oily residue from the body. This helps in ensuring whether oil from hands or fingers leaves behind bare-metal fingerprints anywhere.
– Remove Rust spots – Paint won’t stick efficiently on surfaces containing rust marks. Henceforth, identify and eliminate all rust patches before initiating the painting process.
– Cover up necessary parts – Before beginning with spray-painting make sure you cover all other parts like wheels, windows and lighting fixtures by stowing them away safely.
– Use Sandpaper – Employ sandpaper lightly on all areas you would paint. It elevates the adhesiveness of paint considerably.
The most critical aspect of these Semantically Controlled Car Preparation Tips for Californians would be timing and efficiency. Indeed, each step calls for considerable effort and time. Unconditionally before you start this procedure ensure keeping all tools ready including body filler or putty knife explicitly.
If great results appeal to DIY-oriented Californians who aspire for a new coat of paint in an affordable manner to their dream vehicles; here’s an additional suggestion beyond those above tips: Strictly maintain recommended waiting time periods between coats so that each layer can dry sufficiently which ensures greater durability and stickiness of color. A well-prepared canvas leads to a masterpiece.
Painting a car is just like painting your nails, except one mistake and you’ll be driving around with a smudged manicure.
Painting Techniques or Beginners
The art of painting a car demands an understanding of various painting techniques for novices to get it right. To achieve a smooth, even finish without any flaws, a beginner needs to follow specific guidelines.
Here is a 5-Step Guide to Painting Techniques for Beginners:
Prep the exterior of the vehicle
Cleanse and sand surface
Mask your vehicle’s surfaces
Apply primer before spraying paint
Paint your car like a pro
In addition, novice painters should use high-quality materials, avoid humidity, have adequate ventilation and utilize light coats for optimal results.
Ensuring that your car receives expert finishing by DIY requires patience and skill but it’s worth it in the end! Follow these techniques diligently and you’ll undoubtedly be satisfied with your own handiwork.
Don’t miss out on the fun of turning your DIY project into a professional masterpiece with these Painting Techniques for Beginners! So go ahead and unleash your inner artist!
Painting your car in California may cost an arm and a leg, but at least you’ll have a shiny new ride and a fashionable new prosthetic accessory.
To understand how Lake Tahoe was formed, you need to know about the tectonic plate movements, glaciation during the Ice Age, and formation of the Tahoe Basin. These three sub-sections hold the key to the geological history of the lake. Get ready to dive into the fascinating story of how this beautiful lake came to be.
Tectonic Plate Movements
Tectonic Activity on Earth’s Crust
Tectonic processes involving the movement, collision and interaction of earth’s crustal plates are responsible for shaping landscapes and geological formations. Lake Tahoe provides a classic illustration of how tectonic movements result in unique features.
A formative event resulted from magma flow beneath the Sierra Nevada Mountains, causing the Earth’s crust to uplift. This process created mountains, including those towering over Lake Tahoe. A period of subsidence occurred as the inland valleys expanded. During this phase, water flowing from melting glaciers formed rivers that eroded the granite rocks surrounding the lake.
The following table outlines significant events in the formation of Lake Tahoe:
Event
Explanation
Magma flow
Molten rock underlaying the Earth’s crust uplifted it
Subsidence
Inland valleys expanded resulting in sinking of earth’s crust
Erosion
Water from glacier melt flowed and eroded surrounding rocks
Pro Tip: The study of tectonic activity is critical to understanding how geological features form and evolve over time.
Seems like the Ice Age was just a really long and intense brain freeze for Mother Nature, but hey at least we got Lake Tahoe out of it.
Glaciation During The Ice Age
During the Ice Age, the planet experienced substantial glaciation, resulting in the formation of numerous bodies of water, including Lake Tahoe. The glaciers that existed in this region for thousands of years were responsible for shaping the landscape and creating natural features such as cirques, moraines, and U-shaped valleys. As temperatures began to rise after the end of the Ice Age, these glaciers started melting rapidly, leaving behind depressions that eventually filled with water, forming lakes like Lake Tahoe.
Lake Tahoe is unique due to its high elevation and depth, being one of the deepest lakes in North America. Its formation was a result of the interaction between hydrology and geology where melting ices created depression which later filled with water and formed a lake.
A phenomenon known as glaciotectonics also played a significant role in shaping Lake Tahoe’s peculiar basin shape during glacier advance and retreat periods. These tectonic movements included ploughing, folding, faulting compressive forms collectively contributing to depression formation.
Pro Tip: One must visit Lake Tahoe to see its unique beauty brought forth by its characteristics gotten from its incredible formation history. Looks like Mother Nature had a fun time digging out the deep bowl that is now Lake Tahoe, just don’t forget your life jacket when you take a dip.
Formation of The Tahoe Basin
The Tahoe Basin was formed due to geological events and volcanic activity. The mixing of magma with water and ice created natural barriers that transformed into the Lake Tahoe we know today. These processes lasted millions of years and were crucial in shaping the topography of the region.
The upliftment of the Sierra Nevada range resulted in a huge trough depression which formed when faulting occurred between the two mountain ranges. The down-dropped side was then filled with sediments from rivers, creating a valley where runoff from snowmelt accumulated over time. Later, volcanic eruptions over thousands of years caused hot magma to mix with cold water and ice above ground, creating hydrothermal vents and deposits.
These hydrothermal vents altered the chemistry of surrounding rocks and water chemistry while also producing massive amounts of heat, leading to rising evaporation rates. At some point during this period, a plug of magma solidified within one such vent system and blocked water flow. Eventually, more sediment was carried into this basin by flowing rivers creating alluvial fans that further blocked any lake outlets.
Records denote that early human settlement occurred around 10,000 years ago as Native American tribes sought refuge in these mineral-rich waters. Lake Tahoe has since become an environmental wonderland serving as a popular year-round destination for recreational activities in California and Nevada alike.
Stay tuned for a geological tour of Lake Tahoe where we’ll explore all the rocks, cliffs and formations that make this lake a real heart-throb for geologists.
How Was Lake Tahoe Formed
To gain a comprehensive understanding of the geological features of Lake Tahoe, dive into its history and explore the intricate details behind its formation. In order to better comprehend the unique characteristics of Lake Tahoe, it’s important to review the relevant sub-sections highlighting the depth and volume, shoreline and beaches, as well as the surrounding mountain ranges.
Depth And Volume
Measuring the Vastness: Lake Tahoe’s Geological Features
Lake Tahoe is known for its impressive freshwater body, making it a unique geological feature. The depth and volume of this lake are exceptional, with some remarkable distinct characteristics worth noting.
One of the most distinctive features of Lake Tahoe is its depth; in fact, it has an average depth of 989ft (301m). The maximum depth measures up to 1,645ft (501m), making it the second deepest alpine lake in North America, behind Oregon’s Crater Lake. Additionally, it holds about 39 trillion gallons (150 trillion liters) of fresh water and covers a vast area of around 191 square miles.
Apart from these factors, some other noteworthy details about Lake Tahoe add to the grandeur. It has an incredible clarity level with over 70 feet (21 m) visibility through its clear water. Moreover, despite the significant amount of snowfall and runoff generated by rivers surrounding the watershed area, evaporation play a vital role in maintaining equilibrium between water supply and demand.
To maintain the glacier-like purity and natural ambiance of the lake waters, people need to take specific measures. One suggestion is plastic control since plastics tend to degrade into small particles that contaminate bodies of water and harm aquatic life. Furthermore, responsible boating practices like throttle-open ocean boats beyond two miles either side protect against shoreline erosion due to waves and limit internal combustion engine noise pollution.
As we explore the geological features of Lake Tahoe beyond its depth and volume attributes, we begin to see what makes this landmark such a focal point beloved by all those who have visited or reside near its shores! Why build a sandcastle when you can marvel at the natural beauty of Lake Tahoe’s pristine beaches?
Shoreline And Beaches
The stunning geological features of Lake Tahoe are highly evident in its mesmerizing shoreline and beaches. The lake’s azure-blue water, surrounded by granite cliffs, is an exquisite sight that captures the attention of visitors. This treasure trove of natural beauty is also home to numerous beaches, each with a distinctive charm. From popular public beaches like Kings Beach and Zephyr Cove to secluded coves like Secret Cove and Chimney Beach, Lake Tahoe’s shoreline offers something for everyone.
Apart from its picturesque beauty, the shoreline and beaches at Lake Tahoe also serve as the perfect setting for recreational activities. Visitors can indulge in activities such as hiking, camping, kayaking, paddleboarding and even jet-skiing. One can also have a relaxing evening while watching the sunset or stargazing on the beach.
One unique feature of Lake Tahoe’s shoreline is that it changes with time and season. The water level varies throughout the year due to snowmelt in spring and early summer months. This phenomenon creates an ever-changing landscape and highlights Nature’s constant evolution.
Don’t miss out on visiting Lake Tahoe’s stunning shoreline and beaches during your trip to this mesmerizing destination. A glimpse of this wonder awaits you! The mountains surrounding Lake Tahoe are so old, even their wrinkles have wrinkles.
Surrounding Mountain Ranges
Many towering geological features surround the beautiful Lake Tahoe. These massive mountain ranges not only make up breathtaking vistas to look at, but they also play a crucial role in the formation of this famous lake. The mountains act as natural barriers, protecting the lake from harsh, cold winds and heat waves. They also filter out impurities from the water that runs into Lake Tahoe, making it one of the purest and clearest freshwater lakes in the world.
Moreover, these mountain ranges are a hub of diversified flora and fauna. The Sierra Nevada Mountain Range is home to hundreds of species including marmots, gray foxes, black bears, coyotes, American beavers and many more. Similarly Carson Range is home to various bird species that can be spotted along with panoramic views in its nature trails.
The impressive mountain ranges surrounding Lake Tahoe are extraordinary sites that tourists should definitely not miss! Looks like Lake Tahoe’s environmental changes will be the only thing more unpredictable than my ex’s mood swings.
Environmental Changes
To understand how environmental changes have impacted Lake Tahoe, delve into the section ‘Environmental Changes’ with the sub-sections Climate, Water Quality, and Threats to the Ecosystem providing solutions. Explore how each of these factors has contributed to the geological history of Lake Tahoe and the implications for its ecosystem.
Climate
The impact of these events on the environment is immense. Climate change has led to the melting of Arctic ice caps and the rise in sea levels, highlighting the desperate need for people worldwide to come together and address this emerging crisis collectively. To address this issue requires a comprehensive approach from all nations and regions since the consequences of climate change can affect the entire planet.
Recent research suggests that some areas are experiencing harsher effects than others due to changes in weather patterns caused by human activities. These impacts can further trigger natural systems’ collapse resulting in significant losses for several species habitats.
A true example of how climate changes have already begun impacting our planet is evident through historical evidence from Antarctica’s shrinking Ice Sheet, where melting rates have nearly tripled over the past decade. As such trends continue across different areas globally, it becomes increasingly important than ever before for our world leaders to implement policies focused on environmental sustainability and conservation measures.
Looks like the only thing clear about our water quality is that it’s not clear at all.
Water Quality
Pollution is one of the major causes that alters water quality affecting aquatic plants, animals and ecosystem balance. Agricultural activities, improper disposal of waste, industrial discharges may contribute to the accumulation of nutrients which may result in oxygen depletion in aquatic environments.
Managing water quality also requires creating an integrated management plan that includes provision of clean water supply, implementing measures to prevent contamination from waste and sewage. Moreover, restoration techniques such as riparian plantings can improve overall watershed health by adding organic matter back into the soil along stream banks which helps control erosion.
It’s important to follow best practices to avoid contaminating our freshwater resources with harmful pollutants as they have long-lasting effects on both human health and wildlife. Regular monitoring ensures adherence to properly regulated guidelines, reduce threats upon nature resulting in better environmental protection policies.
Looks like our ecosystem is competing with celebrities for the title of ‘Most Endangered Species’.
Threats to The Ecosystem
The ecological system is susceptible to various hazards, posing significant challenges to environmental sustainability. Human activities, including overexploitation of resources, pollution of water bodies, and habitat loss, pose a major threat to the ecosystem. The negative impact of these activities is far-reaching and may result in devastating consequences that negatively affect humanity’s livelihoods.
A significant issue that threatens the ecosystem’s survival is climate change. The prolonged alterations in temperature patterns lead to the emergence of pests or diseases, resulting in fluctuations in food production and yield losses for farmers. Additionally, climate change alters rainfall patterns that lead to flooding or drought, further exacerbating ecosystem destruction.
Waste management is one of the pressing environmental challenges requiring immediate action. Poor waste disposal practices allow hazardous chemicals into the environment that contaminate soils and water causing adverse health effects on humans and wildlife. These effects have long lasting implications for ecosystems as it disrupts vital processes like nutrient cycling or groundwater recharge.
There are many examples where various communities around the world have experienced ecological damage due to human activities. For instance, deforestation in parts of Indonesia contributes to greenhouse gas emissions leading to warming temperatures at a global level. This example reiterates how neglecting precautionary measures towards environmental protection puts people’s lives at risk worldwide.
Looks like humans have succeeded in leaving their mark on the earth – and not the good kind like when you sign a visitor’s book.
Human Impact
To better understand the impact humans have had on the geological history of Lake Tahoe, this section will examine the different periods of time and how they have shaped the region. Starting with the Native American presence, moving on to the trapping and logging era, and finishing with the most recent tourism and development, we’ll explore the ways in which these historical events have affected the formation and preservation of Lake Tahoe.
Native American Presence
The indigenous Americans inhabited North America long before European exploration. They contributed greatly to the continent’s biodiversity and ecological balance. Native American communities varied in culture, language, and lifestyle across the regions they occupied.
Their profound reverence for nature informed their sustainable land-use practices like rotational farming, resilient crop selection, and hunting regulations. However, with the arrival of colonial powers, indigenous populations suffered casualties through genocides, forced expulsions, and epidemics.
Despite the adversities they faced, many Native American tribes endure to this day while preserving their distinct cultural identities. Today they continue to advocate for environmental protection while pursuing land justice.
A true fact: The Navajo Nation reservation has been severely impacted by colonization’s environmental consequences like uranium mining leading to radioactive contamination.
The Trapping and Logging Era, where humans made more holes in trees than a woodpecker on speed.
Trapping And Logging Era
The period of harvesting natural resources for profit has had a significant impact on the environment. The exploitation of animal fur and timber in human history, which we shall refer to as ‘Resource Exploitation’, caused massive destruction to forest systems and various animal populations. Despite emerging environmental awareness, this era led to depletion of our natural resources.
Logging and trapping were key activities at this time. Many large trees were felled to provide materials for construction, including buildings and transportation systems. Further, indigenous animals’ habitats were destroyed through indiscriminate trapping methods that resulted in species extinction or threat. Depletion of natural resources hindered the ecosystem’s ability to maintain critical balances resulting in a loss of biodiversity.
Beyond just exploiting natural resources for human benefit, other consequences included increased carbon emissions through manufacturing processes required for new building material production.
Pro Tip: Despite effective conservation efforts aimed at regenerating vulnerable ecosystems today, raised public awareness of environmental impact can be a powerful deterrent against exploitation before it’s too late.
Tourism may boost the economy, but it’s hard to ignore the environmental impact of millions of people insisting on taking selfies with endangered species.
Tourism And Development
As human beings continue to make strides in development, the tourism sector has become a crucial part of economic growth. Not only does it bring revenue and opportunities for cultural exchange, but it can also have negative impacts on the environment and indigenous communities. The development of tourism facilities often results in habitat destruction, pollution, overconsumption of natural resources, and congestion.
It is essential to consider sustainability measures and ecotourism practices that minimize the environmental impact of tourism while promoting local conservation efforts. This can include responsible waste management practices, renewable energy sources, and engaging with local communities in decision-making processes.
Moreover, it is important to recognize that tourism development can have social consequences such as displacement of indigenous populations or exploitation of labor. Governments should ensure that tourism development initiatives prioritize fair labor practices, equitably distribute benefits among local communities, and respect the rights of indigenous peoples.
A study by the World Tourism Organization (UNWTO) found that sustainable tourism could generate economic benefits while preserving natural and cultural resources. By implementing environmentally conscious policies in conjunction with sustainable business practices, we can create a brighter future for both the economy and our planet.
Conservation efforts are like trying to put out a forest fire with a squirt gun – it’s a noble effort, but ultimately ineffective against the immense impact of human activity.
Travel around Lake Tahoe to experience the most breathtaking views. Explore the scenic loop of 72 miles that encircles the lake. The duration of driving around depends on your pace and stoppages. Discover various scenic lookout points, beaches, parks, historical landmarks and enjoy water sports activities.
While traveling toward Emerald bay from South shore, pay homage at Camp Richardson Resort’s General Store for its famous Rum Runner drink and a round of beach volleyball.
Lake Tahoe is welcoming all year round with different entertainment in each season – skiing in winters at diverse resorts and water recreation activities during summers. Experience blissful natural beauty while staying where location meets luxury – The Ritz Carlton or also check out various vacation rentals available.
Pro-tip: Plan your travel during off-seasons or weekdays to avoid excessive traffic on popular route Hwy-89, which serves North and West shores.
Driving around Lake Tahoe is like trying to resist eating just one potato chip – impossible and always leaving you wanting more.
Driving Around Lake Tahoe
To make the most of your trip to Lake Tahoe, you need to explore by car. If you want to take a scenic drive around the lake, check out the different route options and plan some stops at popular viewpoints and attractions. To refuel and recharge during your trip, we’ll suggest some recommended stops for food and drinks along the way.
Route Options
Embarking on a journey around Lake Tahoe opens up the options to explore various routes in and around this breathtaking area.
First, the quickest and most accessible route is Highway 50, encompassing California State Route 28 through South Lake Tahoe and Nevada State Route 431 which leads to Mount Rose Summit.
Alternatively, one can take US Route 395 for its scenic drive and spectacular views of Eastern Sierra.
For adventurous souls, consider the southern shoreline by combining US Route 50 with winding curves of Meeks Bay Road and Emerald Bay Road.
Apart from these routes, travelers may also venture out to nearby attractions such as Truckee or Carson City.
Lake Tahoe with its snow-capped peaks and crystal clear waters never fails to astound its visitors. A travel itinerary here includes a myriad of outdoor activities like hiking, skiing, fishing and much more.
In fact, it’s an exciting experience to stop at multiple vista points along any of the aforementioned routes that grant breathtaking panoramic views of Lake Tahoe’s turquoise splendor.
According to Travel + Leisure magazine’s “World’s Best Awards” survey among readers (2021), which ranked best lake destinations worldwide – Lake Tahoe stands tall at number five.
Driving around Lake Tahoe is like a scenic version of Whac-A-Mole, with beautiful viewpoints and attractions popping up at every turn.
Popular Viewpoints And Attractions
To explore the most popular scenic spots and attractions while driving around Lake Tahoe, consider these recommendations:
Charmlee Wilderness Park: With its miles of hiking trails through beautiful rolling hills and captivating canyon views, Charmlee Wilderness Park is perfect for nature enthusiasts.
Heavenly Mountain Resort: This stunning ski resort features breathtaking 360-degree views from atop the world-renowned Heavenly Gondola. Plan your visit during summer concerts or winter skiing.
Emerald Bay State Park: This pristine natural reserve boasts the scenic Emerald Bay Beach, Fannette Island, and access to Vikingsholm Castle.
Apart from these, drive along North Shore Boulevard for picturesque vistas of crystal-clear waters against mountainous backdrops. Lastly, make sure to snack on delicious treats at the quaint Sugar Pine Cakery & Cafe in Tahoma. For a full experience of Lake Tahoe’s beauty, don’t forget to take detours down lesser-known roads that offer quieter settings with equally stunning scenery. And why not try renting a bicycle instead of driving? This provides an excellent way to explore Tahoe’s attractions and stay active at the same time. Fuel up on more than just gas at these tasty pit stops around Lake Tahoe.
Recommended Stops For Food And Drinks
If you’re looking for some delightful places to grab a bite or quench your thirst as you drive around Lake Tahoe, we’ve got you covered! Take a break and savor the local delights at these spots:
Indulge in delicious coffee and pastries at Tahoe House Bakery & Gourmet.
Satisfy your cravings with handmade chocolates from The Chocolate Bar.
Treat yourself to wood-fired pizzas made with organic ingredients at Rubicon Pizza Company.
Enhance your taste-buds by trying the unique tapas-style plates at Bite American Tapas.
Experience a classic 50’s diner vibe with breakfast served all day long from Red Hut Cafe.
Cool off by indulging in organic and Vegan ice cream from Susie Scoops Ice Cream Truck.
For those who appreciate adult beverages, check out Revive Coffee & Wine, whose extensive wine selection is sure to please.
Enjoy stunning views of Emerald Bay while sipping on a cocktail or grabbing a snack at The Beacon Bar & Grill situated lakeside.
Pro Tip: Timings may vary according to weather conditions or seasonal changes, so it’s advisable to check their website before venturing out.
I hope you’re not in a rush, because driving around Lake Tahoe is like trying to make a three-point turn on a rollercoaster.
Time Estimate For Driving Around Lake Tahoe
To estimate the time required for driving around Lake Tahoe, you need to consider various factors. These factors affect the duration of your drive and determine the optimal time to take this scenic route. In this section, we will discuss the different factors influencing the estimated drive time. You will also learn about the ideal time to visit for driving around Lake Tahoe.
Factors Affecting Duration of Drive
The duration of driving around Lake Tahoe is influenced by multiple factors:
Traffic conditions play a crucial role, as peak hours can cause significant delays and increase travel time.
The route taken can impact the drive duration since taking shortcuts through residential areas may not be the fastest option.
Additionally, the weather conditions are also an essential factor to consider as snowfall or rain can affect road visibility and driving speed. In spite of these variables, driving around Lake Tahoe generally takes approximately 2-3 hours. A notable fact is that the lake’s circumference spans across two states – California and Nevada.
When it comes to driving around Lake Tahoe, the ideal time to visit is whenever you can ditch work and escape reality for a little while.
Ideal Time to Visit For Driving Around Lake Tahoe
Traveling around Lake Tahoe can be an awe-inspiring experience. If you are planning to go for a drive, it is important to choose the right time for your journey. The most favorable season to take a drive would be during the late spring or early fall. During this time, the temperatures are mild and the crowds are less compared to peak seasons.
Driving around Lake Tahoe can still be enjoyable during winter as well but there might be road closures due to snowstorms. Also, summer could bring in more tourists which could lead to traffic congestion and limited parking spots. Hence, it’s best avoided if you prefer a quieter experience.
It is important to note that weather patterns affect the travel times around Lake Tahoe in general. It’d be useful to keep yourself updated with weather forecasts before setting off on your trip so that you’re prepared for any possibilities.
A good friend of mine planned a drive around Lake Tahoe during peak summer last year and had trouble finding parking spots at most stops, ruining their experience of exploring the place peacefully. My friend suggests that visitors plan their visits ahead when driving at peak times so as not to ruin one’s time here without proper preparation!
Smooth driving around Lake Tahoe is like finding a parking spot at the beach: it’s rare, but oh so satisfying.
Tips For a Smooth And Enjoyable Drive Around Lake Tahoe
To ensure a smooth and enjoyable drive around Lake Tahoe, you need to prepare yourself beforehand, take safety precautions, and be aware of local rules and regulations. In this segment of the article, we’ll provide you with helpful tips to make your drive around Lake Tahoe fun and stress-free. First, we’ll cover how to prepare for the drive, followed by the importance of safety precautions. Lastly, we’ll discuss the significance of adhering to local rules and regulations to prevent any mishaps during your journey.
Prepare For The drive
To ensure a smooth and safe drive around Lake Tahoe, it is critical to make proper preparations. These preparations will not only enhance your experience; they will also guarantee your safety while on the road.
Here’s a 5-step guide to preparing for the drive around Lake Tahoe:
Check Your Vehicle: Before embarking on a trip, inspect your car or rental vehicle to ensure everything is functioning correctly. Check fluids, brakes, tires and headlights.
Pack Appropriately: Pack all necessary supplies, including a first aid kit, water bottles, snacks and an emergency supply kit.
Plan Your Route: Use GPS or maps to plot out your route of travel ahead of time. Consider alternate routes in case there’s traffic on the primary road.
Research Weather Conditions: Weather can impact your travel plans; thus, you should check weather conditions before starting your journey around Lake Tahoe. If snow affects roads during winter months, plan accordingly with chains or snow tires.
Take Frequent Breaks: Long drives can be daunting; hence taking breaks every few hours could help refresh your mind and rejuvenate you for safe driving.
Sourdough bread is made with just a few ingredients. It is dairy-free and perfect for those with lactose intolerance.
Take a look at the key ingredients needed to make sourdough bread:
Ingredients
Quantities (in grams)
Flour
500
Water
350-400
Salt
10-15
Starter
100
You can also add flavor and spices like garlic, rosemary, or cinnamon.
The fermentation process of sourdough bread can take many hours and even days. A slow fermentation gives better flavor and texture.
Chef Peter Reinhart says, “Sourdough is one of our oldest forms of leavened bread.” It’s delicious, healthy, and has lots of history.
Let’s hope making sourdough bread is easier than that new TikTok dance!
Steps in Making Sourdough Bread
To guide you through the process of making sourdough bread without dairy, we present the steps involved in making sourdough bread with four sub-sections: making the starter, preparing the dough, fermenting the dough, and shaping and baking the bread. Each sub-section is crucial in its own way, and by following these steps, you can make delicious and healthy sourdough bread at home.
Making The Starter
To make sourdough bread, the first step is to ‘Initiate the Starter’. Here’s how:
Grab a jar and fill it with equal parts flour and water
Mix until no lumps remain and let it rest at room temperature for 24 hours
Discard half of the mixture and feed it with fresh flour and water in equal parts
Repeat this every 12 hours for 5-7 days, or until it doubles in size within 4 hours
It should have a vinegar smell and visible bubbles. It’s now ready!
Remember to use the starter at its peak activity – when it has doubled – and discard or share half. Sourdough bread has a long history – Napoleon even carried it in battle! Start kneading and get ready to enjoy the unique texture and flavor of homemade sourdough bread.
Preparing The Dough
Mix flour and salt in a bowl, stir with a fork until shaggy. Cover with a cloth for 30 minutes.
Knead the dough, be careful not to over-knead. Place in an appropriate vessel and cover. Store in a cool, dry place.
Start your starter culture – this affects flavor! Leave it overnight to develop gluten.
Sourdough has been made since ancient times. Legend tells of a soldier who mixed grain and water, creating the first sourdough loaf! Now, let’s begin fermenting your dough!
Fermenting The Dough
Fostering the natural bacteria in dough is super important when baking sourdough. This helps form gluten and creates the signature tangy flavor in artisanal bread. Here’s your 3-step guide to Cultivating Sourdough Dough:
Let your flour, water, and yeast combo sit untouched for 12+ hours.
Every 30 minutes over 2-3 hours, fold or knead your dough.
Shape your dough into loaves and let sit on a floured surface overnight.
Remember to keep your workspace warm and humid! Also, using organic wheat flour can help boost microbial activity in your starter.
Pro tip: To get different flavor profiles, experiment with different fermentation and resting lengths. You’ll be the master of sourdough bread-making in no time! Get ready for a serious arm workout as you shape and knead your dough.
Shaping And Baking The Bread
Ready to transform your dough into a scrumptious bread? Here’s how:
Heat up your oven! Preheat it and place a baking stone or Dutch oven for at least 30 minutes before you start baking.
Prepare the dough: Place it on a floured surface. Fold each side to form a rounded shape.
Create tension on the surface: Flip the dough onto an unfloured part of your work surface. Push down and drag towards you to create tension.
Proofing: Put it in a bowl that’s been dusted with flour. Let it rest for 20 minutes to one hour, depending on the room temperature.
Baking: Put the loaf in your preheated oven. Bake for 45-50 minutes until its crust turns golden brown and crispy.
Cooling: After taking out bread from oven let it cool completely before slicing or breaking open.
Be gentle when shaping so you don’t affect fermentation. Check the dough often – rising times may vary!
For a great look, use a sharp razor blade or knife to score before baking.
Remember, sourdough is like a pet you can eat!
Common Questions About Sourdough Bread
To clear any confusion you might have about sourdough bread, we have answered some common questions for you. If you’ve ever wondered whether sourdough bread contains dairy or if it is gluten-free, we’ve got you covered. Additionally, we will be discussing how long it lasts.
Does Sourdough Bread Have Dairy
Sourdough bread is dairy-free. It’s made of just flour and water. But, some recipes may contain milk or butter. So, check the label if you’re lactose intolerant or have a dairy allergy. Some bakeries or manufacturers may add dairy products. Contact the maker if you’re not sure about the ingredients.
Also, don’t assume sourdough bread is gluten-free. Many recipes use wheat flour. To ensure your bread is dairy-free, make it at home with simple ingredients. Sorry, gluten-lovers – sourdough bread won’t magically get rid of gluten.
Is Sourdough Bread Gluten-Free?
Sourdough bread is a popular alternative for those who are gluten intolerant. It contains lower levels of gluten than other types of bread. However, it is not completely gluten-free. The fermentation process used to make sourdough can break down some gluten proteins, making it easier to digest for those with mild sensitivities. But, it’s not safe for those with severe intolerance or celiac disease.
For mild cases, sourdough can be a safer option. But, it’s important to note that the level of gluten can vary. So, double-check the ingredients and nutrition info before purchasing.
Sourdough has been around since ancient Egypt. In the middle ages, people used it as currency due to its value as a reliable food source and long shelf life. Now, it’s popular again due to its unique flavor profile and potential health benefits. But, like most relationships, the longer you keep it in the fridge, the less satisfying it becomes.
How Long Does Sourdough Bread Last?
Sourdough bread can be kept for a week if stored properly. Wrap the loaf in plastic and keep it at room temp for 2-3 days. Then store in fridge to avoid mold. To refresh stale sourdough, sprinkle water and reheat in oven or toaster.
Life of sourdough depends on factors like temp, humidity and initial baking. Furthermore, its dense texture and lack of preservatives mean it dries out quickly.
Tip: Freeze slices of sourdough for long-term storage. Toast from frozen for maximum freshness.
How Much Does It Cost To Change Your Name In California
The process of legally changing your name in California can be quite involved. It requires filling out forms, appearing in court, and going through a background check. Fees for filing the paperwork and additional costs related to publishing notices of the name change in newspapers should also be taken into account.
To begin the name-changing process in California, an individual must first obtain a copy of their birth certificate as well as their marriage license or divorce decree if applicable. They must then fill out various forms provided by the court, including a Petition for Change of Name and Order to Show Cause for Change of Name. Once these forms are completed, they must be filed with the county clerk’s office.
After filing the necessary paperwork, individuals will receive a court date where they will present their case before a judge. If all goes well and there are no objections to the name change, the judge will issue an order granting the name change.
Something unique about California’s process is that once someone has received approval from the judge to change their name, they must then publish a notice of intention to change their name in a newspaper of general circulation once a week for four consecutive weeks. After this is complete, individuals must file proof of publication with the court.
As with any legal process, it can be helpful to hear about other people’s experiences going through it. One individual shared how changing her last name after getting married was easy – she simply included the request on her marriage certificate and paid a nominal fee at the courthouse when registering it. However, changing her first name required much more work and involvement with lawyers due to legal complications.
Get ready to rummage through your archives, because changing your name in California requires more paperwork than filing your taxes.
Required Documents for Name Change in California
To complete the name change process in California, you need to provide certain documents. In order to make it easy for you, this article focuses on the “Required Documents for Name Change in California” section, with sub-sections like “Birth Certificates and Legal Name Changes”, “Marriage Certificates for Name Changes”, and “Court Orders for Name Changes”.
Birth Certificates and Legal Name Changes
Legal Name Changes: Vital Records and Paperwork
When changing your legal name in California, it is essential to have the proper documentation on hand. This includes a certified copy of your birth certificate, which is necessary to prove your identity and date of birth. You will also need legal paperwork of the name change, such as a court order or marriage certificate.
Additionally, some individuals may need to provide other documentation depending on their specific situation. For example, if you are a non-U.S. citizen applying for a name change, you may be required to present additional paperwork.
Remember that failing to provide the necessary documents could result in delays or even rejection of your name change application. It’s important to do thorough research and ensure you have all the required paperwork before beginning the process.
Don’t risk missing out on opportunities because of an outdated legal name. Make sure you have all necessary documentation ready for your California name change application.
Who knew tying the knot could lead to so much paperwork? Get ready to dig out that old marriage certificate for your name change in California.
Marriage Certificates For Name Changes
For a name change in California after marriage, providing the Marriage Certificate is an essential document. The certificate must be an original or certified copy, issued by the County Clerk-Recorder’s office where the marriage license was originally obtained. This certificate must have both spouses’ names along with the date and location of marriage.
If the Marriage Certificate is not available, a court order authorizing a name change will be required instead. Additionally, a certified copy of this court order needs to be submitted to complete the gender marker or name change process on all legal documents.
It is important to note that all documents that are submitted for a name change must be in English or come with an official English translation. Originals or certified copies are accepted by many agencies except for Social Security Administration (SSA), which requires certified copies only.
Ensure that your documents have been recently issued – SSA may likely reject immigration documents over two years old.
Submitting complete and accurate documents with no errors can greatly increase your chances of getting approval for your name change without delays.
You don’t need a court order to change your name to Beyoncé, but it certainly helps.
Court Orders For Name Changes
Changing your name in California requires a court order, which involves a legal process requesting for a new name. This process can only be granted if you have valid reasons that comply with the state’s regulations.
To acquire a court order for name change in California, one must file a petition, attend a hearing, and publish required notices, among others. Additionally, you must provide valid government-issued identification cards and fingerprints.
It is important to note that individuals who are changing their names due to marriage or divorce do not need a court order but must still follow certain procedures.
According to the California Courts website, A Petition for Change of Name (form NC-100) can be used to ask the court to change your name. You will also need to fill out several other forms and pay filing fees.”
In summary, getting a court order for name change in California requires proper steps and documentation complying with the state’s regulations and guidelines. Ready to ditch your old identity like a bad habit? Follow these steps to legally change your name in California.
Steps to Change Your Name in California
To change your name in California, follow the steps in this section titled “Steps to Change Your Name in California.” You will learn about each sub-section, which includes “Filing a Petition for Name Change,” “Publishing Name Change Notice,” “Obtaining a Court Order for Name Change,” and “Updating Personal Records and Identification.”
Filing a Petition For Name Change
When considering a name change in California, you will need to apply for a legal petition. This process involves several steps that must be followed carefully to ensure success.
Step 1: Fill out the necessary paperwork from your local courthouse or online. The documents will require detailed information about yourself and the reason for the name change.
Step 2: Obtain a Local Criminal Record Check from police departments in every county you have lived in since turning 18.
Step 3: Attend a hearing in front of a judge, present your case, and wait for their decision.
It is important to note that changing your name can be complicated and time-consuming, with an average cost of $435. However, if successful, it can have significant benefits both personally and professionally. A name change may help with identity protection or cultural preferences.
Finally, a chance for your ex to see you in the newspaper for something positive as you publish your new name change notice in California.
Publishing Name Change Notice
As per California state laws, publishing a notice of name change is a mandatory requirement to complete the process. You must publish your name change in an approved newspaper for four consecutive weeks. The notice must include your previous name, new name, and information on how to object to the change.
Upon completion of publishing your name change notice, the newspaper will provide you with an affidavit as proof of publication. Keep this affidavit safely as it is required when you file the petition for a change of name with the court.
It is important to note that if you have changed your name due to a marriage or divorce decree, you do not need to publish a notice in the newspaper. However, you still need to file legal paperwork with the court for an official name change.
A woman named Sarah recently went through the process of legally changing her last name after getting married. She had to go through many forms and processes and felt overwhelmed at times but was glad she did it correctly following California state laws.
Who knew changing your name in California required a court order? Looks like the only thing easier to obtain than a name change is a restraining order.
Obtaining a Court Order For Name Change
To legally change your name in California, you need to acquire a court order. You can do this by submitting a petition for name change in the Superior Court in the county where you reside, with appropriate supporting documents and fees. Once the forms are filed, a date will be set for your hearing.
During the hearing, you will present the reasons for your name change request to the judge. If everything is satisfactory, the judge will sign an order granting your name change. You need to update all legal documents and government records after obtaining this order.
Keep in mind that if you have any outstanding debts or criminal records, they may affect your request for a name change. Additionally, it might take several weeks or months to obtain a new birth certificate and Social Security card with your new name.
Don’t let fear of missing out keep you from changing your name professionally and legally. Do thorough research, prepare yourself well before filing for a petition for name change in California and enjoy the benefits of having a new identity that reflects who you are now.
Time to update your personal records and identification, because being called by the wrong name at the DMV is the ultimate form of torture.
Updating Personal Records And Identification
To update your personal records and identification in California, there are specific steps you must follow. These include:
Filling out an application form and providing relevant identification documents to the authorities.
Once they approve the request, you will need to update your social security card, driver’s license, passport, and other essential documents accordingly.
It is essential to keep in mind that changing your name can be a lengthy and expensive process. Due to this reason, it is advisable to hire the services of an experienced attorney who will guide you through the process.
While updating personal records may seem like a small task, it can have significant implications. It can affect various aspects of your life such as employment or financial records. Therefore, it is crucial to ensure all necessary documents reflect the new name accurately.
As one California resident shared their experience of updating their name on legal documents; It was a time-consuming process that required attention to detail. However, with the help of an attorney familiar with California laws and procedures, the transition was smooth and painless.
If money talks, then changing your name in California must be a full-on conversation.
How Much Does it Cost to Change Your Name in California?
To change your name legally in California, you’ll need to know the costs involved. With this section on “How much does it cost to change your name in California?” and its sub-sections – “Court filing fees for name change,” “Publication fees for name change notice,” and “Additional fees for name change services” – you’ll get an overview of the expenses involved in the process.
Court Filing Fees For Name Change
When applying to change your name legally in California, you’ll need to pay a fee. The cost of the court filing fees for a name change varies depending on the type of name change and other factors.
Below is a table that highlights the Court Filing Fees for Name Change:
Type of Name Change
Fee
Adult Name Change
$435
Minor Name Change (Parental Request)
$435
Minor Name Change (Non-Parental Request)
$635
It’s important to note that this table provides current and actual data of court filing fees for name changes in California as at 2021.
If additional copies of your name change order are required, you may incur extra charges. These fees might differ based on each county’s individual regulations.
A man from San Diego, Dr. Mark Smith shared his story about changing his name legally and discovering that he had to pay extra fees when he acquired more than one copy of the legal order. This tale serves as an elegant reminder to ensure you’re aware of what expenses you can expect when undergoing a name change.
Looking to change your name in California? Get ready to shell out some cash because the publication fees for the mandatory notice alone will have you second-guessing that new moniker.
Publication Fees For Name Change Notice
When changing your name in California, one of the fees you’ll need to pay is for publishing a notice of the name change in a local newspaper. This fee is called the Publication Fees for Name Change Notice.
To give you an idea of what to expect, we’ve created a table of sample costs based on different areas and newspapers. Please note that these are just estimates and actual costs may vary.
Area
Newspaper
Cost
Los Angeles County
Los Angeles Daily Journal
$95-$130
San Francisco Bay Area
San Francisco Examiner
$70-$450
Riverside/San Bernardino County
Press-Enterprise
$200-$350
It’s important to remember that the exact cost will depend on a variety of factors, including the newspaper chosen and where you’re located. Costs can also fluctuate depending on the season and circulation size.
Pro Tip: To save money, consider researching several newspapers and comparing their prices before choosing which one to publish your notice in.
Looks like changing your name in California not only requires cash, but also comes with some sneaky additional fees. Don’t forget to bring your wallet and a magnifying glass!
Additional Fees For Name Change Services
Additional Fees for Changing Your Name in California
Changing your name requires more than just filing a petition, and you will need to pay additional fees on top of the basic filing fee. Here are the extra fees that you may incur when changing your name in California:
Fingerprints: You must submit fingerprints for both state and national criminal background checks, which typically cost around $100.
Court Order Copies: If you want certified copies of the court order approving your name change, each copy will cost $25.
New Identification Documents: After changing your name, you will need to obtain new identification documents, such as a driver’s license or passport, which come with their own fees.
It is vital to note that these additional costs may vary depending on each case’s individual circumstances.
If you have a criminal history record, this could result in an additional fee due to the requirement of submitting court dispositions.
California courts generally do not accept personal checks or credit/debit cards when paying for these fees. Ensure that you bring enough cash or money orders to cover all associated expenses.
Changing your name in California may seem daunting, but it’s a ‘name game’ worth playing if you’re ready for a fresh start.
Considerations For Changing Your Name in California
To make a name change in California, you need to be aware of certain considerations. Among them are criminal record and name change approval, name change and bankruptcy, and name change and child support. These sub-sections provide solutions for individuals who may need to navigate these situations.
Criminal Record And Name Change Approval
Changing your name in California with a criminal record can be a complex process. The court typically approves name changes unless it would harm public interests or deceive others. However, certain criminal convictions may create obstacles.
Having a criminal record does not automatically disqualify you from changing your name. But, some convictions require disclosure to the court, and the judge may consider factors such as the severity of the crime and how recently it occurred. A conviction for fraud, identity theft, or any deceptive act that intentionally misrepresents one’s identity could be especially problematic.
If you have a criminal past, consult an attorney familiar with California law and name change procedures who can help you complete the appropriate forms and make sure all requirements are satisfied before submitting your petition. Precise documentation is required, including background checks with fingerprints taken by local law enforcement agencies.
Failing to follow procedures accurately could delay or even deny your name change request. Make sure to provide all necessary information, take time to prepare all documents thoughtfully and carefully so you don’t miss out on any critical detail during this process.
Why shout ‘bankruptcy’ when you can just whisper ‘name change’?
Name Change And Bankruptcy
Changing your name during bankruptcy can impact the process. It requires notifying all creditors and undergoing a legal name change process. This can extend the timeline of your bankruptcy case, incur additional fees, and complicate matters with the court.
If you proceed with a name change before filing for bankruptcy, it may still impact the process as you will have to notify all creditors and update all legal documents. It is crucial to consult with a bankruptcy attorney to understand the consequences and steps to take before changing your name.
Additionally, creditors may view a name change during bankruptcy as an attempt to hide assets or avoid debts. The court may scrutinize your motives and request additional information on why you want to change your name.
It is suggested that individuals wait until after their bankruptcy case has concluded before changing their name to prevent any complications or delays in the process. However, if necessary, consult with a bankruptcy attorney before proceeding with any legal changes.
Changing your name won’t change your child support payments, but it might change the amount of sympathy your ex gets from their friends.
Name Change And Child Support
When changing your name in California, it’s important to consider how it might affect child support payments. The court may have trouble enforcing payment orders if the name on the order and the name on official identification don’t match. It’s crucial to update all documentation once a name change is complete.
Additionally, if you’re seeking a name change during ongoing child support proceedings, you must notify the other party and provide evidence of the change. Failure to do so may result in complications with future enforcement actions or even a dismissal of your case.
Remember that even if a name change has been granted, child support orders remain in place until modified by the court. Make sure to contact your county’s local child support agency for assistance with updating your information.
It’s important to note that changing one’s name does not discharge any accumulated debt owed under a child support order. In fact, accumulating delinquent payments can lead to license suspension, liens or wage garnishments according to Department of Child Support Services (DCSS).
Changing your name in California may be a hassle, but at least you won’t have to write out your full name on those annoying Scantron forms.


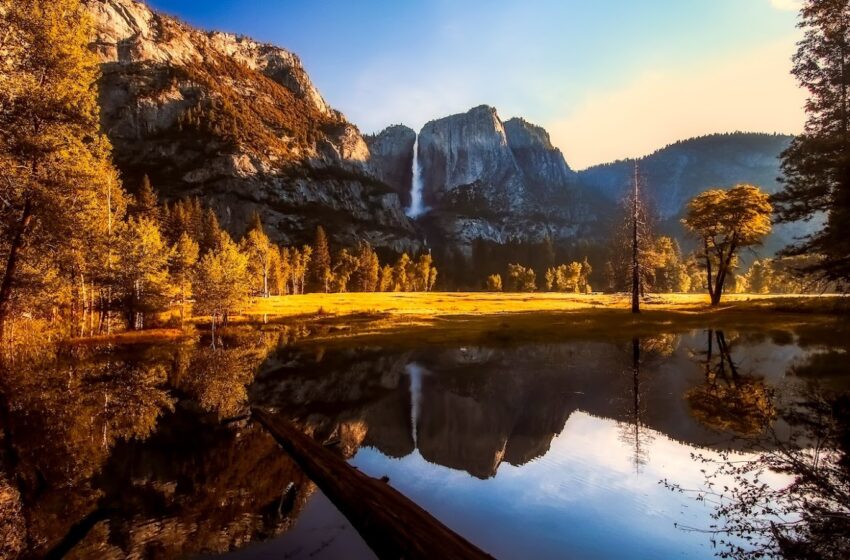

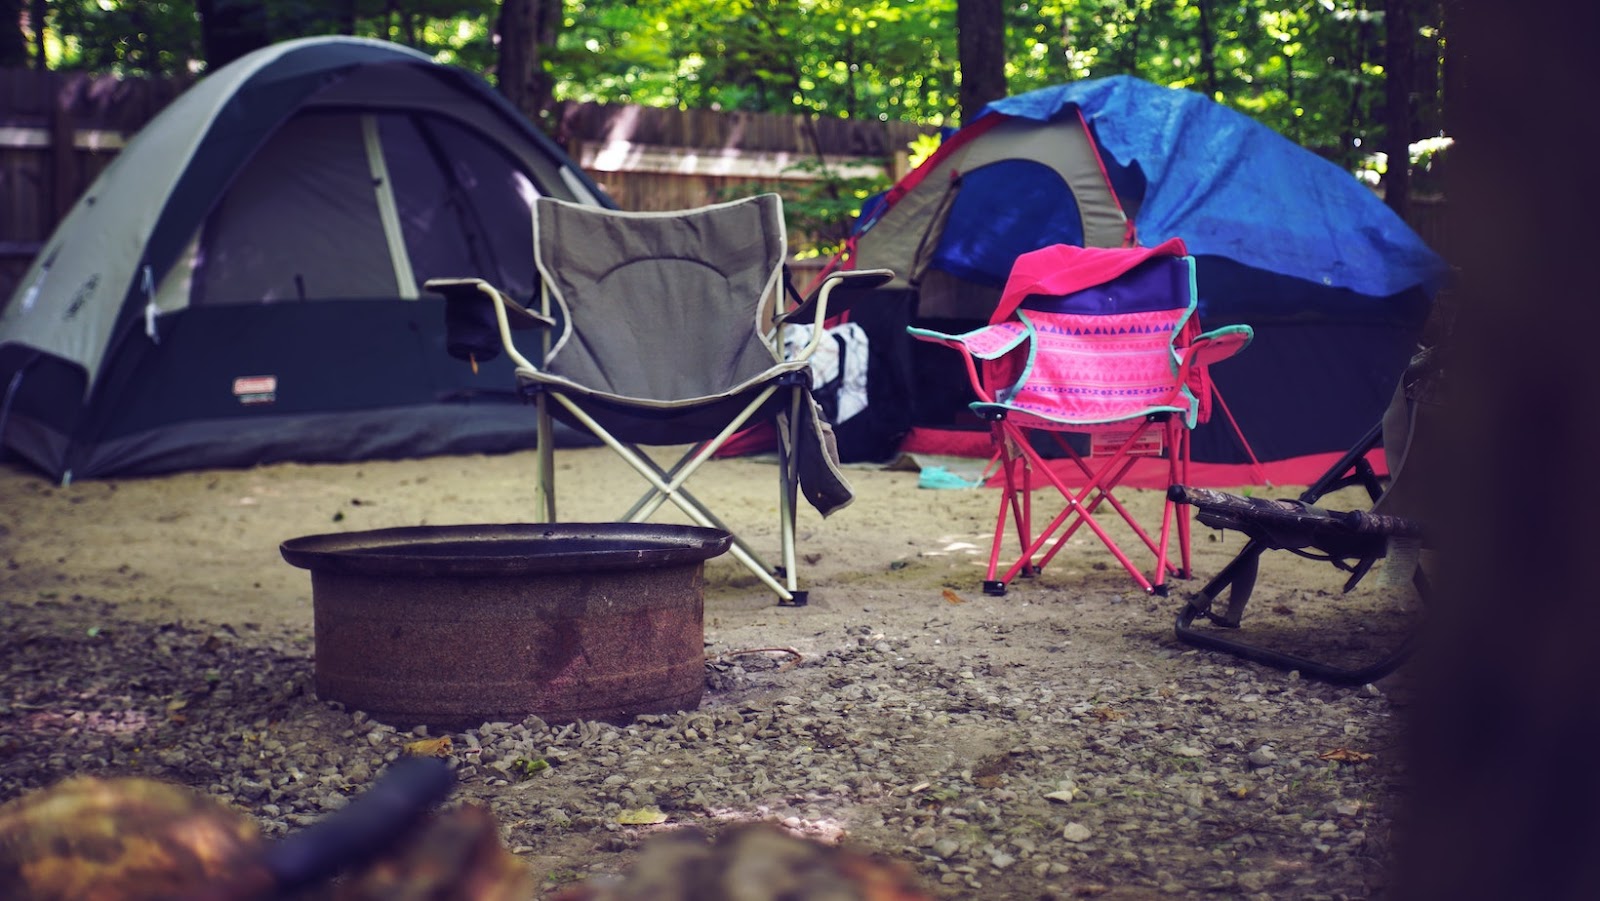
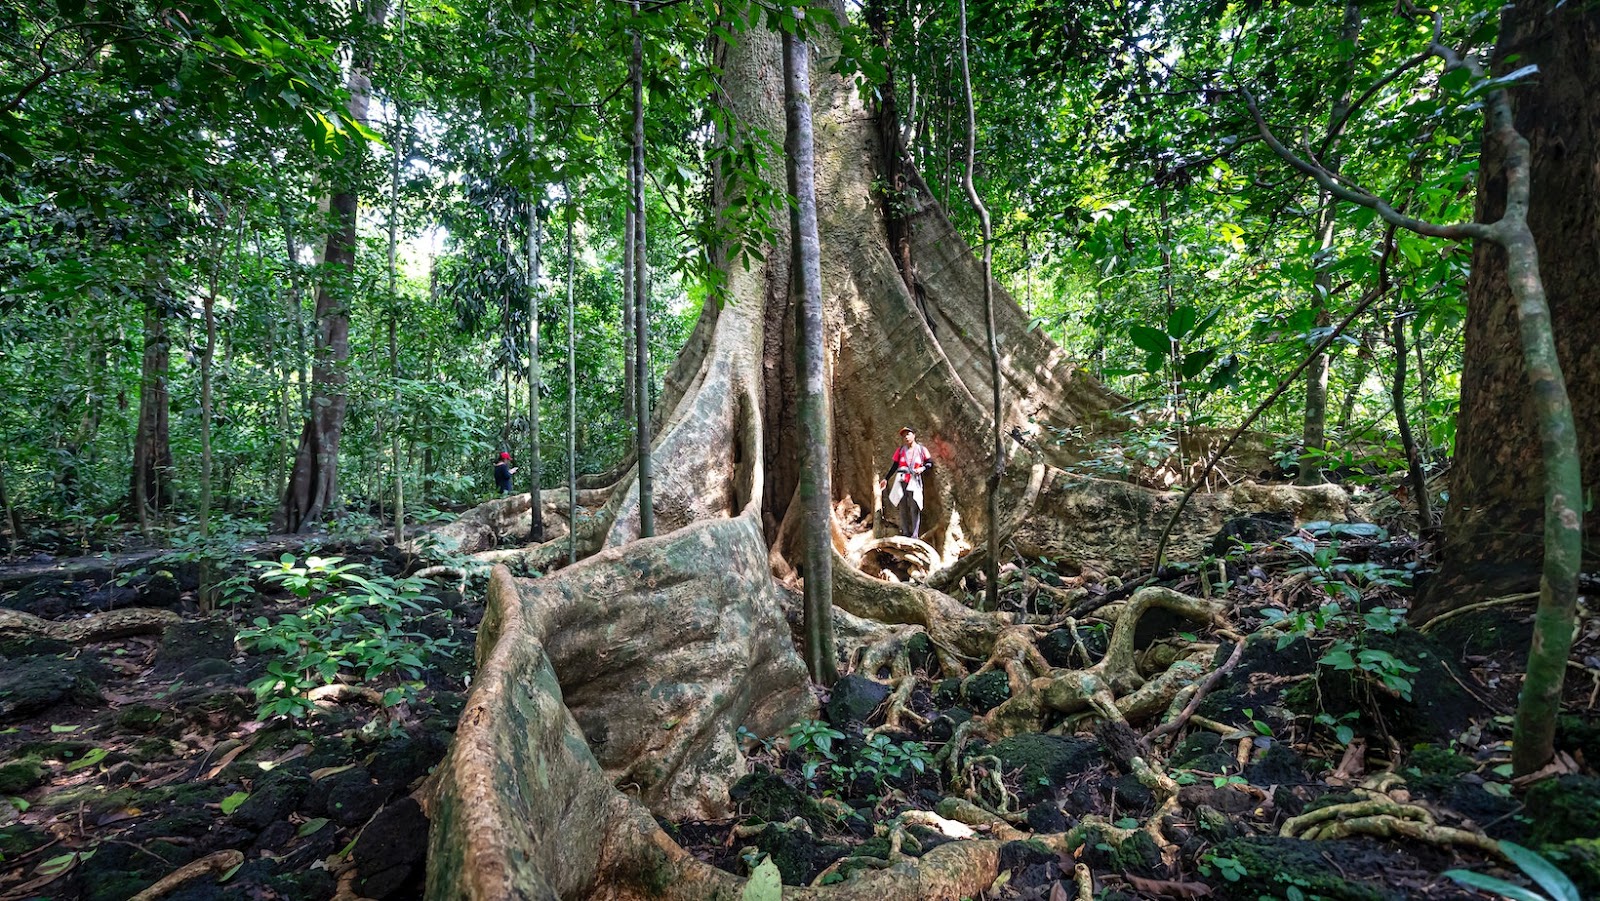
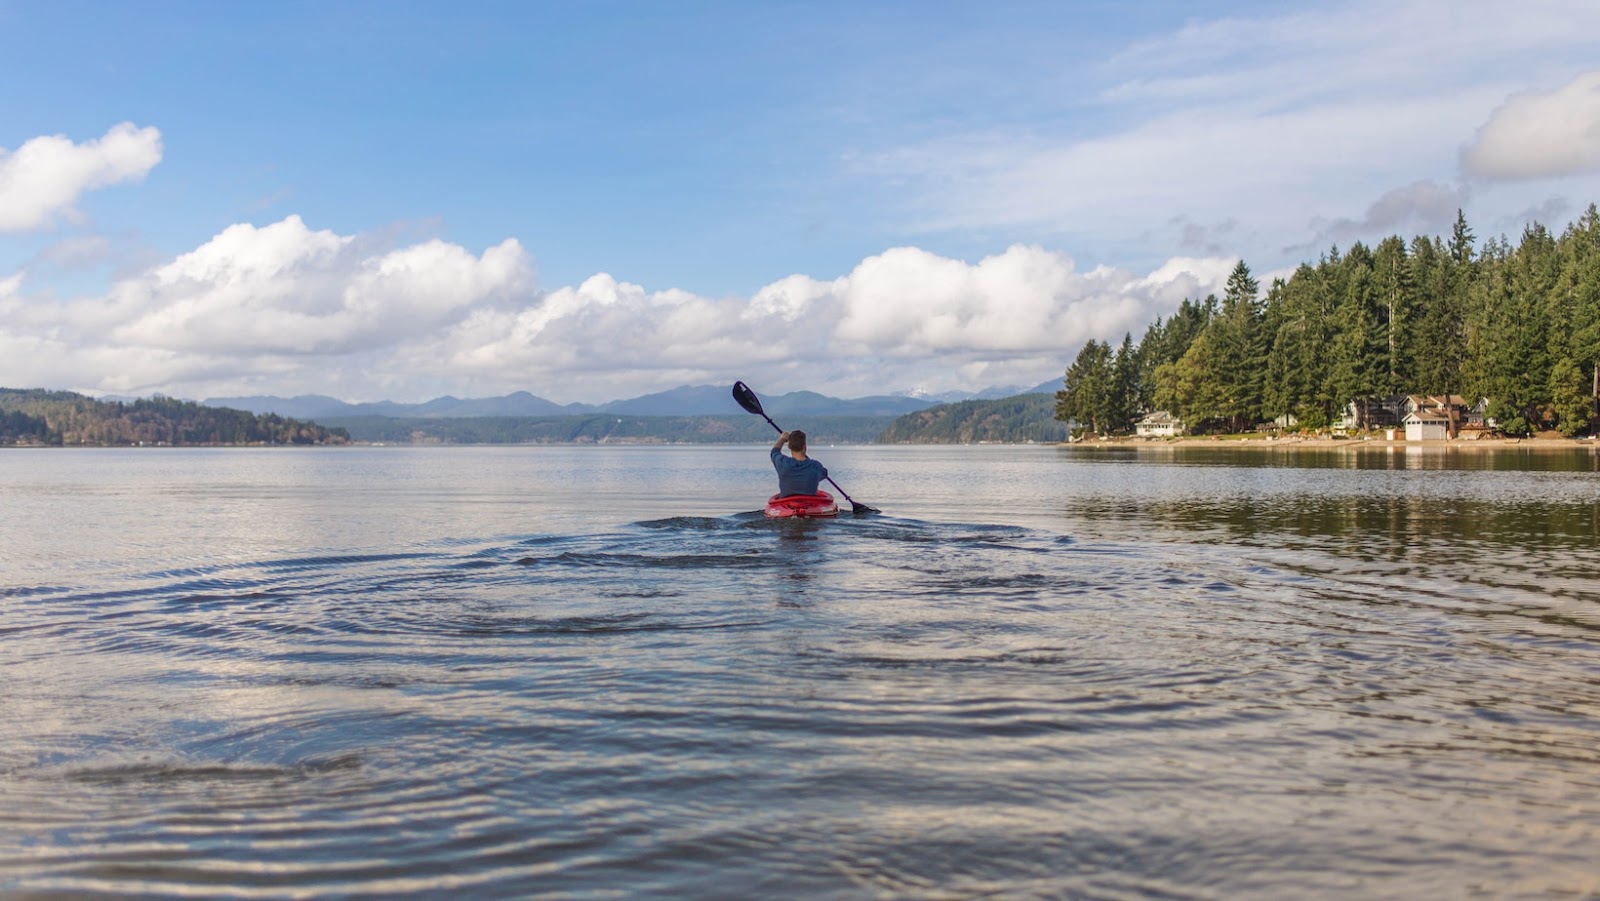
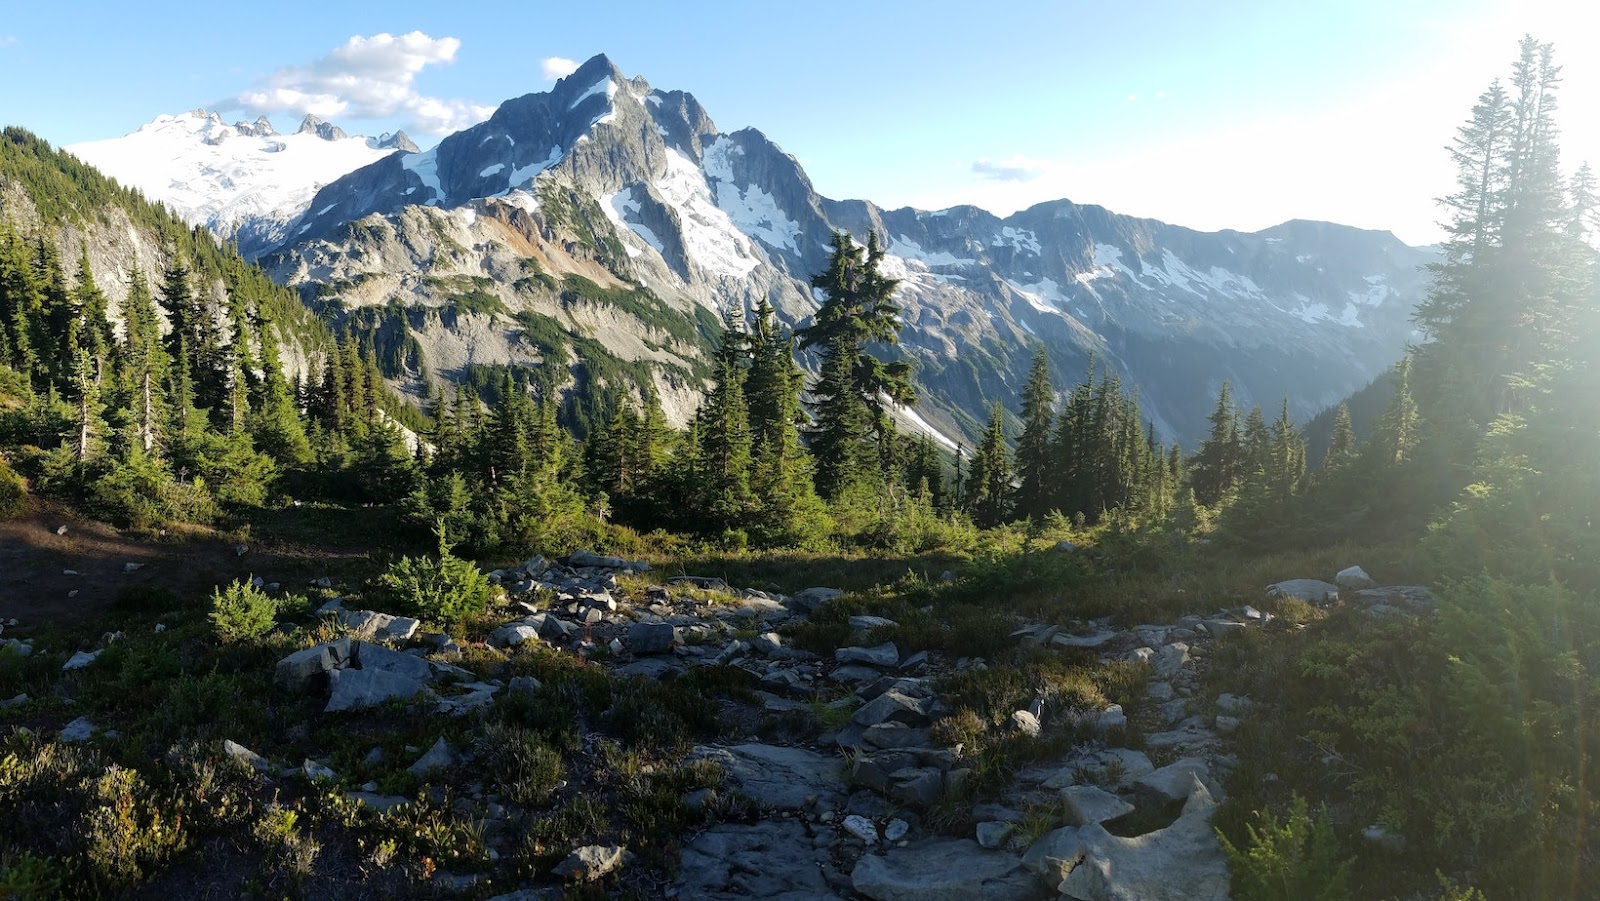


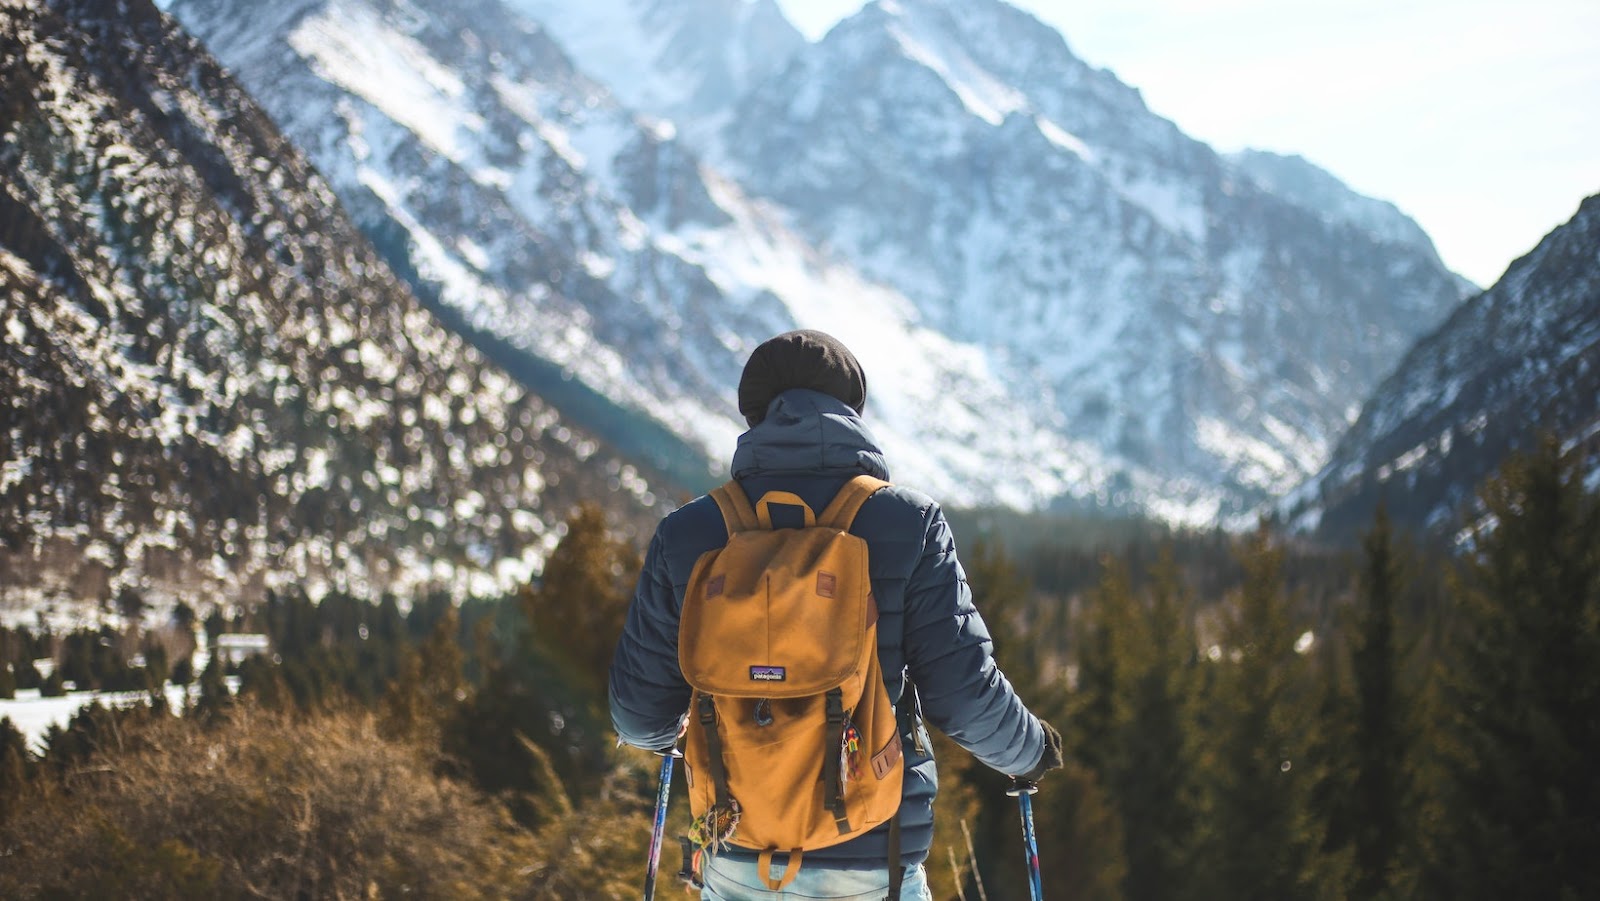
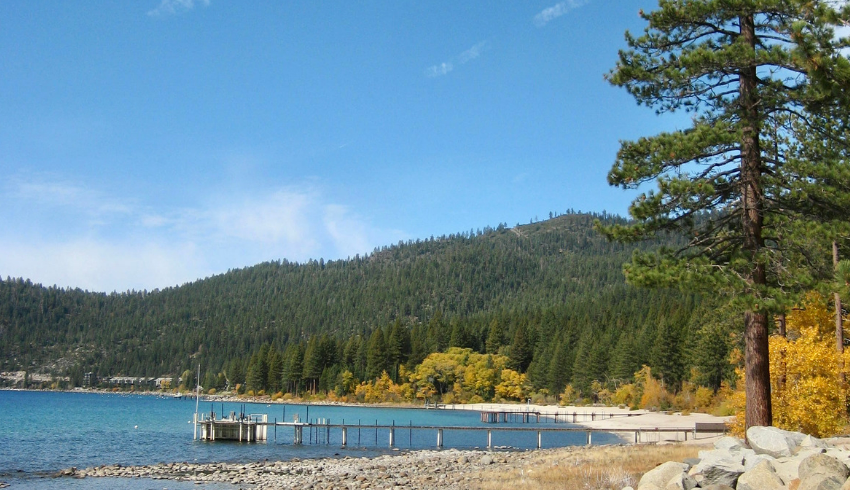
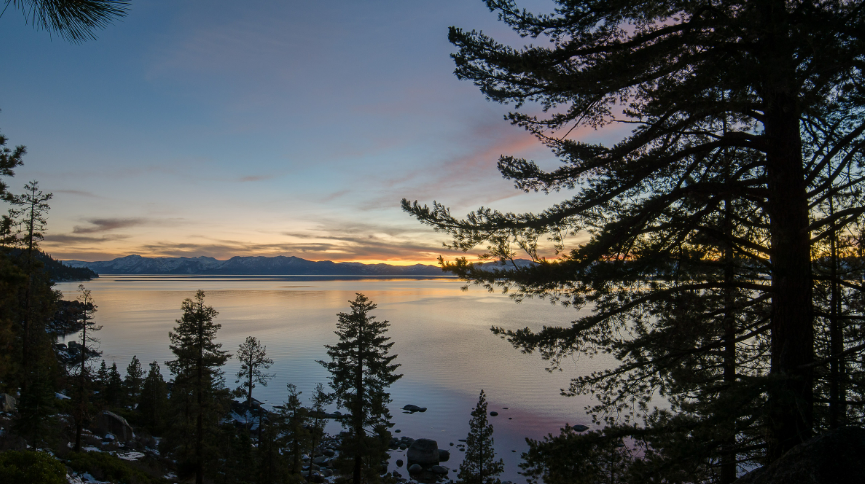
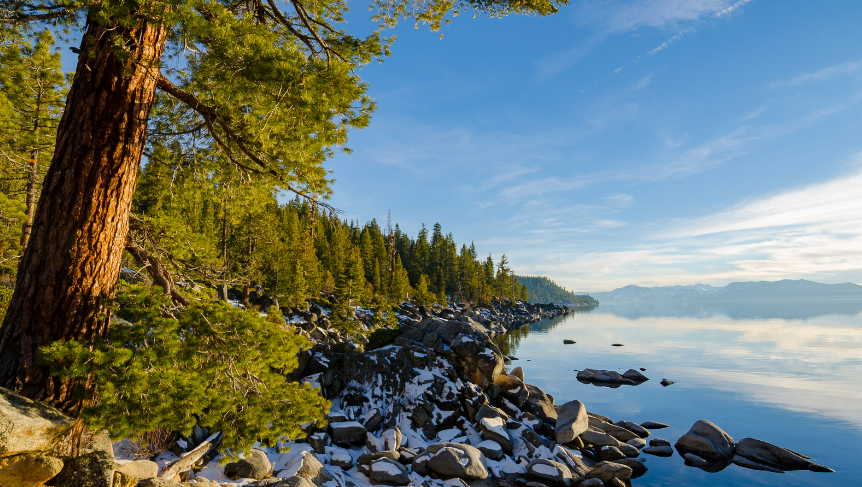
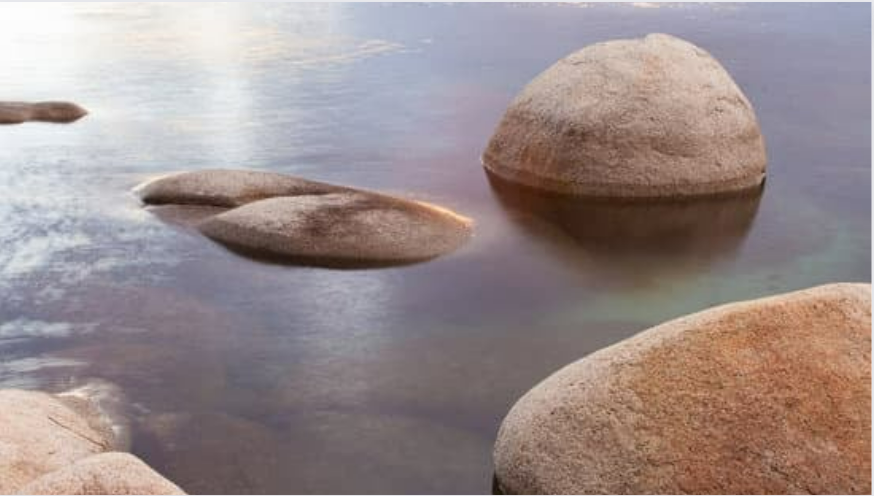

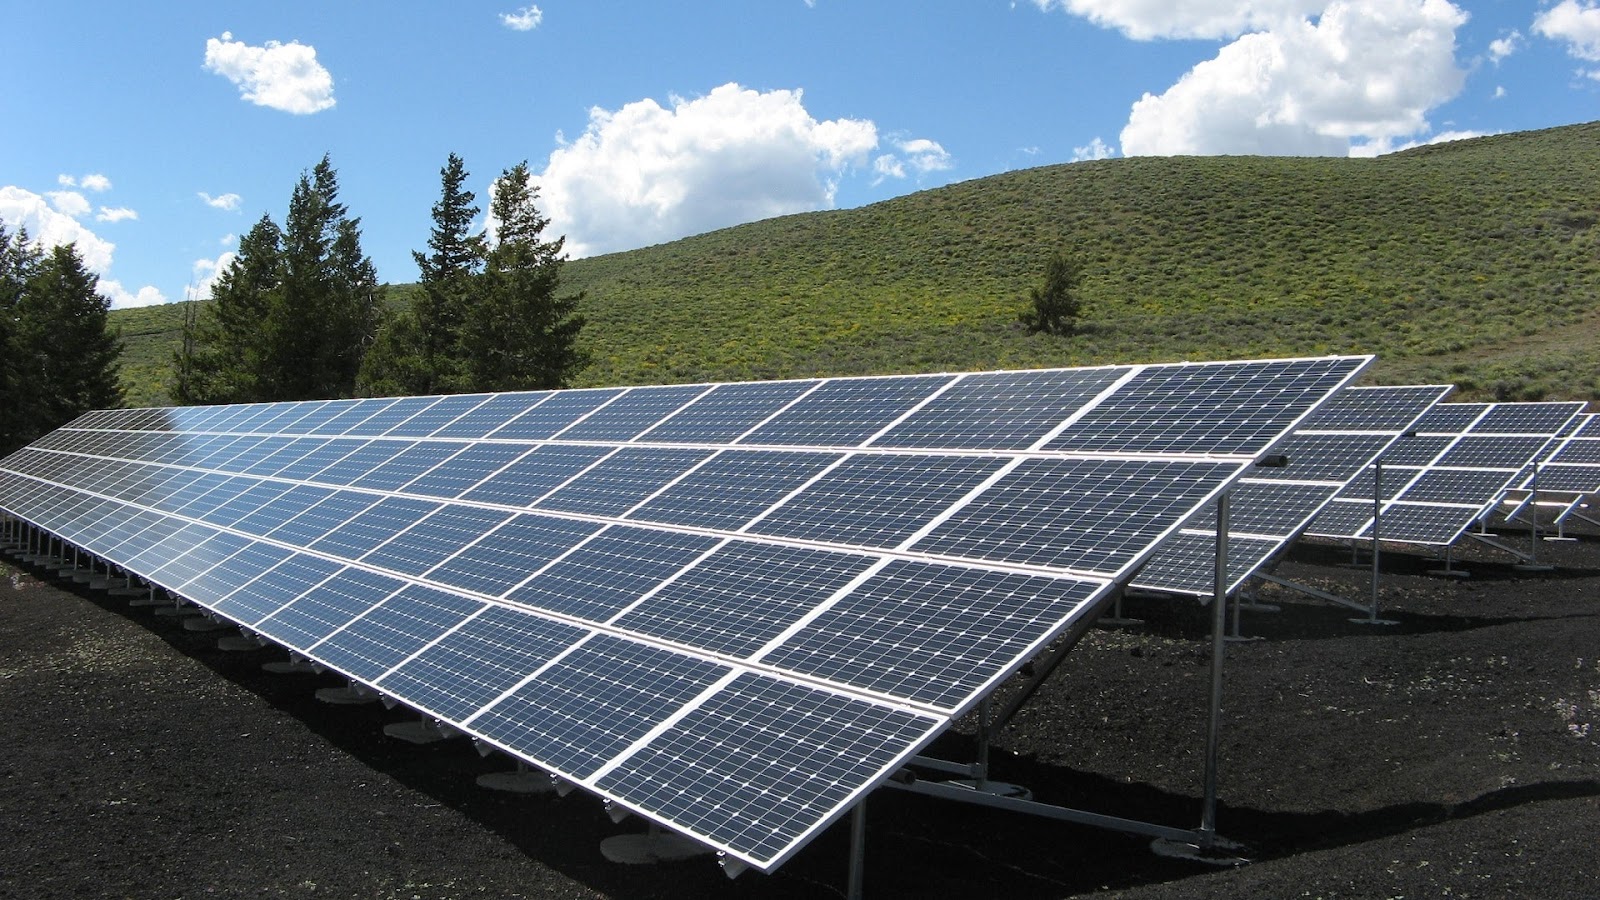
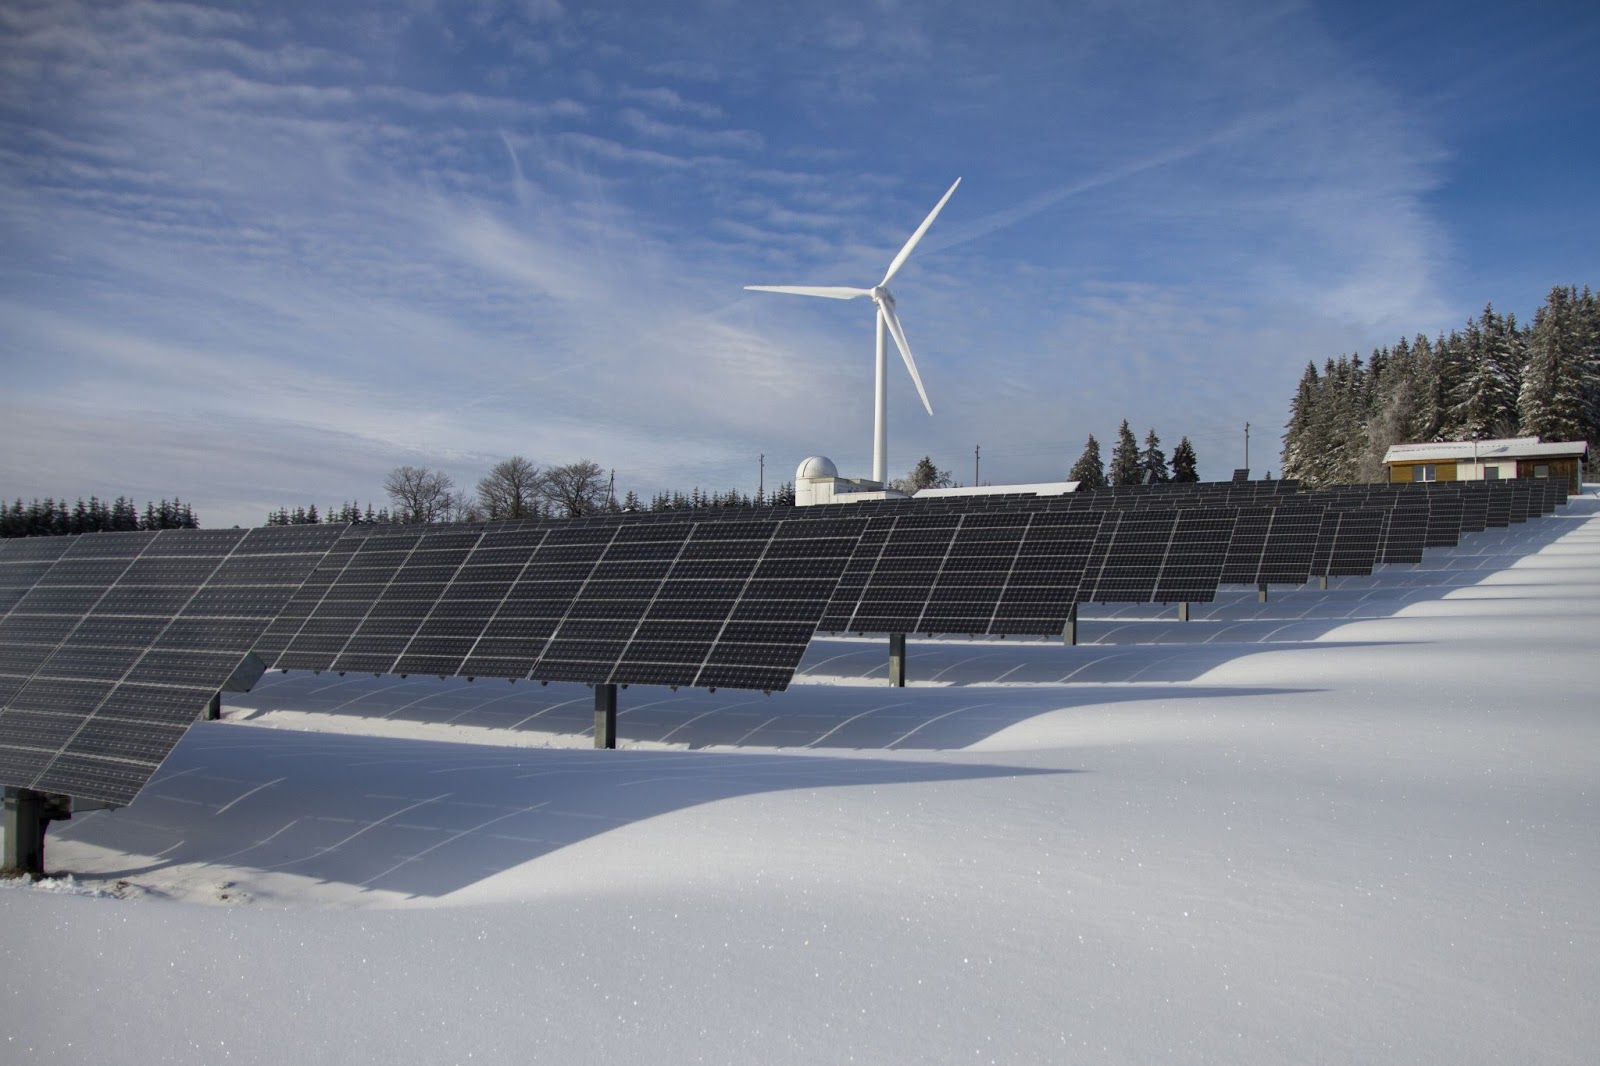


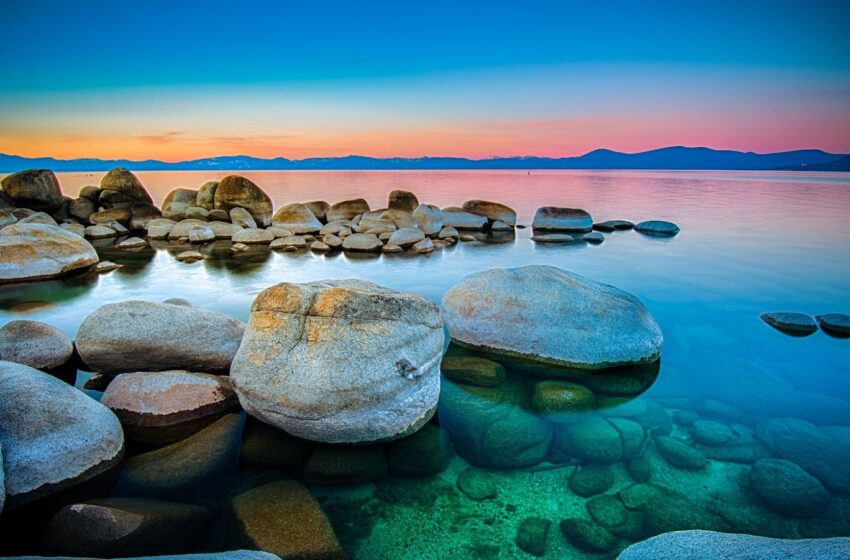
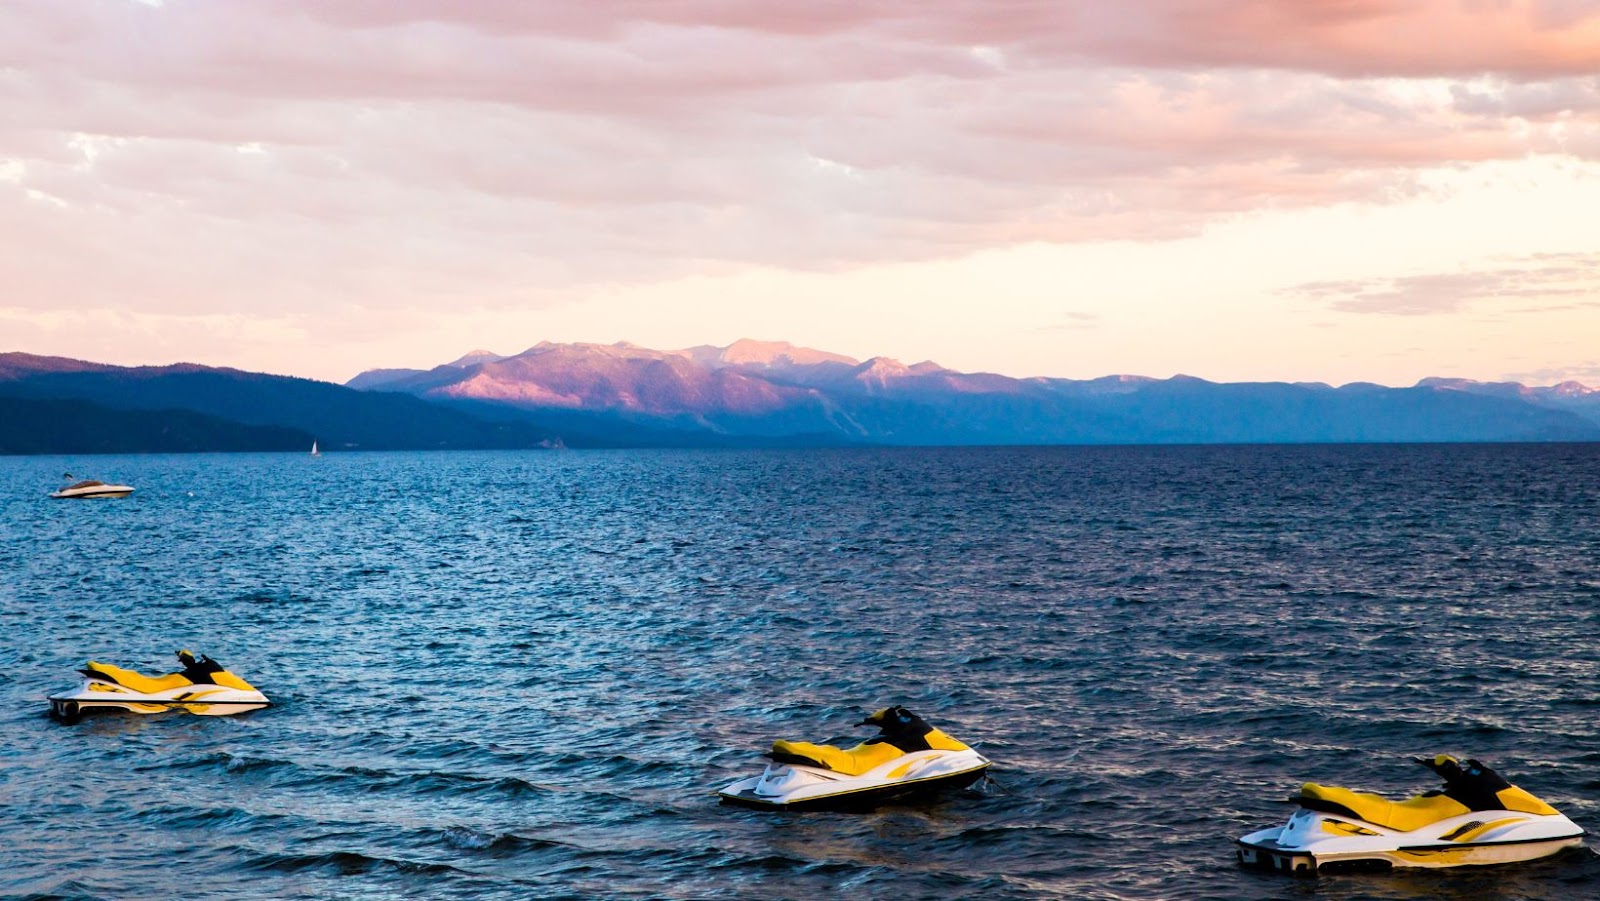
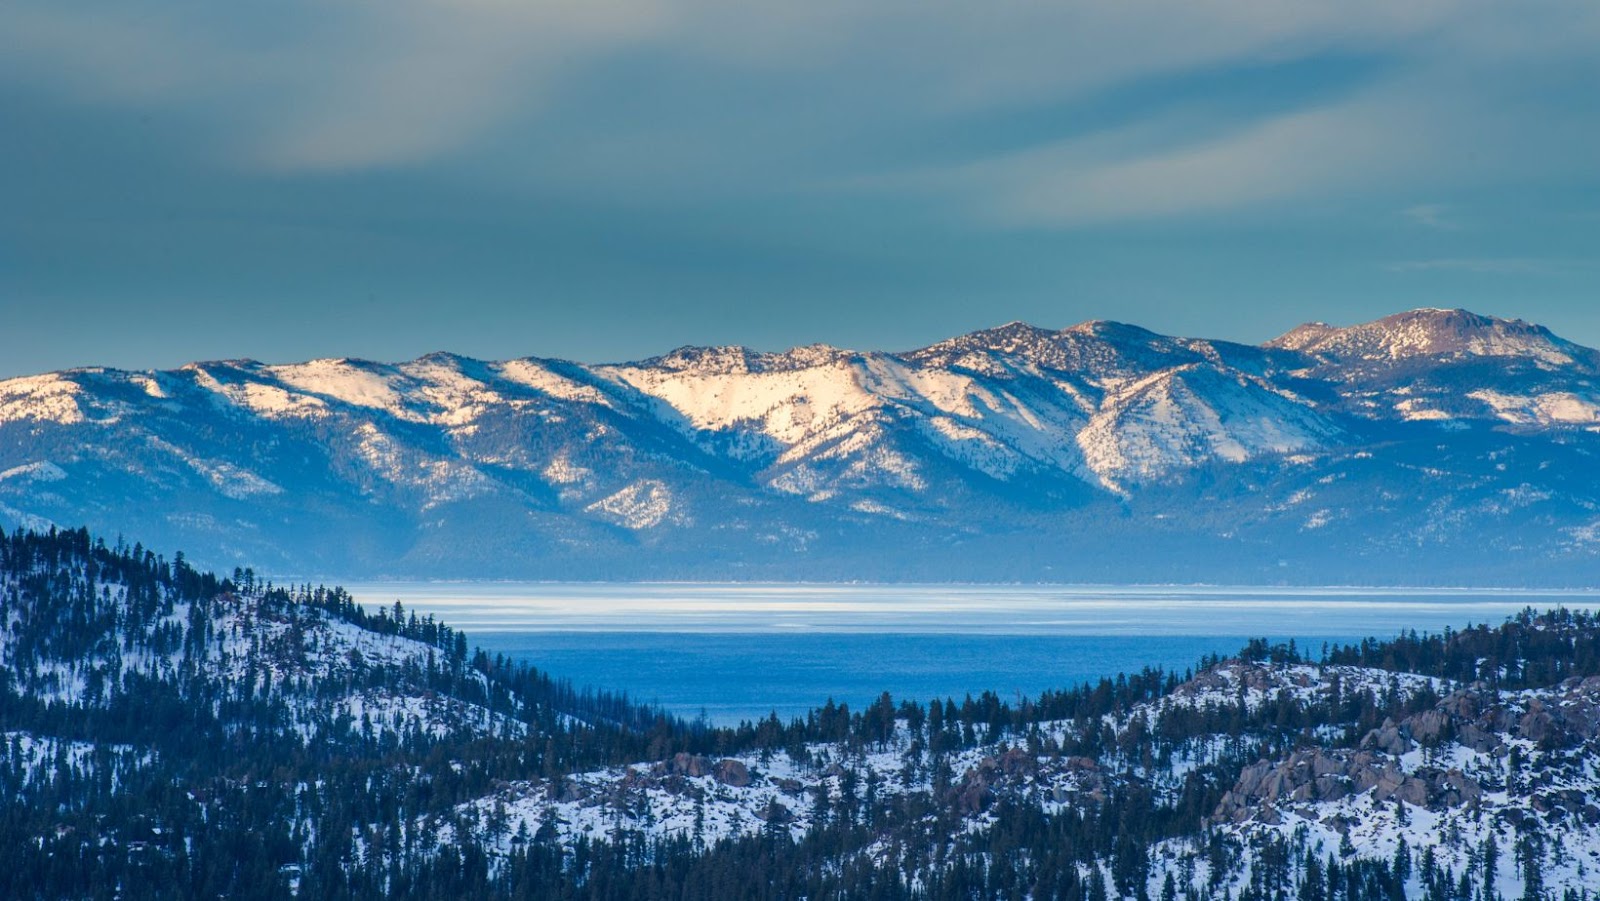


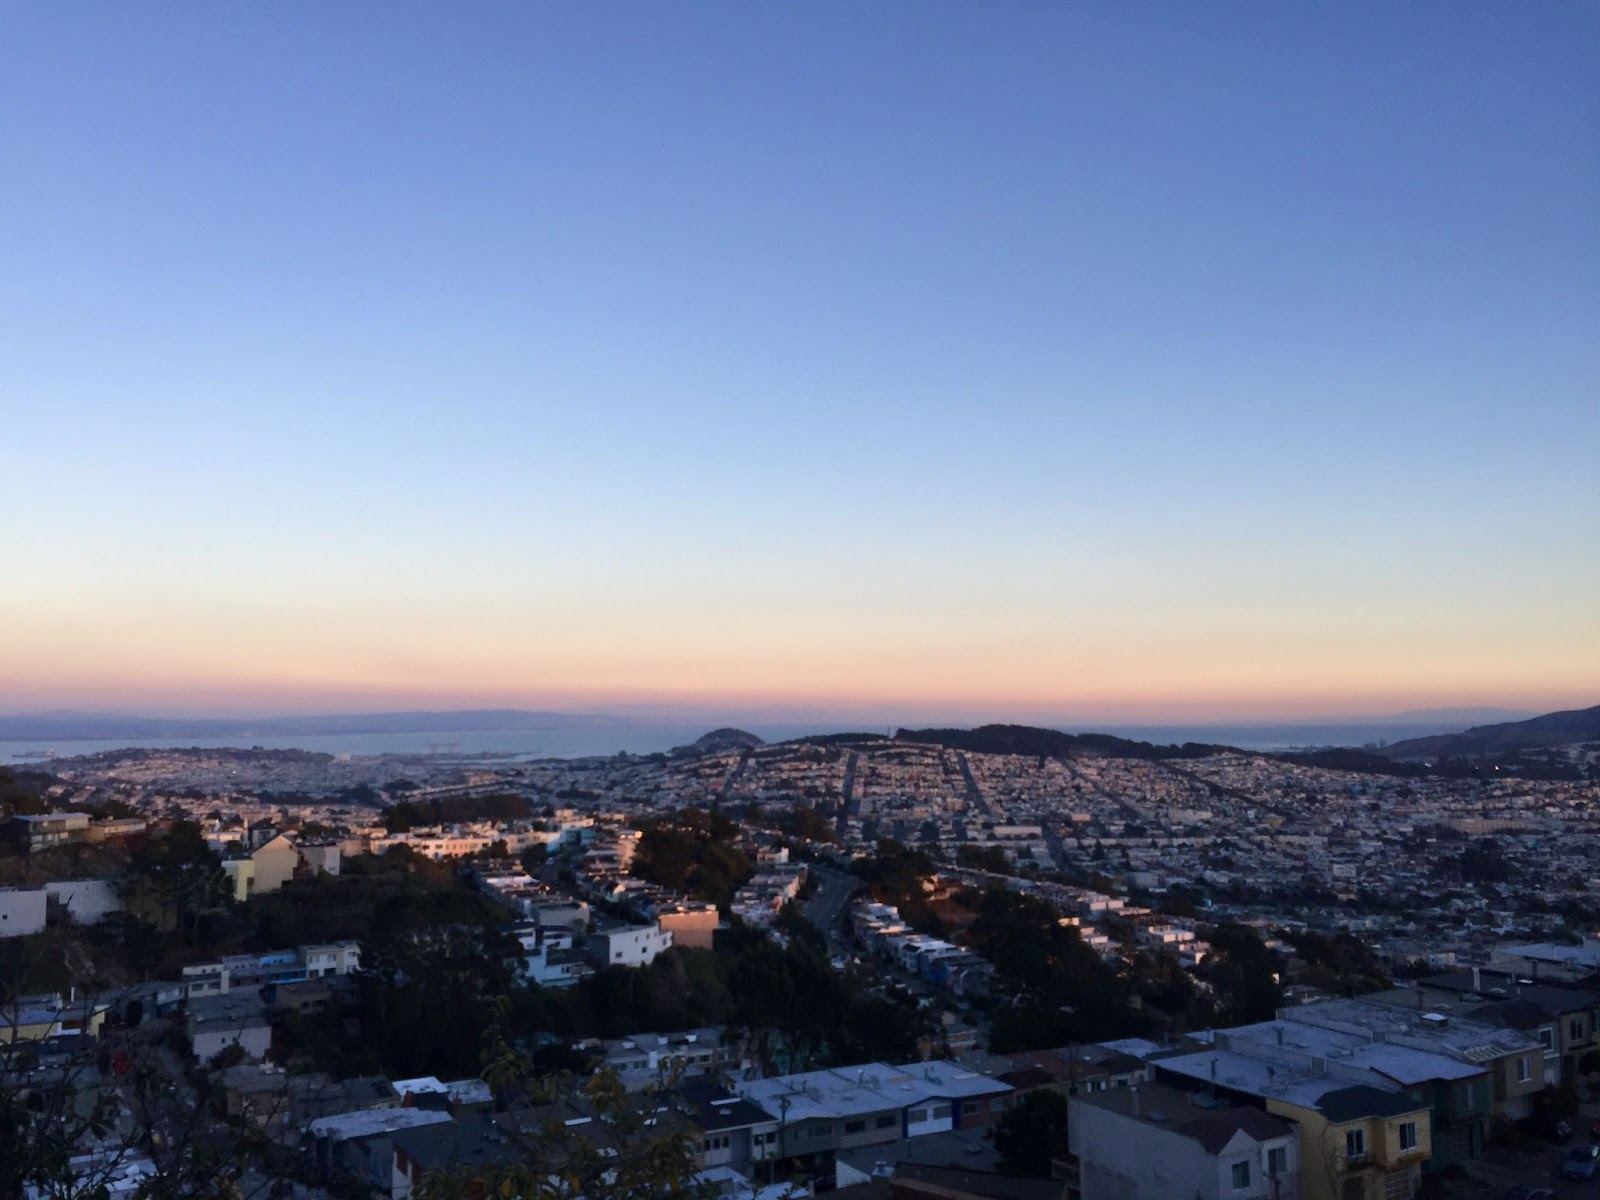


![Pexels-franciano-puhales-[ff]-13247705](https://newportmediainc.com/wp-content/uploads/2023/06/pexels-franciano-puhales-ff-13247705.jpg)