Author: Shana Ortiz

  • Sequoia National Park Attractions

    Sequoia National Park Attractions

    In Sequoia National Park, you’re spoilt for choice when it comes to places to rest your head. From campsites and lodges to cabins and hotels, Where to Stay in Sequoia National Park is all about selecting the right place for your needs. Consider the options available along the Generals Highway or closer to the main attractions, and determine what kind of experience you’re after.

    If you’re looking for unique accommodation options boasting all the creature comforts, there are places to stay that offer stunning views of the mountains and forests with the convenience of modern amenities. For those who crave a more adventurous vacation, there are campsites and cabins that cater to the outdoor enthusiasts. Remember to factor in location, budget, and availability when making your decision. Get the best experience by finding out which lodging options offer perks such as shuttle service and guided tours.

    Plan ahead to secure your spot, as these accommodations typically fill up quickly. When planning Where to Stay in Sequoia National Park, choose wisely and enjoy the unique beauty of this natural wonderland.

    Sleeping among the giant sequoias? Now that’s what I call a tree-mendous experience!

    Lodging Options Inside The Park

    Inside Sequoia National Park, there are many places to stay. Guest House and Lodge is the most convenient, with restaurants and shops nearby. Cabins offer a private experience in nature. Camping gives an authentic outdoor adventure, with multiple campgrounds across the park. RV camping is an option for more comfort. And, for a more off the beaten path experience, backcountry camping requires a permit. Lastly, Wuksachi Lodge offers a unique lodging option with various room types and modern amenities.

    Remember, reservations fill up fast during peak season, so book in advance.

    For those wanting privacy, rent a home near Sequoia National Park on Airbnb.

    No matter your preference or budget, there’s a lodging fit for everyone in the park – unless you stay at Wuksachi Lodge, where the prices are as tall as the trees!

    Wuksachi Lodge

    In the core of Sequoia National Park lies a tranquil retreat: Wuksachi Lodge. Its rustic stone fireplace and wooden beams beckon guests to relax. The 102 guestrooms are modern, with cozy atmospheres and soft lighting. Many on-site restaurants offer culinary delights.

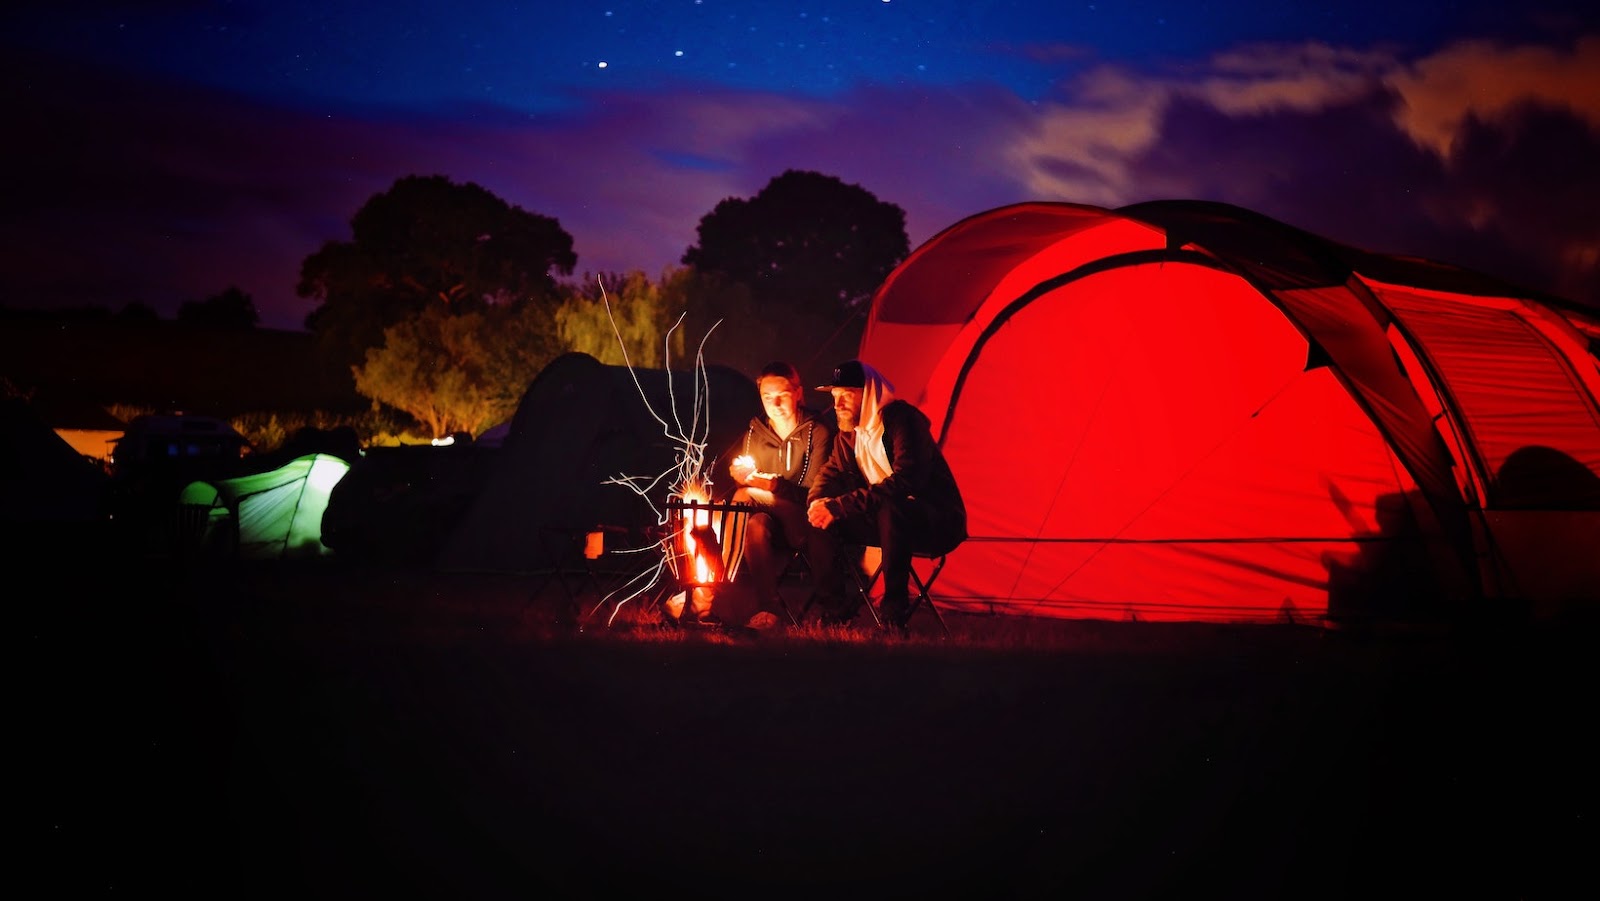
    Outdoor activities like hiking, skiing, or simply meandering through California’s landscapes are available. Camping and stargazing are musts!

    Sequoia National Park was America’s second national park after Yellowstone. Established in September 25th 1890, you can sleep under the stars at the Lodgepole Campground – pine needles included!

    Sequoia Lodgepole Campground

    Seeking a scenic vacation in Sequoia National Park? Look no further than the Sequoia Lodgepole camping ground! Here, you can find activities for the whole family, like fishing, hiking, and nature trails. The sites are perfect for tents or RVs with picnic tables, fire rings, and restrooms nearby.

    Take advantage of the awesome outdoor activities! Explore breathtaking landscapes on one of the many hiking trails, or take a peaceful stroll. Bring your family fishing at Hume Lake, or just take a break to relax in nature.

    Sequoia Lodgepole is the perfect place to fully appreciate nature’s beauty while enjoying modern amenities. Unwind beneath the oak trees and marvel at the stars from your shaded campsite. Let go of daily stress and take in the extraordinary atmosphere.

    Did you know that Sequoia National Park was established during President Benjamin Harrison’s term? These giant sequoias have been living here for over 2000 years, providing nourishment for wildlife and incredible views for visitors. Take in the stories and the sensational sights of Cedar Grove Lodge!

    Pexels-pixabay-462017

    Cedar Grove Lodge

    Cedar Grove Lodge, tucked away among the Sierra Nevada range, offers an unbeatable experience. You can pick from 21 rooms, each with scenic views, cosy beds and modern amenities. Plus, there’s an on-site restaurant serving yummy dishes made with local ingredients.

    You’ll be close to Mist Falls and North Dome hiking trails. Plus, there are lots of waterfalls and natural wonders to explore.

    If you want more seclusion, you can rent a rustic cabin. It’ll have basic amenities like beds and bathrooms, but no room service or housekeeping.

    Research shows that nature is good for both your body and mind. When you stay at Cedar Grove Lodge, you can take in Sequoia National Park’s natural splendour, while also relaxing in comfort and style.

    Camping Options Inside The Park

    Love the outdoors? Check out Sequoia National Park’s five campgrounds for the perfect camping trip!

    • Lodgepole Campground is located in the heart of the park, with trails and vistas aplenty.
    • Dorst Creek Campground, on the other hand, is best for fishing and water activities.
    • Potwisha Campground has a cool climate and historic sites nearby.
    • Buckeye Flat Campground provides a secluded experience near the Giant Forest.
    • Lastly, South Fork Campground offers stunning views of Kings Canyon – ideal for bird watchers.

    Reservations are needed during peak season (May-October), but first-come, first-served sites during off-peak months are also available. Bear-proof storage lockers are available at each site for added safety. For an extra special trip, consider dispersed camping on public lands surrounding the park – just check regulations and permits beforehand. Most importantly, follow Leave No Trace principles when camping in wild areas!

    Lodgepole Campground

    Are you searching for a place to crash in Sequoia National Park? Lodgepole Campground is a top choice! It’s close to the Kaweah River, making it great for riverside camping. The site features amenities such as picnic tables, fire pits, and bear-proof lockers – perfect for families. Plus, there are plenty of hiking trails like Big Trees Trail and Mist Falls Trail nearby.

    If you’re lucky, you may catch a glimpse of black bears or mule deer during your stay. One visitor even saw a bear cub playing with its mom during a morning walk! For a more rustic experience, head to Dorst Creek Campground – no WiFi here, but plenty of wild wildlife.

    Dorst Creek Campground

    Pack your camping gear and head to the Dorst Creek Campground! Located in Sequoia National Park, this serene spot provides bear-proof food storage and access to potable water.

    You’ll find plenty of amenities to enjoy, such as hiking trails, scenic views, and nature exploration activities. Plus, you’re surrounded by giant sequoias!

    Dorst Creek offers clean restrooms and showers for all its guests. Plus, there are 174 camping spots up for booking through recreation.gov. Reserve early to guarantee a spot during peak season.

    The rustling leaves at night make this spot a favorite of visitors from around the world. Come explore the magic of Sequoia National Park with your family and colleagues at Dorst Creek Campground!

    Potwisha Campground

    Potwisha Campground is the perfect place to stay when visiting Sequoia National Park! It’s nestled in the foothills of the Sierra Nevada and offers a picturesque view. Plus, it’s great for all levels of outdoor adventurers – from hiking trails to amenities like flush toilets, potable water, and picnic tables. Just remember to reserve early during peak season.

    It’s said that the area used to be inhabited by Potawisha people, part of the Mono tribe, for many years before Europeans settled. If camping isn’t quite your thing, there are plenty of alternatives outside of the park.

    Pexels-quang-nguyen-vinh-4268158

    Where to Stay in Sequoia National Park

    Seeking alternatives to Sequoia National Park’s lodgings? Look no further! There are several options outside the park.

    • Hotels and resorts abound in nearby Three Rivers and Visalia.
    • If you’re looking for an immersive experience, Princess Campground has got you covered with affordable camping sites.
    • Vacation rentals provide natural settings with privacy for families or larger groups.
    • For a touch of luxury, Plantation Bed & Breakfast Inn offers home-cooked breakfasts and spa services in a rustic setting.

    These options generally require more travel time than staying in the park. But lower prices and seclusion make it worth it for many visitors.

    Dispersed camping may be another option, providing a real adventure. You’ll need to find your own site on public land outside designated campgrounds, and don’t forget permits!

    When choosing accommodations, consider the pros and cons of each option. Flexibility is key when it comes to finding the perfect place for your trip.

    Three Rivers

    Three Rivers, situated outside of Sequoia National Park, is a small, gateway town. Visitors can find lodges, vacation rentals, and bed and breakfasts for a convenient stay.

    The town’s downtown area is quaint, with restaurants, cafes, and shops. The Kaweah River is also accessible for activities such as fishing and rafting. Campgrounds are available for those who want an immersive experience.

    Hikers have trails inside and outside the national park. Each trail has its own breathtaking views.

    Lonely Planet guidebook claims that Three Rivers offers “natural beauty without having to compromise on food and lodging.” Visalia travelers should pack bug spray as the mosquitoes are bigger than some sequoia trees!

    Visalia

    Visalia: the “Gateway to the Sequoias”! It’s a great place to stay when visiting the National Park. Accommodation options range from hotels to motels to lodges. Plus, you can enjoy hot tubs and luxurious swimming pools. Visit unique attractions like ImagineU Interactive Children’s Museum, Fox Theatre or Riverway Sports Park. Fresno is also nearby, where you can escape the crowds and enjoy the unique aroma of agricultural farmland.

    Fresno

    Experience the vibrancy of Fresno! There are plenty of accommodation options for visitors to the Sequoia National Park region. Staying in Fresno has its advantages, like diverse restaurants, shops, and museums. Stay at North Palm Avenue, Shaw Avenue, or Clovis Avenue– all near Fresno Yosemite International Airport.

    For those seeking rural California charm and urban amenities, visit a guesthouse or ranch in nearby towns like Sanger or Reedley. Enjoy horseback riding, wine-tasting, and nature-walks!

    During summer, try Sierra Nevada Mountain lodgings near Kings Canyon National Park or Cedar Grove for easy access to hiking trails and backcountry experience. Enjoy a unique outdoor adventure!

    Did you know? Tourism is one of Fresno’s leading industries (Travelmag). So come and feel small in the presence of giant trees, and even smaller when bears show off their fishing skills!

    Attraction Highlights in Sequoia National Park

    Sequoia National Park offers breathtakingly beautiful natural surroundings and an array of attractions to explore. Let us delve further into what makes this one of the top destinations for nature and outdoor enthusiasts.

    The following are some of the attractions to explore in Sequoia National Park:

    • Giant Forest – Home to some of the world’s largest trees, including the General Sherman Tree, the largest known tree by volume on the planet.
    • Moro Rock – A granite dome that offers panoramic views of the park and surrounding area.
    • The Crystal Cave – A stunning underground wonderland with crystal formations that are sure to amaze.
    • Tokopah Falls – A challenging hike, but well worth the effort for the stunning waterfall at the end.

    It is worth noting that Sequoia National Park is also home to a diverse range of wildlife, including black bears, bighorn sheep, and mountain lions. Visitors can explore the park’s flora and fauna by taking one of the many hiking trails or experiencing a ranger-led program.

    During my visit to Sequoia National Park, I hiked the Congress Trail and was able to appreciate the vastness of the park’s forests and the incredible size of the trees. As I stood beneath the General Sherman Tree, I felt in awe of the natural world’s power and endless beauty. It was truly a sublime experience that I will always cherish.

    Move over NBA, the General Sherman Tree is officially the biggest baller in town.

    Pexels-m-venter-1659437

    General Sherman Tree

    Sequoia National Park is home to the largest tree species on Earth. Among them stands a majestic tree known as the “Patriarch” – the largest sequoia in existence.

    The General Sherman Tree is the park’s most visited attraction, named after a Union Army leader in the American Civil War. It stands an impressive 274.9 feet tall and 36.5 feet wide – a sight to behold!

    The diameter of the Sequoia trees can be awe-inspiring, taking centuries to develop through natural events. The General Sherman Tree’s size offers a unique experience that can’t be found anywhere else in the world.

    What makes this tree stand out from the rest is its massiveness and age. It is an estimated two thousand years old and weighs 2.7 million pounds! Forty people linking arms would barely fit around its base.

    This tree has been standing for two millennia, making it one of the oldest living organisms on Earth – a true testament to nature’s strength! According to National Geographic, its size can make people feel small when viewed up close.

    Along with the giant trees, Crescent Meadow’s high altitude can leave visitors breathless.

    Crescent Meadow

    Crescent Meadow is a must-visit spot in Sequoia National Park. It’s surrounded by dense forests and granite peaks. This natural beauty provides stunning views of nature’s artistry. Listen to the birds chirping while you take a leisurely hike on one of the trails.

    You’ll come across different wildlife, like beavers, mule deer, and black bears. The visitors’ center has educational materials to help you learn about conservation efforts.

    You can relax, picnic with your loved ones or take photos at Crescent Meadow. Get away from city life and soak in the natural paradise.

    Pro tip: Avoid going during peak season when it’s crowded. Invest in comfortable shoes, as you’ll have to cover lots of ground! Moro Rock is a tough hike, but the view is worth it.

    Moro Rock

    The top attraction in Sequoia National Park is Monno, which translates to “rock” in Mohawk. It’s often called a giant sequoia for humans, with beautiful views of the Great Western Divide and Kaweah River. Reach the summit, and you’ll be rewarded with stunning 360-degree vistas of the Sierra Nevada mountains. Handrails make it accessible to all – but be careful!

    Venture to The Giant Forest for 500 groves of giant sequoias, some hundreds of feet tall. Feel the grandeur of these ancient trees. Or, for a shorter trip, visit Moro Rock for amazing views. Little Baldy Trail is less crowded, but also offers beautiful scenery.

    For a real adventure, take wilderness trips into remote regions with only foot or mule access. These expeditions can last days or weeks – and you’ll come back changed, having encountered different ecosystems and wildlife. Or, to see a breathtaking waterfall, visit Tokopah Falls!

    Tokopah Falls

    Take a journey to Sequoia National Park and witness the magnificence of Tokopah Falls! You’ll be mesmerized by the tall trees and luscious greenery, as well as the roaring cascades that majestically tumble down into a peaceful pool. From the wooden bridge just before the falls, you can admire the spectacular view.

    Explore the area further with activities like trout fishing or pack a picnic and enjoy quality time with your loved ones in nature’s embrace. Don’t forget to bring a camera to capture these special moments. Even the squirrels at Giant Forest Museum are impressed by the size of the trees! Don’t miss out on this unique experience – visit Tokopah Falls today!

    Giant Forest Museum

    Discover the Giant Forest’s history at the huge woodland exhibition hall in Sequoia National Park – a must-see! Appreciate examples of fauna and flora in the park, as you explore the many landmarks on display.

    Step into the museum for an experience of nature, with adequate protection from elements and clean restrooms provided for visitors. Ask questions of the Volunteer staff about which landmarks you want to visit. Don’t miss out on the hand-painted murals that decorate the walls, depicting nature themes seen within the park. It’s said that travelers paid 25 cents to enter this converted log cabin during its early days (circa 1928).

    Get ready for an adventure – trek, rock climb, and dodge bears in the park!

    Pexels-krivec-ales-554609

    Activities in Sequoia National Park

    Paragraph 1 – With an array of unique experiences, Sequoia National Park has something for everyone. From scenic hiking trails to exploring the awe-inspiring Giant Forest, this magnificent national park offers endless possibilities for visitors.

    Paragraph 2 – The Activities in Sequoia National Park are:

    • Hiking – Home to an extensive network of trails, Sequoia National Park is a haven for hikers. Whether you’re an experienced trekker or a casual stroller, the park offers something for everyone.
    • Giant Forest – The park is known for its remarkable giant sequoia trees, which are the largest trees on earth by volume. Visitors can take a stroll through the Giant Forest and get up close to these towering giants.
    • Wildlife Watching – With over 400 animal species calling the park home, Sequoia is a paradise for wildlife enthusiasts. From black bears to mountain lions, visitors can observe a wide range of animals in their natural habitat.

    Paragraph 3 – For those seeking a unique experience, a visit to Crystal Cave is a must. This underground wonderland features sparkling rock formations that are a treat for the eyes. Visitors can take a guided tour and witness the beauty and complexity of this natural wonder.

    Paragraph 4 – Pro Tip: It is advisable to carry adequate supplies and gear, including water, sun protection, and sturdy shoes while exploring the park. Additionally, it’s essential to follow all park regulations, including observing wildlife from a safe distance and staying on designated trails to preserve the park’s delicate ecosystem. If you’re looking for a good workout and a chance to commune with nature, the hiking trails at Sequoia National Park are the perfect way to say goodbye to your couch potato days.

    Hiking Trails

    Dive into Sequoia National Park with its multiple trails! From relaxed strolls to intense hikes, there’s something for everyone. Check out the Big Trees Trail, a 1.3-mile loop featuring magnificent giant sequoias. Or, take the Tokopah Falls Trail, a 3.4-mile round trip to a beautiful waterfall. Experienced hikers? The High Sierra Trail awaits – a multi-day adventure through stunning parkscapes. To get even more out of your trip, join one of the ranger-led hikes or wilderness trips for exclusive insights!

    Remember to go prepared – bring sturdy boots, water bottles, sunscreen, and practice leave-no-trace principles. Oh, and keep a safe distance from the wildlife – you can’t get that perfect selfie!

    Wildlife Viewing

    Wildlife Exploration at Sequoia National Park – A Unique Experience!

    Sequoia National Park offers an unforgettable experience for wildlife exploration. Here are some must-try activities:

    • Grizzly Falls – great spot to see black bears and other wildlife
    • Moro Rock Trail – home to peregrine falcons and golden eagles
    • Crescent Meadow – where mule deer can be seen grazing in the morning
    • Kings River Overlook – watch bighorn sheep grazing on surrounding rocks
    • The Wolverton Trailhead – spot bobcats, coyotes, and mountain lions

    For even more knowledge, hire a park ranger guide. They provide extensive information about the ecology of different species.

    It’s wise to get a professional guide to find animals in their natural habitat. This way, you’ll learn about their behaviors and habits.

    To make the most out of your exploration trip, bring binoculars, telescopes, and appropriate clothing. Don’t forget insect repellent and snacks for the best nature experience ever!

    Scenic Drives

    Embark on a magnificent drive through Sequoia National Park! Witness stunning views of nature as you take a breathtaking journey. Highlights include:

    • Generals Highway, an iconic scenic route that winds through the park.
    • The Kings Canyon Scenic Byway with its impressive canyons and rock formations.
    • High Sierra from Big Baldy Ridge Overlook.
    • The tranquil Cedar Grove Village.
    • Dorst Creek Road with meadows and crystal streams.
    • Hume Lake’s sunset views from Forest Route 14S75.

    There are many more routes to explore. Start planning today! Note: vehicles longer than 22 feet or wider than 7 feet are not allowed in the park. See the Sequoia Parks Conservancy website for more information. Fun fact: Generals Highway was built in 1921 with picks, shovels, and dynamite! Ready to ski and snowshoe? Just remember: falling down is tree-hugging in the snow.

    Pexels-janko-ferlic-1068554

    Snowshoeing and Skiing

    Winter in Sequoia National Park is an awesome opportunity to explore the snow-covered wilderness. Make sure it’s on your bucket list! Here are some activities you can enjoy:

    • Ski the scenic park.
    • Take a guided snowshoe trek and explore places that aren’t accessible by ski trails.
    • Snowshoe to nearby groves and witness giant sequoias standing majestically in the snow.
    • Test your backcountry skiing skills and take in stunning views of the Sierra Nevada mountains.
    • Take a self-guided ranger-led tour if you’re looking for some solitude.
    • Cozy up in historical lodges at Wuksachi Village, open year-round.

    Remember to check current conditions with park rangers or online before your winter adventure! And don’t forget to visit General Sherman, the world’s largest tree. It stands at over 275 feet tall and is an amazing sight.

    Ranger Programs

    Discover Nature with Park Rangers in Sequoia National Park!

    Take part in exciting outdoor activities with Ranger Programs. Here are five of the options:

    • Guided hikes to view giant sequoias and wildlife
    • Evening campfire programs: storytelling, music, science talks
    • Junior ranger programs for young explorers – quizzes, crafts, badge making
    • Educational talks on natural history, geology, ecology
    • Stargazing walks to view constellations in the dark

    Gain valuable insights from experts during your journey. Plus, some of these ranger-led activities are included with your entry fee.

    For a more personalized visit, opt for these extras:

    • Custom-guided tours to lesser known areas with rangers
    • Take part in citizen science projects – explore and research!

    These add-ons will make your visit even better. Select from many Ranger Programs offerings today! Get ready to be amazed by nature’s size and beauty – but don’t forget to stretch your neck muscles for all that gazing up at Sequoia’s tall trees!

    Tips for Visiting Sequoia National Park

    Sequoia National Park is a stunning destination that offers breathtaking views and natural wonders. If you plan to visit, it’s essential to know how to get the most out of your trip. Here are some suggestions that can help you make the most of your time in Sequoia National Park.

    One tip to keep in mind is to plan your visit ahead of time and do a little research to make the most of your trip. It is wise to check weather conditions and trail closures before you go. Another important thing to consider is choosing the right time of year for your visit, as it may affect accessibility to some attractions.

    To get around Sequoia National Park, consider using the park shuttle service. The shuttle is an excellent option for reducing your carbon footprint and getting around the park hassle-free. It also allows you to enjoy the ride and relax while taking in the surroundings.

    If you are interested in exploring Sequoia National Park’s wilderness, consider going on a guided tour or participating in a ranger-led interpretive program. These programs offer unique insights into the park’s history, geology, and natural wonders.

    Finally, when it comes to staying in Sequoia National Park, there are a variety of options available. From camping to lodges and cabins, there is something to fit every budget and style. For a more authentic experience, consider camping. If you prefer a more luxurious stay, consider staying at a lodge or cabin. Whatever you choose, be sure to book your accommodations well in advance to avoid disappointment.

    When to Visit

    Sequoia National Park awaits adventurers all year! The perfect time to visit depends on what you want to experience.

    Summer (July-Sept) is sunny and pleasant but it’s also the busiest season with more people and longer wait times. For a calmer atmosphere, check out spring (April-June) or fall (Oct-Nov). Spring offers wildflowers and fall displays foliage in stunning colors.

    Winter (Dec-Mar) is great for snowshoeing, skiing, and snowboarding – but some areas may be off-limits due to snow. Arrive early/late to avoid crowds and traffic. Check weather conditions as sudden changes can occur.

    One visitor shared their awe of the autumn hues. They suggest planning your trip around the park’s shuttle schedule, as parking can be limited at peak season. Oh, and don’t forget to leave that RV at home – those mountain roads are narrow!

    Pexels-no-name-66990

    How to Get There

    Reaching Sequoia National Park can be a voyage! To get there, do the following:

    • Chart a path by car/shuttle
    • Check out road closures and weather
    • Buy entrance ticket online or at gate
    • Drive through twisty roads to the park entrance

    Moreover, if you want to stay, book in advance as options are limited. Pro Tip: Take breaks and carry plenty of water for high altitude driving. Obey park regulations – don’t get lost or meet an unfunny forest ranger!

    Park Regulations And Safety Tips

    Planning to visit Sequoia National Park? Here are some tips to keep in mind for a safe and enjoyable trip:

    • Stay on designated trails.
    • Don’t feed wildlife.
    • Prepare for sudden weather changes.
    • Drones are prohibited in the park.
    • Bring bug spray!

    Follow these tips for an unforgettable experience! Don’t miss out on this incredible destination!

    Packing Essentials

    Exploring Sequoia National Park requires the right gear. Here are some must-haves:

    • Clothing: Layering is key! Have waterproof jackets and suitable footwear.
    • Sun Protection: Don’t forget sunscreen (SPF 30+), a hat and sunglasses. With higher elevation, sun exposure is more intense.
    • Daypack: Bring a sturdy daypack for water bottles, snacks, maps and a first aid kit.
    • Camera: Capture stunning views of the park.

    Plus, bear canisters are mandatory when backpacking in the park. Animals live here, so campers must store food safely.

    Did you know? Bear cans were introduced in Yosemite National Park in 1996 after an increase in bear-related incidents involving human food. Now, several national parks require bear-resistant containers. When booking a campsite in Sequoia National Park, remember: slow and steady wins the spot.

    Making Reservations Early.

    When planning a trip to Sequoia National Park, it’s best to book accommodation early. The park is becoming more popular and lodges and campsites can fill up quickly. Booking in advance will help you find the perfect spot and save you from expensive hotels outside the park.

    Some campsites inside the park require reservations. So, without one, you might not have many options.

    Did you know Sequoia National Park is home to General Sherman? It’s the biggest giant sequoia, standing at 275ft tall and 36ft wide at the base. It’s also one of the tallest and most massive trees in the world!

    • Tips For Visiting Catalina Island

      Tips For Visiting Catalina Island

      In order to reach Catalina Island, you have three primary modes of transportation: taking a ferry, flying, or taking a helicopter ride. Each option provides a unique experience and benefits. Let’s take a closer look at each sub-section and which one may be the best fit for your travel needs.

      Taking a Ferry

      Traveling to Catalina Island? Take a watercraft! Boat rides from Long Beach or Newport Beach in SoCal offer scenic views of the harbor and an exciting journey. The ferry typically takes an hour, with multiple trips each day in usual seasons.

      Choose between two types of ferries: conventional and high-speed. Both provide unforgettable views of marine life. To get the best experience, book reservations online beforehand. Many providers also offer vacation packages with ferry tickets, tours, and activities.

      On the first journey, travelers share a special moment. Sun on their faces, ocean spray in their hair, they approach the island’s shores, ready for an amazing adventure. Flying to Catalina Island is like playing Russian roulette with wings!

      Flying

      Take to the skies for a seamless journey to Catalina Island. Various locations offer flights, such as Long Beach, San Pedro and Avalon. These flights take a mere 15-20 minutes and provide an incredible view of the island and Pacific Ocean.

      Once you arrive at either airport, taxis are available or some hotels offer complimentary shuttle services. Contact the airport if you have any flight or transportation queries. Note that weather can affect schedules and cause cancellations – check with your airline beforehand.

      For a luxurious experience, upgrade to a private charter. Companies offer services tailored to personal preferences and routes. Enjoy incredible views during the helicopter ride – no need to worry about heights.

      Summing up, flying is the most convenient way to reach Catalina Island. Take advantage of the complementary or pre-arranged transportation options for easy access to accommodation and attractions. Consider a private charter for comfort and luxury.

      Pexels-somchai-kongkamsri-90286

      Helicopter Ride

      Experience a thrilling air voyage to Catalina Island! Hop on a Chopper or Helitours ride from Long Beach, San Pedro, or Orange County Airport. You’ll get a bird’s eye view of crystal-clear waters and scenic topography. Arrive in style with this alternative mode of transportation.

      Take a unique journey to the island, 20 miles away from mainland California with a helicopter tour. Choose from several operators, offering flexibility in scheduling, group size, and even luxurious options like private tours.

      No designated helipads on the island? No problem! Multiple landing zones are available on request so you can experience all the beauty the island has to offer.

      Don’t miss out on this once-in-a-lifetime opportunity! Book with IEX Helicopters or Anaheim Helicopters for a memorable ride that lasts less than 15 minutes. And if you find a vacant room on Catalina Island, remember: you can always share a bed with your luggage!

      Accommodations on Catalina Island

      To find the perfect accommodation while exploring Catalina Island, you need to consider several factors. In this section, we’ll discuss the different accommodation options available on the island, including staying in Avalon, camping, and renting a vacation home. Each sub-section presents its unique benefits, catering to various vacation preferences. Whether you prefer immersing yourself in nature or indulging in luxurious comfort, there’s an option for everyone.

      Staying in Avalon

      Catalina Island is a great spot to stay! Avalon has many options, from luxury resorts to cozy vacation rentals. Hotels offer amazing amenities, like infinity pools and restaurants. Vacation rentals come with fully-equipped kitchens for multi-day stays. Campers can check out Hermit Gulch Campground for a tranquil, private experience.

      Be sure to book in advance. Activities like biking and beach-hopping change with the seasons. Plus, Catalina Island has been a tourist destination for over 100 years! So, why not ditch the fancy hotels and sleep beneath the stars? Just be prepared for some furry and scurrying wildlife.

      Camping

      Choose from campsites that offer both ocean and inland views for a unique experience! Family, backpacking, or group camping sites are all available. If you’d prefer more comfort, book a “tent-cabin”!

      Potable water, running toilets, showers, and seasonal staff for help are all available too. Reservations are recommended due to limited camping space during peak season. The California state park day use fee applies to all visitors arriving by transporter.

      Hermit Gulch trail offers stunning sunset views and Two Harbors sunrise views. Enjoy campground amenities closeby and create memories to last a lifetime. One camper experienced buffalo roaming inches from their tent at Little Harbor beach!

      Lastly, if you’re renting a vacation home on Catalina Island, it’s not stealing if the towels come with you in your suitcase.

      Renting a Vacation Home

      Seeking a residential experience? Rent a private vacation home on Catalina Island! From cozy cottages to sprawling estates – they offer privacy and exclusivity. Plus, spectacular views and essential amenities like comfortable bedding and kitchen facilities.

      You’ll have access to the island’s social scene and seclusion from the hustle of Avalon. Some vacation homes feature outdoor terraces or patios for enjoying sunsets over the Pacific. Visitors can explore nearby hiking trails or get active with water sports like kayaking and paddleboarding.

      Rent a local’s permanent residence via Airbnb or Vrbo and gain insider tips about what to see and do on the island, plus local dining spots. Renting a private vacation home is the perfect way to relax in style while exploring the island.

      Don’t miss out – book your private vacation home today for an unforgettable getaway with stunning scenery and comfort. Kayaking on Catalina Island is the ultimate way to paddle away your problems.

      Pexels-jens-mahnke-776117

      Activities to do on Catalina Island

      To make the most out of your trip to Catalina Island, engage in some thrilling activities. In order to explore the island to the fullest, this section on “Activities to do on Catalina Island” with sub-sections on hiking, kayaking, snorkeling and scuba diving, and zip-lining will provide you with exciting solutions to make your visit memorable.

      Hiking

      Meander the stunning hiking trails of Catalina Island for a unique terrestrial exploration. Enjoy the rugged terrain and view wildflower meadows from rolling hills or scenic shorelines. Discover the endangered Catalina Island fox and bison, brought here in the 1920s, thriving throughout.

      Hire a knowledgeable guide for an immersive experience and valuable insights about the island’s ecology and history! Don’t forget to bring a map that highlights available trails and dress in layers for changing weather conditions. Wear comfortable shoes with traction, sunscreen, and keep yourself hydrated.

      Kayaking is also an option – just don’t forget to bring a change of clothes in case you end up paddling into the buffalo’s bathing spot!

      Kayaking

      Kayak in the azure waters around Catalina Island! Paddle through the crystal-clear seas and discover the vibrant marine life. Glide through the waves, snorkel in secret coves, and explore hidden beaches. Witness rocky coastlines, crystal-clear water, and stunning sunsets. You can even spot sea lions, seals, dolphins, and flying fish!

      Catalina Island has kayaking tours for any skill level. Imagine seeing the underwater gardens flourish beneath you as you admire the open-sea views. Join an eco-tour to outlying islands and explore remarkable sea caves or give stand-up paddling a try. You can also rent a solo kayak or one for two and paddle around as you please.

      Safety instructions and suitable equipment, like life jackets and helmets, are included in every tour or rental. Enjoy a safe and secure Kayaking experience when visiting Catalina Island – book now and make unforgettable memories!

      Snorkeling and Scuba Diving

      Discover the magical marine life beneath Catalina Island! This Californian paradise offers snorkeling and scuba diving like no other.

      • Behold garibaldi, kelp bass, and moray eels.
      • Venture into sea star-filled underwater caves and shipwrecks.
      • Go on a daring night dive to meet crustaceans, lobsters, and octopuses.
      • Swim with the giants – sea bass over 500 pounds and 7 feet long!
      • Take a beginner-level course from pro instructors, or get certified.

      Nature has crafted some incredible wonders in Catalina’s depths – like vibrant rock formations filled with exotic fish, rare invertebrates, and marine plants!

      Venture into lesser-known diving sites like Ship Rock or Farnsworth Bank to spot angel sharks and barracudas.

      Don’t forget your wetsuit, fins, snorkel, and tank! Respect the wildlife and environment while enjoying your dive.

      Jump into Catalina Island’s underwater world! Feel the rush with a zip-line ride that’ll have you wanting more.

      Zip-Lining

      Soar through the air on an adrenaline-filled journey that’ll leave you breathless! Aerial trekking lets you explore Catalina Island’s rugged terrain from a whole new angle, high up in the sky.

      Take on obstacles and zip lines suspended in the sky, and be rewarded with breathtaking views of the island. Plus, our guides clue you in on the island’s history and ecology.

      For a truly memorable experience, try our night-time zip-lining tour. Zip-line under a blanket of stars – an experience you won’t soon forget! Don’t miss out – book your zip-lining tour today.

      Dining on Catalina Island

      To explore the culinary delights of Catalina Island, you need to know where to dine. In order to satiate your taste buds with mouth-watering food, this section on Dining on Catalina Island with sub-sections that include Restaurants in Avalon, Beachside cafes and bars, Dining at the Casino, can be a solution.

      Pexels-uriel-castellanos-933843

      Restaurants in Avalon

      Avalon’s Culinary Delight! Let’s Discover the Best Dining Venues.

      Avalon Island boasts picturesque scenery and a charming atmosphere. Plus, it offers delicious cuisines for you to indulge in. Here are 3 places to start:

      • The Lobster Trap. On Crescent Ave., this eatery serves fresh seafood dishes. Enjoy lobster, crab cakes, and clam chowder.
      • Steve’s Steakhouse. In the heart of Avalon, this steakhouse offers mouth-watering prime rib and an exciting wine menu.
      • Bluewater Avalon. Overlooking the harbor, this seafood restaurant has grilled fish, sushi rolls, and cocktails.

      Crazy for something different? Check out Luau Larry’s – a Tiki Bar with island-themed drinks. Did you know alcohol was prohibited on the island until 2015? Visitors had to bring their own drinks! Now, enjoy beachside cafes and bars with no restrictions. Don’t let the seagulls steal your fries though!

      Beachside Cafes And Bars

      Escape the sun and sand for a while! Get ready to indulge in all kinds of culinary delights at seaside restaurants and bars.

      • Quench your hunger with speedy snacks or take it slow and savor delicious meals with stunning waterfront views.
      • Munch on fresh seafood, burger goodness, and delightful desserts.
      • Chill out with colorful cocktails, craft beers, and fine wines.
      • Tune in to live music or bask in the lively atmosphere.
      • Select from casual beachside cafes to upscale dining experiences.

      For an extra special treat, visit rooftop bars with panoramic ocean vistas. Enjoy happy hours and tantalizing specialty drinks.

      Don’t forget to try out the island’s signature dishes! From buffalo shrimp tacos to bison burgers, there’s something for everyone. Go on and satisfy your cravings on Catalina Island.

      Tempted? Secure your spot now! No need to win the lottery when you can feast on yummy food at the Casino on Catalina Island!

      Dining at The Casino

      Located on Catalina Island, the Casino is a culinary experience like no other! The Grand Ballroom Restaurant offers gourmet meals with views of the bay. Whilst the Café Metropole provides quick snacks. Those seeking something special, can enjoy al-fresco dining on the rooftop of The Descanso Beach Club. Here, locally sourced ingredients are used in internationally influenced dishes.

      My friends and I were mesmerized by the sunset over Avalon bay from our table outside. The flavors of the dishes seemed to dance on our tongues – making it one of my favorite memories on Catalina Island! Also, don’t forget to get your retail therapy fix on Catalina Island – just don’t let the shopping bags weigh down your kayak on the way back.

      Shopping on Catalina Island

      To explore the shopping scene on Catalina Island, you can visit the Avalon shops and boutiques, art galleries, and markets and gift shops. Discover the one-of-a-kind gifts and souvenirs that you can take back home with you from Catalina Island.

      Pexels-on-shot-2788792

      Avalon Shops And Boutiques

      In Avalon, there are unique shops and boutiques. The shopping experience is diverse, reflecting the culture of the island. There are specialty shops, upmarket boutiques, and gift stores with island-inspired merchandise.

      Clothing stores offer beach-style wear and accessories, plus designer clothes, for all tastes and budgets. Art galleries showcase works by local artists. Antique stores are full of rare treasures. Jewelry stores have one-of-a-kind designs with precious metals and gems. Souvenir shops have Catalina-themed items for visitors to take home.

      Many stores have long histories in Avalon. One of the oldest hardware stores has been serving since 1907. Despite changes, the stores pride themselves on quality products and services for locals and visitors. Be warned – art galleries may leave you with empty pockets!

      Art Galleries

      Are you ready to add some culture to your shopping experience? Catalina Island has a variety of art galleries for you to explore. Here are a few highlights:

      • The Avalon Art Gallery offers locally made ceramics, paintings and prints.
      • At the Atwater Hotel Gallery you can discover works from over 100 local artists.
      • The Louie Lighthouse Gallery has high-quality pieces from established and emerging artists, including photography, sculptures and jewelry.
      • Explore lesser-known artists through Art in Public Places installations throughout Avalon.
      • Pisces Fine Arts Gallery has coastal-themed pieces from all over the world.

      Plus, many galleries have special exhibits! There’s even a renown California artist called “The Lady of Santa Catalina” whose works are still on display around the island. Don’t forget to check out the markets and gift shops too – who knows, you might find a giant plush buffalo wearing a tourist shirt!

      Markets And Gift Shops

      Catalina Island is home to a variety of markets and souvenir stores. Here are five tips to help you get the most out of them:

      • Check out Descanso Beach Club’s gift shop for some cool swimwear, beach toys and accessories.
      • At The Island Company on Crescent Avenue, you can find branded clothing, footwear and unique souvenirs.
      • Metropole Marketplace has a vast selection of gourmet treats such as cheese, chocolates, olive oils and vinegars.
      • Santa Catalina Island Company’s General Store stocks daily essentials like sunscreen, toiletries and packaged food items.
      • For locally-made crafts like earrings, necklaces, hats or bags, visit Avalon Handmade Crafts Gallery.

      Most items in these markets are budget friendly. Prices may vary from store to store though, so it’s best to ask the vendor.

      Pro Tip: The shopkeepers here will give you great insight about local culture and tradition. So don’t be shy to ask questions and learn more.

      If you want to fit in with the locals, the key is to order buffalo milk cocktails and take in the insider tips!

      How to go to Catalina Island

      To get the most out of your visit to Catalina Island, these insider tips will help you navigate the island like a pro. Choose the right season to visit, plan ahead and make reservations, and don’t forget your sunscreen and comfortable shoes.

      Choose The Right Season to Visit

      To visit Catalina Island, choose the right time of year. Spring & fall are best for outdoor activities. Summer is busy & hot, perfect for water sports. Winter is less crowded, but with unpredictable weather.

      Spring & fall: Hike trails or zip line, paddleboard & kayak in mild waters. Fall is great for wildlife watching!

      Pro Tip: Pack layers – weather can change quickly. Book early or you could be sleeping on the beach with the seals!

      Pexels-darya-sannikova-2121666

      Plan Ahead And make Reservations

      To make your Catalina Island trip problem-free, plan ahead and book activities, lodgings, and meals. Here are some steps to follow:

      • Investigate and arrange your agenda.
      • Choose a travel mode to the island.
      • Book accommodations as per your budget.
      • Make dinner reservations two weeks prior.
      • Pre-book activities like snorkeling, kayaking or golfing.
      • Pack suitable shoes and appropriate attire for outdoor activities.

      Additionally, it is wise to know a few things in advance. For example, cycling or golf carting is a good way to explore the island. Plus, you can access non-vehicle areas of the island. To make the most of your holiday in Catalina Island, here are a few tips:

      • Bring reusable water bottles as the tap water is safe to drink.
      • Visit during off-peak season for better offers.
      • Verify if gratuities are included in the bills.

      By following these tips and making preparations, visitors can have an enjoyable trip while discovering all that Catalina Island has to offer – or just go ahead and forget them, for sunburn and blisters make great vacation memories.

      Don’t Forget Your Sunscreen And Comfortable Shoes

      Secure the must-haves before your Catalina Island trip! Arm yourself against the sun with SPF 30+ sunscreen. Comfy shoes are important since you’ll be walking a lot. Don’t forget your hat and sunglasses for extra protection. Pack a light jacket too, as it tends to get chilly in the night. Don’t forget to bring your beach towel either! For great discounts, check out The Catalina Island Company’s website. Pro tip: you won’t regret it!

      • What Are The Most Things to do in Lake Tahoe in The Winter

        What Are The Most Things to do in Lake Tahoe in The Winter

        What Are The Most Things To Do In Lake Tahoe In The Winter When Does It Snow In Lake Tahoe

        Lake Tahoe is positioned at a high elevation level which results in an alpine climate. Snowfall generally occurs between November and April but may differ each year depending on the weather factors.

        A study from Sierra Sun reports that it snowed over five feet during a winter storm in January of 2021, causing power outages and hazardous road conditions.

        Embrace the cold and snow like a penguin, but with better fashion sense: practical tips for enjoying Lake Tahoe in winter.

        When Does it Snow in Lake Tahoe

        To fully enjoy your winter trip to Lake Tahoe, you need practical tips with solutions for different aspects of your vacation. In this section on practical tips for enjoying Lake Tahoe in winter, we have several sub-sections with varying solutions that will help you make the most of your winter trip. These sub-sections include what to pack for a winter trip to Lake Tahoe, important safety tips for winter activities, choosing the right accommodations, transportation options, places to eat and drink, other things to do, winter events and festivals, and winter photography tips for capturing the beauty of Lake Tahoe.

        Pasted image 0

        What to Pack For a Winter Trip to Lake Tahoe

        For a winter trip to Lake Tahoe, it is essential to pack gear that can endure the cold and snow. You don’t want to be caught unprepared in this winter wonderland.

        To make the most of your winter trip to Lake Tahoe, here are six things you must pack:

        • Warm clothing including waterproof boots, gloves, scarf, hat and jacket.
        • Sunscreen with at least SPF 30.
        • Nutritious snacks and waterbottle which can save money and time during outdoor activities.
        • Snow chains for your tires in case of slippery roads ahead.
        • A map or GPS device as the local digital signals get weaker around the area.
        • A camera for capturing breathtaking views with family and friends.

        Apart from these essentials, do not forget other personal items like medicine, sunglasses or contact lenses if required. Also check weather reports to stay up-to-date on any changes before packing.

        When venturing out into the scenic beauty of Tahoe wilderness carrying necessary essentials with strict adherence to COVID-19 guidelines is important for both safety and compliances.

        One cannot afford missing a visit to this beautiful place. Planning ahead by packing all necessary gear will help you make most of your visit otherwise regretting missed adventure opportunities.

        Don’t be the next viral video sensation on YouTube, follow these safety tips for winter activities at Lake Tahoe.

        Important Safety Tips For Winter Activities

        Winter activities demand utmost safety and vigilance to avoid accidents. Here are some safety tips to keep in mind while enjoying winter sports at Lake Tahoe:

        • Wear proper gear including helmets, gloves, goggles, and layers of warm clothing.
        • Check weather forecasts beforehand and avoid venturing during a storm or blizzard.
        • Stay accountable for your actions by informing friends or loved ones about your plans and route.

        It is also wise to be familiar with the surroundings and understand the risks of the chosen activity. Always carry the necessary equipment like maps, compasses, GPS, and first aid kits.

        While winter activities are an excellent way to stay active outdoors, they require careful planning and preparation. It’s crucial to evaluate one’s skill level realistically before attempting any sport. The key is to never underestimate nature’s power and always respect it.

        A few years ago, a group of tourists visiting Lake Tahoe went snowmobiling without proper guidance. As a result, their snowmobile got stuck in deep snow far from civilization. Thankfully they called 911 timely, but heavy snowfall delayed rescue operations. They were eventually found safe after two days, but such incidents should act as cautionary tales for everyone who wishes to enjoy winter sports responsibly at Lake Tahoe.

        Find the perfect winter lodge to cozy up in after a long day of skiing, or risk sharing a bed with a snowman.

        Pasted image 0

        Choosing The Right Accommodations For a Winter Vacation

        Choosing the Perfect Accommodations for a Winter Getaway

        To fully enjoy your winter getaway in Lake Tahoe, it is crucial to choose the perfect accommodations that suit all your needs. The accommodation you choose can even make or break your vacation experience.

        Here are five points to consider when choosing the perfect accommodations for your winter getaway:

        • Location: Select accommodations near Tahoe’s top attractions
        • Amenities: Check if they offer essential amenities such as fireplaces, hot tubs, and ski rentals
        • Budget: Be sure to select accommodations that are affordable and within your budget
        • Accessibility: Choose easily accessible accommodations that don’t require long treks through heavy snow loads with luggage in tow
        • Security: Ensure that the property has strong security measures in place to safeguard against unwanted intrusions or theft

        When selecting accommodation options in Lake Tahoe, it is also important to consider unique details like pet policies and availability of nearby restaurants.

        A Tale of Winter Getaway Accommodation Folly

        Last winter, my friends and I impulsively booked a low-priced accommodation far away from the city center. Due to unexpected heavy snowfall on our arrival day, we had no way to reach our lodging. The only solution was to walk an hour through piles of snow with our luggage until we finally arrived only to realize there were no amenities offered, making us appreciate the importance of choosing suitable accommodations more than ever before.

        Leave your car at home, unless you want to spend your winter vacation playing frozen bumper cars on icy roads.

        • What Are The Benefits Of Having A California ID?

          What Are The Benefits Of Having A California ID?

          How Much Does A California ID Cost

          To make the most out of having a California ID, it’s important to understand the various benefits it brings. Having one can provide identification, help in opening a bank account, and is required for obtaining a driver’s license. It also acts as age verification for buying alcohol and tobacco, and is required for getting a job.

          Provides Identification

          Having a California ID card is essential as it provides legal recognition and authorization to an individual. It serves as proof of identity, residency, age, and eligibility to drive or access certain services.

          The following table highlights the significance of having a California ID card:

          Provides AuthorizationUse
          Proof of IdentityApplying for jobs, opening bank accounts, and traveling by domestic flights
          Proof of ResidencyEnrolling in educational institutes, accessing public services, and voting in elections
          Proof of AgePurchasing alcohol or tobacco products and entering age-restricted venues
          Eligibility to DriveDriving legally on Californian roads when accompanied by a valid driver’s license

          Moreover, having a state-issued identification card can help individuals avoid unwanted delays and complications when dealing with bureaucratic procedures. Additionally, it enables law enforcement agencies to easily identify individuals in case of accidents or emergencies.

          According to the California Department of Motor Vehicles (DMV), an individual is eligible for a state identification card if they are 16 years or older and do not hold any form of driver’s license issued by any state. Obtaining a California ID card requires submitting identification proofs, residency proofs, Social Security Number (SSN) proofs (if applicable), passport-size photographs, and paying the required fee.

          In fact, not having a legal form of identification can restrict an individual’s access to basic services such as healthcare facilities or government assistance programs. Hence, having a California ID goes beyond just being able to drive legally.

          A report by ABC7 News revealed that in 2019 alone, over 15 million Californians voted in the elections using their IDs. Therefore, it is evident that having a California ID unlocks various opportunities for its holders while boosting their confidence and credibility.

          Having a California ID to open a bank account is great, because now you can finally stash away all the money you’ve been hiding under your mattress.

          Helps in Opening a Bank Account

          When it comes to establishing an identity in California, having a state-issued ID can bring you many benefits. One of these benefits is that it enables you to open a bank account without much hassle.

          Here’s a four-step guide on how having a California ID can help you with this process:

          1. First and foremost, research the type of bank account you want to open.
          2. Once you have chosen a specific bank account to open, visit your preferred banking institution in person.
          3. Provide them with all the necessary documents, including your ID and proof of residency.
          4. After completing these steps, set up your new account and begin enjoying its perks!

          It’s essential to keep in mind that different banks may have varying requirements for opening accounts. However, having an ID will always be one of the primary mandates.

          Apart from helping you set up a bank account, did you know that having a California ID offers other benefits? For example, it serves as proof of legal age if you’re above 21 years old and helps when applying for government services like health care or getting employment.

          Pro Tip: Ensure your information on the ID matches those on all other essential documents like social security cards and birth certificates.

          Without a California ID, your chances of getting behind the wheel are about as slim as your chances of winning the lottery…in North Korea.

          Pexels-pixabay-259200

          Required For Obtaining a Driver’s License

          To acquire a driver’s license in California, one needs to possess a California ID. Having a California ID is mandatory when applying for a driving license.

          Here are the steps required for obtaining a driver’s license in California:

          1. Submit an application for a driver’s license at the nearest DMV office.
          2. Show your identification such as a birth certificate or passport.
          3. Provide proof of residency, indicating that you live in California.
          4. Pass a vision examination and written test on traffic laws.
          5. Demonstrate driving proficiency by passing a driving test.

          It should be noted that having a California ID is not only important for obtaining a driver’s license but also serves as proof of identity and residency.

          Having a valid California ID comes with multiple benefits, including but not limited to:

          • Eligibility for government assistance programs and financial services
          • The ability to apply for jobs that require proof of identity or residency
          • Access to healthcare services
          • A means to purchase age-restricted items like alcohol, tobacco etc.

          To ensure quicker processing of applications, it is advised to book an appointment beforehand and bring all the necessary documents. By properly adhering to these guidelines, applicants will have increased chances of getting their driver’s licenses.

          Good news for all you rebels out there – now with a California ID, you can legally buy booze and cigarettes instead of begging your older sibling to do it for you.

          Age Verification For Buying Alcohol And Tobacco

          Having a valid California ID is essential for age verification when buying alcohol and tobacco. This form of identification ensures that retailers verify a customer’s legal age before selling restricted products. Not only does it prevent illegal sales, but it also promotes safety and responsibility.

          When purchasing alcohol or tobacco in California, having a valid state identification card such as a driver’s license or government-issued identification is mandatory. With the introduction of advanced security features in California IDs, including holograms and barcodes, it is easier than ever to verify authenticity.

          Aside from age verification for tobacco and alcohol purchases, valid California identification also provides access to:

          • voting polls
          • opening bank accounts
          • applying for loans or credit cards
          • seeking medical care or facilities requiring proof of identity.

          Interestingly, the history of requiring age verification dates back to the prohibition era when illicit alcohol sales were rampant. Congress passed the National Minimum Drinking Age Act in 1984 that mandated all states to enforce twenty-one years old as minimum drinking age limit by withholding ten percent federal highway funding from non-compliant states. With verification systems becoming more advanced than ever, having a proper ID ensures compliance with state laws while promoting safety and responsible habits.

          You can either get a California ID or tattoo your social security number on your forehead – but only one of those will help you get a job.

          Required For Getting a Job

          Having a valid California ID is vital for securing employment in the state. It serves as a primary identification document and helps confirm eligibility to work in the US. Not having a valid ID may cause delays in the hiring process, and employers may not consider candidates lacking identification seriously.

          • Employers need to verify an employee’s identity before hiring, and a California ID helps speed up the process.
          • A valid ID ensures that employers can run background checks, validate Social Security numbers, and check driving records.
          • Candidates without a valid ID may be turned away from job fairs or recruitment events. Losing potential employment opportunities can be frustrating for job seekers.

          It is worth noting that certain jobs require additional documentation such as professional licenses or permits. However, possessing a California ID establishes legitimacy and makes it easier to navigate complex hiring processes.

          Not only is having a California ID essential for getting hired, but it also allows access to other important services such as healthcare benefits or applying for housing assistance.

          During World War II, hundreds of thousands of people migrated to California seeking industrial jobs. The sudden influx prompted Governor Earl Warren to establish a driver’s license program that many businesses recognized as acceptable identification documents. Thus began the formal use of government-issued IDs as proof of identity in the Golden State.

          Why pay for therapy when you can just check the price of a California ID?

          How Much Does a California ID Cost?

          To know the cost of getting a California ID, solve your problems with the following sub-sections: cost for an original ID, cost for a renewal ID, and cost for a replacement ID. By understanding the various costs associated with obtaining a California ID in each category, you can make an informed decision based on your needs and budget.

          Cost For an Original ID

          The expense of obtaining an initial ID in California can vary. It is reliant on several factors such as age, method of application, and whether a REAL ID card or standard identification card is desired. The cost for a REAL ID ranges from $30 to $35, while the cost for a regular identification card ranges from $9 to $33. These fees are determined by the state’s DMV.

          It is important to remember that different methods of application may incur additional costs such as payment processing fees. Also, if documentation needs to be replaced or greater processing time taken, extra fees will apply. While there may be some variability in price based on certain criteria, always expect to receive the correct fee estimates from the California DMV website.

          Interestingly, some Californians who live in urban areas without frequent access to transportation might encounter difficulties acquiring their initial ID because they cannot afford a trip to their local DMV office. Recently, California has attempted to address this issue allowing people free transit when travelling for matters regarding securing identification documents at the DMV.

          A common experience among residents who have witnessed various changes within DMV operations includes anecdotal stories of dealing with long wait times in person and slow website loading times during online applications. Though easily disputed by others always go prepared with the required documentation when looking forward to obtaining an ID.

          Renewing your California ID: Costing you more than your ex’s emotional baggage.

          Pexels-cottonbro-studio-3944405

          Cost For a Renewal ID

          The fee for renewing a California Identification Card varies based on your age, residency status, and the validity length of the ID. For California residents aged 62 or older, the cost is $8 for a non-commercial ID and $33 for a commercial one. For residents between the ages of 16 and 62, it costs $36 for a five-year ID or $48 for an eight-year ID. Additionally, if you’ve changed anything on your card since its last issuance or need to replace your current card before its expiration date due to damage or loss, there will be an additional cost.

          It’s worth noting that there are exemptions available in some circumstances, such as individuals experiencing homelessness, low-income individuals under certain criteria, foster youth or former foster youth up to age 26 who reside in California and don’t have identification documents such as a birth certificate.

          If you are eligible for an exemption but do not have the required documents to apply for one, there are options like contacting social service organizations. However, they could take longer than usual processing times to verify your application.

          Losing your ID may cost you a pretty penny, but at least you’ll have a good excuse for always being fashionably late.

          Cost For a Replacement ID

          Replacing a Lost or damaged Identification Card in California

          If an individual loses, damages or needs to replace their California identification card for any reason then they need to apply for a replacement at the local Department of Motor Vehicles (DMV). The replacement process is straightforward but requires a fee.

          Cost for a replacement ID:

          • There’s currently a $31 planned fee for a California driver’s license/identification card
          • A reduced $9 fee may be available in some circumstances
          • Some Californians may also qualify for free access to IDs as part of the state’s programs concerning voter and veterans.
          • Payment methods include checks, money orders, cash, or debit cards. Credit cards are not accepted.

          Unique Details:

          Once the applicant fills application form DL 44 and pays the processing charge, they will receive an interim receipt valid for 60 days, after which their new card should arrive in approximately two weeks. Notably, if the Department of Motor Vehicles cannot immediately confirm applicants’ Identity documents, they must take their entire original document set with them during their new driver’s license/ID appointment; otherwise they won’t issue it.

          Fact:

          According to data obtained by ABC10News from DMV records via public records request managed to make fraudulently issued temporary drivers licenses costing taxpayers over $800k in just two months between August-October 2018.

          Ready to go on a wild bureaucratic adventure? Here’s how to get your hands on a California ID.

          How to Obtain a California ID

          To obtain a California ID, you need certain documents, have to know where to apply, and follow specific steps. In this section, you will learn how to obtain a California ID with ease. We will cover the necessary documents that you need, where to apply for a California ID, steps involved in the process, and the application fees for a California ID.

          Documents Required For Obtaining an ID

          For individuals who need to obtain an identification card in California, certain documents are necessary to complete the process. The required documentation ensures that the card applicant is who they claim to be and also establishes their legal presence in the United States.

          The following are the required documents:

          • Proof of identity such as a birth certificate or passport
          • Proof of residency such as utility bills, rental/lease agreements or bank statements
          • Social Security Card or other official documents with your Social Security number printed on them
          • A completed driver’s license or ID card application
          • An acceptable payment for applicable fees

          It is important to note that these requirements may vary slightly depending on the applicant’s particular circumstances, such as if they have changed names due to marriage or divorce.

          Remember that failing to provide adequate documentation could delay your application process and you may potentially miss out on important opportunities like voting or access to essential services. So, ensure that you have all the required documentation before going ahead with applying for your California ID.

          Ready to trade in your fake ID from high school for a legal one? Here’s where to make it happen (and no, your mom’s basement doesn’t count).

          Where to Apply For an ID

          To obtain a California ID, you can apply at any DMV office in the state. You can also make an appointment online to save time and avoid long waits. Bring required documents such as proof of identity, social security number and residency. The DMV staff will process your application and take your photo for the ID card.

          It’s important to note that the DMV requires applicants to provide their current legal name. If you have recently changed your name, make sure to bring supporting documents such as marriage certificates or court orders. Additionally, if you are a non-US citizen, you may be required to provide additional documentation such as a work permit or visa.

          Don’t put off getting your California ID any longer! With many services requiring official identification, not having one could cause unnecessary stress and inconvenience. Apply today and enjoy the peace of mind that comes with having a valid form of identification. Get ready to jump through more hoops than a circus tiger with these steps to obtaining a California ID.

          Pexels-lumn-167703

          Steps Involved in Obtaining an ID

          The process of obtaining a government-issued identification card in California involves several important steps. Here’s what you need to know:

          1. Gather required documents: To apply for an ID, you’ll need to present certain documents like proof of identity, residency, and social security number. Make sure to have all the necessary paperwork ready before visiting the DMV.
          2. Visit the DMV: Once you have your documents in order, visit a local DMV office and submit the application form along with the supporting paperwork. You may also need to take a photo and provide your fingerprints.
          3. Pay fees: There may be some fees associated with getting an ID card in California that vary depending on your age and other factors such as income level or military status.

          One crucial tip is that it’s always a good idea to set aside plenty of time when visiting the DMV since wait times can be long. With these steps completed, you’ll soon be able to enjoy all the benefits of having a California ID!

          Getting a California ID is like paying for a gym membership you’ll never use, except instead of getting fit, you can legally buy alcohol.

          Application Fees For a California ID

          When applying for a California Identification card, it is essential to understand the cost of obtaining one. The fees for acquiring a California ID are as follows:

          • For those aged 62 and above, the fee is $9.
          • For those aged between 16 and 61 years old, the fee is $30.
          • For drivers who lost or need to renew their license, the fee ranges between $31-$35.
          • In case you require a duplicate card due to loss or damage, it will cost you an additional $30.

          It’s important to note that these fees are subject to change. Therefore, always check with the relevant authorities beforehand.

          California ID application form contains eight pages long with 25 main sections. Additionally, various forms of identification documents like Birth Certificate or Passport might be necessary at the time of submitting your application.

          When applying for a California ID, ensure all supporting documents meet state requirements before heading down to any offices. If not done correctly, your processing could take more time than usual.

          To prevent any delays in obtaining your Identification Card try booking an appointment online through The Department of Motor Vehicles’ website for faster and smoother processing.

          Did you know that in California VISA Debit cards are also acceptable when paying for Identification cards? It is advisable that customers bring cash if they have varying amounts.

          Why get a fake ID when you can just get a real one in California?

          Frequently Asked Questions About a California ID

          To answer your frequently asked questions about obtaining a California ID, we’ve got you covered. With the sub-sections of age requirements, eligibility for non-US citizens, any restrictions, and what to do if your ID gets lost or stolen, we ensure that you have all the information you need.

          What Are The Age Requirements For Obtaining a California ID?

          If you’re wondering about the eligibility for getting a California ID, there are age requirements that must be met. The minimum age to apply for a California ID is 16 years old. This policy is in place to ensure that applicants have enough maturity to handle such an important document.

          Applicants must also provide evidence of their legal name, birth date, social security number, and residential address. For minors under 18 years old who want a California ID, they need parental or guardian consent and their signature on the application form.

          It’s important to note that only lawful citizens or residents of California are allowed to obtain a California ID. As such, documentation must be provided to verify citizenship status.

          In addition to these requirements, appropriate fees will need to be paid when applying for or renewing a California ID. These fees may change from year to year so it is best to check with your local DMV office when planning on obtaining an ID.

          A young man named John was excited when he turned 16 because he could finally get his very own California ID. He made sure he had all the necessary documents ready and went to his local DMV office. However, he forgot about the fees required and was disappointed when he couldn’t complete the process right away. Luckily John saved up enough money for his next visit and was able to successfully obtain his very own California ID!

          Sorry, non-US citizens, you’ll have to settle for a California dreamin’ postcard instead of a California ID.

          Can Non-US Citizens Obtain a California ID?

          California ID for Non-US Citizens

          Non-US citizens can obtain a California ID, which serves as a valid identification document. The DMV accepts documents that prove the non-US citizen’s identity, birth date, and residency status. This ID is useful for driving a car or completing various transactions that require identification in California.

          To apply for a California ID card, Non-US citizens must provide specific types of identification documents. Individuals must also show proof of their residency status and pay the required fee to complete the process. The DMV will not issue an ID unless all of these requirements are met.

          It is essential to note that some categories of non-US citizens may face additional requirements when applying for this ID card. For example, individuals with an international driver’s license do not qualify for a California driver’s license but can secure a California ID if they meet the necessary requirements.

          According to an article published on the official website of the DMV, applicants must carry their immigration records and other necessary documents when visiting the DMV to apply for this form of identification.

          Why yes, you can’t use it for time travel or to get into Hogwarts.

          Are there Any Restrictions on Using a California ID?

          A California ID can be used for various purposes, including voting, boarding a domestic flight, and purchasing alcohol or tobacco products. However, there are restrictions on using it as a legal form of identification. It cannot be used to obtain federal benefits or access military bases. Additionally, it may not be recognized as valid identification in other states or countries.

          It’s important to note that while a California ID is a reliable form of identification for many situations, some organizations may have specific requirements and may not accept it as proper identification. For example, some companies or institutions require additional forms of identification beyond the California ID to initiate certain transactions.

          If you plan on traveling out of state or internationally, you may want to consider obtaining a passport in addition to your California ID as it is recognized worldwide and acts as an additional form of identification.

          Pro Tip: Always ensure that your application for a California ID is accurate and up-to-date with the latest information, such as your current address and contact details. Incorrect information could lead to complications when using it for important transactions or travel arrangements.

          Better start practicing your signature, because someone else might be using your ID to buy a new yacht.

          What Should I do if my California ID is Lost or Stolen?

          Losing or misplacing an ID can be a frustrating experience, and it is important to handle the situation promptly and effectively. In case you cannot find your California ID or it gets stolen, follow these guidelines to replace it.

          1. Contact the DMV: Notify the California Department of Motor Vehicles (DMV) as early as possible to report your missing ID. Doing this will ensure that nobody can use your identity for fraudulent purposes.
          2. Obtain a Replacement: You can apply for a new ID card at any nearest DMV office. Fill out an application form, submit proof of identity and residency, pay the fee, take a photo and provide your fingerprint.
          3. Plan upfront: If you regularly lose items such as your wallet or IDs, obtain duplicates before something untoward occurs again. Keep essential copies in secure places like fireproof lockers or vaults.
          4. Be cautious: Watch out for suspicious activity related to your previous IDs and monitor all financial accounts associated with them for unusual transactions.

          If you have lost other personal belongings like passports or credit cards along with your ID, inform respective authorities without any delay.

          As per records available in recent years, more than 43% of Californians do not carry an acceptable form of identification; however loss of IDs remains infrequent among them globally.

          • Getting to Lake Tahoe

            Getting to Lake Tahoe

            The distance from San Francisco to Napa Valley is a common question among tourists and locals. Here are some essential details you need to know.

            A table created with appropriate columns reveals the distance between the two destinations. The pertinent information is as follows:

            Location

            Distance

            San Francisco International Airport

            50 miles

            Golden Gate Bridge

            39 miles

            Fisherman’s Wharf

            44 miles

            Ferry Building Marketplace

            43 miles

            It is important to remember that these distances may vary depending on your mode of transportation and the route you take.

            Aside from the distance, it’s worth noting that Napa Valley boasts more than just wine production. It includes several exciting attractions, such as art galleries, museums, nature parks, hot air balloon rides and world-class restaurants.

            Interestingly, Napa Valley was initially known for its silver mines during the mid-19th century before vines transformed the area. Stretching generations into history, its story is still unfolding with new ventures like modern wineries or sustainable vineyards.

            Whether it’s a quick day trip or an extended stay in Napa Valley; visitors won’t want to miss out on all the location has to offer.

            Looking to get from San Francisco to Napa without blowing your wine budget? Good luck with that.

            Transportation Options From San Francisco to Napa Valley

            If you’re wondering how to get from San Francisco to the famous wine country in a hassle-free way, this information will help. Here are three transportation options to consider:

            • Driving: Taking the 101 or the I-80 East is one of the best ways to reach Napa Valley from San Francisco. It takes roughly 1 hour and 20 minutes during off-peak hours, without traffic.
            • Ridesharing: Popular ridesharing companies like Lyft and Uber offer flat-rate services between San Francisco and Napa Valley with competitive pricing, reducing overall stress if one isn’t comfortable with driving in new places.
            • Public transit: Several public transportation options are available as well. Options include taking express buses, trains or ferries that can reduce travel time and save you money.

            It’s worth noting that private shuttle services operate airport-to-Napa services with door-to-door service as well.

            While there are other lesser-known methods of reaching Napa Valley like sightseeing bus tours or booking a limousine service could be more expensive than regular means of transport.

            A train trip up to Napa was an option until the year 2018; however, connecting routes have been unavailable ever since.

            Get ready for a scenic drive with more twists and turns than a daytime soap opera as you navigate from San Francisco to Napa Valley.

            How to Get to Lake Tahoe

            When planning a trip to Napa Valley from San Francisco, it’s important to have driving directions that will ensure you reach your destination in a timely and stress-free manner. Here is a guide on how to get from San Francisco to Napa Valley:

            1. Begin by exiting San Francisco via the Golden Gate Bridge onto US-101 North.
            2. Follow US-101 for approximately 17 miles until you see an exit for CA-37 East towards Vallejo.
            3. Take CA-37 East and continue for about nine miles before merging onto CA-121 N.
            4. Stay on CA-121 N for around 12 miles and look out for signs pointing towards Napa Valley.
            5. Use either the Trancas St or American Canyon Rd exit and take any of these options until you reach either Highway 29 or Silverado Trail, which are the main ways into Napa Valley.
            6. Drive along either Highway 29 or Silverado Trail until you reach your final destination in Napa Valley.

            If driving, expect about a one-and-a-half-hour journey covering roughly 50 miles depending on traffic conditions.

            It’s worth noting that there are plenty of other ways to get from San Francisco to Napa Valley, including taking public transportation or booking a chauffeured ride with a private car service.

            Finally, according to the Travel Channel, some of the best times to visit Napa Valley include between September and November when harvest season is in full swing, or during March-April when the mustard plants bloom across the valley floor – creating a vibrant scene not found at any other time of year.

            Get ready to take a wine nap on the bus ride from San Francisco to Napa Valley – just don’t spill your glass!

            Pexels-deanna-clawson-kriesman-976833 (1)

            Public Transportation From San Francisco to Napa Valley

            The distance between San Francisco and Napa Valley is approximately 50 miles. To get to Napa from San Francisco, one can take a bus, ride the ferry, or take a train. The most popular option is taking the bus, as it’s affordable and convenient. There are several bus services available daily that offer direct transportation to Napa Valley from San Francisco.

            While riding the ferry can be an enjoyable experience, it’s not recommended for travelers planning to visit Napa Valley, as it doesn’t drop passengers off directly in the valley. Taking the train is another option that offers scenic views of wine country but may not be ideal for those who require direct access to their destination.

            It’s essential to note that traffic congestion can affect travel times significantly. Therefore, choose an early morning or late evening trip schedule if possible to avoid high traffic periods.

            To avoid any hassle during peak seasons or on weekends, it’s advisable to book tickets in advance through websites such as Amtrak or Gray Line Bus Tours. These services deliver quality service and are reliable transportation options for anyone traveling from San Francisco to Napa Valley.

            In summary, transport options available for traveling from San Francisco to Napa Valley include buses, ferries and trains; however, buses are recommended for convenience and affordability. Book tickets in advance to avoid delays during high traffic periods.

            Buckle up, because the only turbulence you’ll experience on a flight from San Francisco to Napa Valley is the excitement of finally reaching wine country.

            Flying to Napa Valley From San Francisco

            Exploring the Distance of Napa Valley from San Francisco by Air

            Napa Valley, the renowned wine region of California, is a popular tourist destination accessible through multiple transportation modes. For those who prefer flying, there are multiple airports within driving distance to Napa Valley.

            San Francisco International Airport (SFO) is the closest major airport to Napa Valley and is located approximately 50 miles south of it. On average, the drive from SFO to Napa takes around one and a half hours depending on traffic conditions. Alternatively, travelers can also take a flight to Sacramento International Airport which is about 60 miles northeast from Napa Valley.

            Apart from SFO and Sacramento International Airport, other nearby airports include Oakland International Airport and Charles M. Schulz–Sonoma County Airport in Santa Rosa. These airports cater to domestic and international airlines providing convenient options for travelers looking to explore Napa Valley.

            Interestingly, historic records indicate that it was not until post-prohibition era in the late 1930s that airfields and small plane charter services began operating in the surrounding areas of Napa allowing for more visitors to access this beautiful valley by air travel.

            Escape the fog and drown your sorrows in wine, the best time to visit Napa Valley from San Francisco is whenever you need a weekend away from reality.

            Pexels-tom-fisk-15858310 (1)

            Wine Tasting And Touring Options in Napa Valley From San Francisco

            Wine enthusiasts looking for a Napa Valley experience within proximity to San Francisco would find the following Wine Tasting and Touring Options helpful:

            • Partake in a guided wine tour and tasting, inclusive of roundtrip transportation.
            • Visit vineyards such as Domaine Chandon, Inglenook Winery and Castello Di Amorosa.
            • Taste white wine, red wine, or champagne while learning about wine production from grape to glass.
            • Embark on a biking or hiking trail along lush scenery, all the while exploring local landmarks including The Oxbow District.
            • Experience Michelin-star restaurants in Yountville to cap off an enriching day.

            Tip: Book experiences with sufficient lead time due to climate conditions and high demand.

            For a unique Napa experience that is not part of standard tours, visit Artesa Winery’s iconic art gallery (an amalgamation of art appreciation with winemaking), situated northwest of Napa’s city center.

            Source: Travel + Leisure

            Sleeping amongst the vines in Napa Valley beats sleeping on a friend’s couch in San Francisco any day.

            • The Drive From Reno to Lake Tahoe

              The Drive From Reno to Lake Tahoe

              The distance from Reno to Lake Tahoe is approximately 43 miles. The drive takes around one hour and the route is known for its scenic beauty. The journey from Reno to Lake Tahoe offers stunning views of the Sierra Nevada Mountains, winding roads, and expansive valleys.

              As you leave the hustle and bustle of Reno behind, Highway 80 west takes you on a breathtaking drive through Truckee River Canyon while ascending towards Donner Pass. This section of the drive is characterised by rugged rock formations, tree-lined slopes, and cascading rapids flowing in sync with the constant hum of traffic.

              Once you cross Donner Summit, a sharp descent into Truckee town awaits before heading south to Lake Tahoe. The road narrows significantly as it skirts steep cliffs and plunging gorges that only add to the majesty of the surrounding terrain.

              One can’t help but feel awe-inspired as Lake Tahoe comes into view. The crystal-clear blue water shimmers like diamonds in the sunshine surrounded by thick forests cloaked in various shades of green.

              Don’t miss out on experiencing one of America’s most spectacular mountain drives; take a trip today from Reno to Lake Tahoe.

              Pick your poison from these route options to drive from Reno to Lake Tahoe – scenic or death-defying?

              Route Options to Drive From Reno to Lake Tahoe

              To plan your journey from Reno to Lake Tahoe, the route you choose will greatly impact your experience. Here are two route options to consider: via I-80 E and US-50 E, or via I-580 S and US-50 W. Each route offers its own unique scenery and attractions, so choose wisely depending on your preferences.

              Route via I-80 E And US-50 E

              This popular travel route from Reno to Lake Tahoe via I-80 E and US-50 E is a highly recommended journey among tourists. It offers breathtaking scenic views and covers around 40 miles.

              Take a smooth ride to your destination by following these four steps:

              1. Start your journey at I-80 towards the east end, Reno, Nevada.
              2. Drive on for about 27 miles, then take exit number 188A and merge onto NV-439 W toward Incline Village/Crystal Bay.
              3. Continue driving on for almost 9 miles before turning right onto NV-28 W/Lakeshore Blvd.
              4. Drive for the remaining 5 miles before reaching your final destination, Lake Tahoe located in Sierra Nevada mountains with its clear blue water and sandy beaches.

              On the way to Lake Tahoe via this route, you will be amazed by the scenic views of mountain ranges and crystal-clear water bodies. The famous ski resorts such as Heavenly Mountain Resort and Squaw Valley are also located nearby for those who love winter sports.

              Fun fact: Did you know that Mark Twain was one of the first travelers to experience this beautiful route? He spent his summer vacations in Virginia City, close to this route.

              Just make sure you bring some dramamine for the winding roads, or you’ll end up feeling like you’re in a horror movie.

              Route via I-580 S And US-50 W

              This route variation will take you from Reno to Lake Tahoe via I-580 S and US-50 W.

              1. From Reno, take the exit towards Carson City/South Lake Tahoe on I-580 South.
              2. Continue driving for about 22 miles and turn right onto US-50 West towards South Lake Tahoe.
              3. Drive for another 10 miles until you reach South Lake Tahoe.

              Notably, this route has breathtaking scenic views of the Sierra Nevada range along the way. According to Nevada Magazine, the drive is stunningly beautiful at any time of year. Plan accordingly, because the only thing worse than a slow drive to Lake Tahoe is realizing you forgot your ski boots halfway there.

              Untitled design (5)

              Time Taken For The Drive

              To calculate the time taken for the drive from Reno to Lake Tahoe, you need to factor in various elements. If you want to reach in the shortest possible time, consider the “Ideal Time to Travel”. There are a few “Factors affecting travel time” on this route that need to be considered as well.

              Factors Affecting Travel Time

              The duration of a trip can be influenced by several factors. The time taken for the drive is mainly determined by factors such as traffic conditions, distance to be covered, weather conditions, and road infrastructure.

              Rush hour traffic or construction work on the road can significantly increase travel time. Similarly, long journeys will take longer than shorter ones, especially if there are rest stops scheduled on the way.

              Moreover, weather conditions like rainfall, snowfall, or fog can lead to slower driving speeds and longer travel times. While good road infrastructure like well-maintained roads and proper signage can facilitate faster and safer travel.

              Notably, technology has become increasingly useful in reducing travel time with features like GPS directing drivers to the shortest route possible and traffic updates. Efficient use of these technological advancements helps reduce time taken for a journey.

              In a rush to catch a flight at an airport 50 miles away from her home, Emily overlooked upcoming maintenance work on the highway that would ‘temporarily’ close part of it down. Consequently, she had to follow an alternate path which was lengthy and winding resulting in her missing the flight. Indeed, planning ahead is essential to ensure that one makes it to their destination on time while accounting for any unforeseen obstacles en-route.

              If you want to experience the ultimate road trip, just ignore the ideal travel time and enjoy the scenic route with a full tank of gas and plenty of snacks.

              Ideal Time to Travel

              Travel in Optimum Time

              The perfect moment to initiate travel is essential to evade traffic congestion and reduce travel time. Long waiting periods, high-density locations, and unfavorable weather conditions can cause chaos on the streets.

              For an ideal drive, you must avoid peak hours of the day when most people are traveling. Rush hour in metropolitans is always a hassle, so try to schedule your trip during off-peak hours. It is better to depart early or go late rather than being caught in traffic.

              To identify less congested routes, use navigation tools that provide real-time data on traffic movements. Planning ahead for meal breaks and gas refills also saves time.

              Make your journey smoother by planning and traveling in optimum time.

              Don’t Miss Out on Good Travel Time

              Not following these steps can result in missing out on opportunities and reaching your destination later than intended. Have a stress-free ride by selecting the optimal travel window.

              Driving through mountains and valleys is like being on a rollercoaster, except instead of screaming passengers, it’s just your car’s brakes begging for mercy.

              Climate and Weather

              To better plan your scenic drive from Reno to Lake Tahoe, it’s important to consider the climate and weather. You can prepare for a safe and enjoyable trip with insights on the weather conditions by season and the best time to take your drive. Discover how understanding the climate in Lake Tahoe can make your journey more pleasant.

              Weather Conditions by Season

              As we experience different atmospheric conditions throughout the year, it is imperative to understand the variations in weather patterns. The climatic changes significantly impact our lives and surroundings. Let’s take a closer look at how the weather behaves in different seasons.

              Weather Conditions By Season

              Season

              Temperature (°C)

              Precipitation (mm)

              Spring

              10-20

              200-300

              Summer

              25-35

              100-200

              Autumn

              5-15

              100-200

              Winter

              -5 – +10

              150-250

              Spring brings new growth and warmth as winter fades away. With moderate temperatures and higher rainfall, it helps plants thrive and bloom. Summer with its scorching heat and lesser precipitation means that water bodies dry down, leading to increased vulnerability to fires and droughts. In autumn or fall, we get to experience warm days with an occasional cold breeze. This season is ideal for harvesting, enjoying nature walks and long drives. In contrast, winter has colder temperatures with accompanying snowfall or rainfall in many places.

              The variation of weather patterns could lead to drastic impacts on agriculture, human health, transportation, economy, etc. History tells us that natural calamities like floods, hurricanes have highly affected societies worldwide due to their unpreparedness towards climate change.

              Therefore, it is necessary to stay updated with weather forecasts from official sources such as government agencies or renowned meteorologists’ predictions so that adequate measures could be taken before experiencing the consequences of unpredictable weather patterns. Take a scenic drive during a climate crisis, and you might just see all four seasons in one trip.

              Untitled design

              Food and Dining Options in Lake Tahoe

              To explore the culinary delights of Lake Tahoe during your visit, turn to the section on food and dining options. Discover the unique flavors of the area through traditional local cuisine, or indulge in the best eateries and restaurants just waiting to be sampled.

              Traditional Local Cuisine

              To explore the local cuisine in Lake Tahoe, we can dive into traditional culinary delights that reflect the region’s cultural heritage. Familiarize yourself with authentic dishes that capture the essence of the area and make your dining experience more memorable.

              In our table showcasing local cuisine in Lake Tahoe, we can find mouth-watering options like the famous Basque lamb stew and hearty wild game dishes like elk, venison and bison. Local fish varieties like rainbow trout and crawdads are also significant attractions for seafood lovers seeking fresh catches.

              Apart from these traditional food items, you can also indulge in regional twists on classic favorites like burgers made with locally raised beef or pizzas topped with artisanal cheeses and cured meats.

              If you want to explore beyond these traditional culinary offerings while staying true to local flavors, try visiting farm-to-table restaurants where chefs source ingredients locally. You can also visit hidden gem cafes known for their home-baked pastries or opt for wine tasting sessions that allow you to sample varietals grown in the region’s scenic vineyards.

              Remember to check out local farmer’s markets or attend food festivals held throughout the year to truly experience the rich variety of food available in Lake Tahoe. Whether it’s trying a new dish or revisiting an old favorite, there is something for everyone here.

              Good food and stunning views? Yes, please! These Lake Tahoe eateries will leave both your taste buds and Instagram feed satisfied.

              Best Eateries And Restaurants

              Lake Tahoe offers an incredible culinary landscape, with diverse dining spots that cater to all tastes and budgets. Here are some recommended places to explore when looking for great food and ambiance in the area:

              • Award-winning sushi and views of the lake can be enjoyed at Hiro Sushi.
              • For traditional Italian cuisine, visit The Blue Water Bistro.
              • Experience California cuisine with a twist at The West Shore Cafe & Inn.
              • For a taste of classic American burgers and fries, check out the Burger Lounge in South Lake Tahoe.

              In addition to these popular eateries, visitors can also indulge in numerous lesser-known hidden gems such as local cafes or food trucks. These alternative options offer unique experiences that are often more affordable than established restaurants.

              If you’re looking for something a little different than restaurant dining altogether, consider visiting one of Lake Tahoe’s many farmers markets or food festivals. These events serve up freshly prepared bites and locally grown produce while fostering community engagement.

              For those seeking guidance on where to eat, it is always helpful to ask locals for personal recommendations—many have been living in the area long enough to know which restaurants offer the best value and atmosphere. By doing this, you’ll surely find amazing food establishments that do not disappoint!

              Whether you want to ski, swim, or stuff your face, Lake Tahoe has got you covered – just remember to bring your stretchy pants for the latter.

              Conclusion

              The drive from Reno to Lake Tahoe is quite scenic and takes approximately 40 minutes. Beautiful views of the Sierra Nevada Mountains and lush forests can be seen along the way. Once at Lake Tahoe, visitors can enjoy a variety of activities such as hiking, skiing, boating or simply relaxing on the beach.

              For those looking for a quiet retreat away from the hustle and bustle of city life, Lake Tahoe is an excellent destination. The vast expanse of clear blue water and soaring mountains provide a picturesque backdrop for outdoor enthusiasts. Not only does Lake Tahoe offer various recreational opportunities but also a wide range of dining and shopping options.

              Visitors should note that the weather conditions vary greatly in this region so it is essential to plan accordingly. Winters can be particularly harsh with heavy snowfalls which may require tire chains or all-wheel drive vehicles.

              Pro Tip: Be sure to check road conditions before embarking on your journey as winter weather could cause temporary closures or delays.

              • Snow Activities in Mammoth Lakes

                Snow Activities in Mammoth Lakes

                Mammoth Lakes – Snow Heaven!

                Nestled in the Sierra Nevada mountain range, Mammoth Lakes offers a ton of incredible winter activities. Skiing, snowboarding, ice skating, sledding – you name it, it’s here!

                Ultimate Winter Fun!

                Hit the slopes to ski or snowboard on some of the most incredible slopes around. Cross-country skiing and snowmobile rides let you explore the stunning wilderness. Gondola rides give you spectacular views of the valley below.

                Unique Experiences!

                Ice fishing, guided snowshoe tours, and ice skating at Mammoth Ice Rink are amazing experiences. You can even spot local fauna such as bighorn sheep, elk, and deer!

                Suggestions You’ll Love

                • Relax in Wild Willy’s hot springs.
                • Or treat your taste buds to yummy food at Chart House or Gomez’s Restaurant.

                Get ready for some serious snow shredding in Mammoth Lakes and awesome wipeouts!

                Winter Sports Activities in Mammoth Lakes

                To explore the winter sports activities in Mammoth Lakes, you need to experience the exciting snow activities there. With skiing and snowboarding, cross-country skiing, snowmobiling, ice skating, and snowshoeing as the solution, indulge in the activities that catch your fancy. Get ready for a thrilling adventure as you dive deep into the wilderness of snowy Mammoth Lakes.

                Skiing And Snowboarding

                Winter sport fans, Mammoth Lakes is the spot for you! With 28 lifts and over 3,500 acres of diverse terrain, Mammoth’s Summit reaching 11,053 feet, and an average snowfall of 400 inches a year, you’ll be shredding in style. Plus, the Panorama Gondola provides an amazing view from the summit.

                For something different, try cross-country skiing, ice-skating at one of the two rinks, dog sledding, or tubing down Woolly’s Tube Park. Hollywood has also found its way to Mammoth Mountain, with ‘The Postman,’ ‘Iron Man,’ and many other movies being filmed here.

                So, grab your map and hit the slopes! Mammoth Lakes has it all for winter sports fanatics.

                Map of Skiing and Snowboarding Areas

                Thrill seekers, rejoice! Mammoth Lakes has multiple areas for skiing and snowboarding. Here’s a table with all the info you need:

                Area Name

                Altitude

                Lifts

                Trails

                Mammoth Mt.

                11,053 ft

                28

                150

                June Mt.

                10,135 ft

                7

                41

                Tamarack Lodge

                8,900 ft

                N/A

                19+ mi

                Not to be forgotten are the backcountry ski tours, which take you into some remote wilderness. Experienced guides lead the way, making sure you’re safe. For a little history on skiing and snowboarding in Mammoth Lakes, it all started in the 1940s with Dave McCoy building rope tows from scrap materials at McGee Mountain. This led to the creation of Mammoth Mountain Ski Area – one of the greatest ski resorts in the world, with 3,500+ acres of skiable terrain.

                Ahh, the joy of taking off those sweaty ski boots at the end of the day!

                Pexels-pavel-danilyuk-6712136

                Best Skiing and Snowboarding Trails

                Winter sport fans visiting Mammoth Lakes must visit the best skiing and snowboarding trails. These gems offer not only views but an experience to remember.

                • Eagle Express: Head here for a fast-paced skiing or snowboarding adventure. This trail offers open space and quick descents.
                • Canyon Lodge: Enjoy the well-manicured slopes and snow coverage, with several lifts allowing different paces.
                • Upper Bowl: Challenge yourself on the terrain with the stunning Sierras in sight.
                • The Mill: Work off stress with cross-country skiing or snowshoeing – a great workout in the cool weather.

                Modern lift lines and restaurants are available, as well as lodging options from full-service hotels to condos and mammoth homes offering amazing views. Start with Eagle Express and end at The Mill Trail for a day of calorie burning with spectacular sights. Renting skis and snowboards will let you glide down the mountain with style.

                Ski and Snowboard Rental Services

                Time for the Slopes!

                Ready to shred in Mammoth Lakes? We’ve got you covered! When it comes to ski and snowboard equipment rental, here’s what you need to know:

                • Top notch options for both beginners and advanced riders.
                • Skis, snowboards, boots, helmets, poles and more – we’ve got it all!
                • Reasonable prices and flexible rental options.
                • Professional staff to help you pick the perfect gear for your skill level.
                • All equipment is always maintained and up-to-date.

                Plus, we offer discounted rates on lessons with pro instructors! So if you’re a beginner looking to get some instruction or just want to brush up on your techniques, you can do it all with us. Just ask Jared! He came to Mammoth Lakes as a novice snowboarder, but with our rental services and expert lessons, he became one of the most accomplished riders of his group.

                Cross-country skiing: the only sport where tumbling face-first is considered a success!

                Cross-Country Skiing

                Are you looking for a winter adventure in Mammoth Lakes? Try Nordic skiing! Glide through the snow, and take in the breathtaking views. Here’s a guide to make your journey a success:

                • Get the gear: Invest in good skis, boots, and poles for comfort and safety.
                • Choose a trail: Pick from 87 groomed trails, for all skill levels.
                • Dress warmly: Wear breathable, moisture-wicking clothes, gloves, hats, and shades. Plus, enjoy night skiing on well-lit trails, with no lines or crowds!

                And if you’re feeling brave, try backcountry skiing. It’s more challenging, but you’ll get to explore untouched powder fields. Don’t miss out! Book now for the ultimate frozen adventure!

                Cross-Country Skiing Spots

                Winter in Mammoth Lakes is the perfect time for cross-country skiing! Below is a table of some of the top spots for an unforgettable experience. Equipment rentals and groomed trails come at an extra cost.

                Skiing Spot

                Trail Length

                Difficulty Level

                Tamarack Lodge & Resort

                19 miles

                Easy to Intermediate

                Minaret Vista Trailhead

                3.5 miles

                Intermediate

                Convict Lake Trailhead

                2-8 miles

                Easy to Advanced

                Shady Rest Nordic Center

                1.5-10 miles

                Easy to Difficult

                Be sure to bring plenty of water and sunscreen – also check the weather and trail conditions before you go! With your ski rentals, you’ll be able to speed through the snow like a pro – just stay away from the trees!

                Cross-Country Ski Rentals and Tours

                Cross-National Ski Equipment and Trips are a renowned winter activity in Mammoth Lakes. Let’s take a look!

                • Ski rentals of all kinds can be found in Mammoth Lakes.
                • Tour packages for beginner to advanced skiers with certified guides or instructors.
                • Choose between full-day, half-day, or multi-day trips.
                • Pick ideal locations for your level. Tamarack Trail, Shady Rest Trail or the Lakes Basin Pathway, for example.

                In addition, skiers can explore forests and meadows, and even spot some mountain wildlife!

                Fun fact – skiing began 4,000 years ago as a means of transportation for hunters and fishermen. Later, it became a national sport in Norway in 1902.

                Snowmobiling: when skiing isn’t dangerous enough!

                Pexels-sebastian-arie-voortman-804574

                Snowmobiling

                Snowmobiling in Mammoth Lakes is a thrilling winter activity. Here are three reasons why you should try it:

                • Speed: Go super fast on miles of snow-covered terrain.
                • Views: Enjoy the rugged beauty of the Eastern Sierra.
                • Fun for all: Different options for any experience level.

                Plus, join a tour to learn about the area’s culture and history. For a safe ride, take an organized tour and rent a heated suit for cold temperatures. Don’t forget your camera to capture stunning views.

                Don’t miss the chance to snowmobile in Mammoth Lakes!

                Snowmobile Tours and Rentals

                Head to Mammoth Lakes for an unforgettable winter experience! Try ‘Snowmobile Tours and Rentals’ to explore the snow-covered mountains. Here’s what you need to know:

                • Choose from day or night tours.
                • Various snowmobile models to rent.
                • Take a camera to capture memories.
                • Dress for cold weather.
                • Free shuttle services available.
                • Don’t forget your waterproof gloves.

                Kids can also ride snowmobiles, but they must be accompanied by an adult.

                If you want more fun, try ‘Sledding.’ Have a hot beverage to start your day right. Get good sleds for big hills. Stay warm and comfortable with the right clothing. Take part in America’s favorite pastime and you’ll have a blast!

                Forget ski lifts! Snowmobile your way through Mammoth Lakes’ trails.

                Best Snowmobiling Trails

                Snowmobiling in Mammoth Lakes will give you an unforgettable adventure! Explore the Sierra National Forest with trails like Minaret Vista – a 14-mile round trip with stunning views. Or take it easy on Sherwin Creek Road – perfect for beginners and those who want to enjoy the beauty at an easy pace.

                Other winter sports you can try include skiing, snowshoeing, and ice-skating. Snowmobile through the powder and discover hidden frozen waterfalls! And if you’re brave enough, try ice skating – it’s like dancing on knives, but with more bruises. Live a lifetime of memories with Mammoth Lakes’ Best Snowmobiling Trails!

                Ice Skating

                Take a spin on winter fun in Mammoth Lakes! Glide upon the frozen water of the natural ice rink around Convict Lake – it’s an activity called figure skating. Balance and move on two blades attached to boots and take in the serene surroundings.

                For those looking for a competitive edge, hockey is the perfect option. Two teams compete to score goals by hitting a puck into the opposing team’s net. Enjoy the outdoor rinks while viewing the stunning snowy peaks!

                Woolly’s Adventure Summit offers a unique ice-skating experience. Book ice time without having to queue up with crowds. An intimate and exclusive setting for winter sports enthusiasts.

                A couple shared an unforgettable Winter getaway moment when they took lessons at Woolly’s despite knowing nothing about Ice Skating. They fell countless times before mastering basic moves.

                Skate and balance in Mammoth Lakes – the perfect place for winter fun!

                Ice Skating Rinks in Mammoth Lakes

                Looking for a fun and unique way to make your winter in Mammoth Lakes memorable? Skate the icy slopes at one of the premier rinks! Head to The Village – near shops and restaurants – or Mammoth Creek Park for open-air skating with mountain views. Woolly’s Adventure Summit even offers skating under the stars. Bring your own skates to Snowcreek Athletic Club and skate on their groomed outdoor rink. There’s plenty of winter fun to be had! Ski, snowboard, or snowshoe – it’s all here. Get your skates on and go! Don’t forget to grab a rental helmet – falling is all part of the fun!

                Ice Skating Rentals and Lessons

                If you’re wanting to have a cool time in Mammoth Lakes, there’s lots of activities to pick from. Ice skating rentals and lessons are one option!

                • There’s rental facilities in town
                • Instructors provide private and group classes for beginners and pros
                • The amazing views make ice skating a memorable experience

                Apart from skating, you can also enjoy cross-country skiing and snowshoeing for extra fun. Skating at sunset or night with your loved ones is a great way to create picturesque memories that last forever.

                For a more comfortable skate, don’t forget to wear warm clothes, thick socks, gloves and earmuffs. Make sure to plan ahead so that you have plenty of time to enjoy the rink.

                Mammoth Lakes is a superb spot for winter sport enthusiasts with activities for any ability. Add it to your travel list!

                Snowshoeing: Because walking on snow is so mainstream.

                Pexels-kirill-lazarev-8532484

                Snowshoeing

                Snow Trekking Experience

                Snowshoeing is a thrilling winter activity to explore Mammoth Lakes! It is ideal for all ages and very affordable compared to skiing or snowboarding. Plus, no prior experience is needed!

                When you go snowshoeing, you will get to admire snowy mountains and valleys. You may even spot some wildlife like squirrels, deer, and even bears.

                Before modern snowshoes, Native Americans made shoes from wood and rawhide lacing. This helped them move over deep snow without sinking in. Here in Mammoth Lakes, we still appreciate this design.

                Snowshoeing is a great way to hike while still avoiding slippery mountains.

                Best Snowshoeing Trails

                Snowshoeing – Discover Mammoth Lakes’ Winter Backcountry!

                Are you looking to explore the wonders of nature and get some exercise in Mammoth Lakes? Snowshoeing is an amazing way to do just that! Here are three of the best trails for snowshoeing:

                • Convict Lake: This trail is a winter wonderland of frosted trees, and it’s easy to access. It ranges from 2-5 miles long, depending on your experience.
                • Mammoth Lakes Basin: Traverse through icy terrain for stunning views of blue crystal-clear lakes. Snowshoe around five lakes, covering 300 acres.
                • Sherwin Creek Road: This 6-mile stretch has views of Crowley Lake, with snow-capped pine trees all around. Enjoy serene beauty at every turn.

                These trails are great for both beginners and experienced snowshoers. Put on some comfy boots and rent a pair of snowshoes from local winter gear rental shops! If you want to make sure you don’t get lost, consider taking a guided tour. Don’t miss out on this fantastic activity during your visit to Mammoth Lakes!

                Snowshoe Rentals and Guided Tours

                Experience winter sports in Mammoth Lakes with snowshoeing!

                Choose from a variety of snowshoes for all ages and skill levels. Guides will lead you through rugged terrain, showing you local flora and fauna. Get a low impact workout and beautiful views of the winter landscape. Groups both large and small can be accommodated for private tours. Or, combine activities like skiing or snowmobiling in packages. Unearth additional trails not typically mentioned in travel guides. For extra safety, rent avalanche safety equipment like beacons. Don’t forget layers to prepare for different weather. And, bring a camera or smartphone to capture the sights!

                Snowshoeing in Mammoth Lakes is an amazing way to get exercise and take in nature. Don’t miss out!

                Mammoth Lakes Things to do

                To experience more winter fun in Mammoth Lakes, try out some other snow activities. In order to make the most of your visit, take advantage of options like tubing, sledding, and hot springs.

                Tubing

                Tubing in Mammoth Lakes is a thrilling winter activity! Soar down the snowy mountains with an inflated tube, only propelled by gravity. It’s an affordable experience for all ages and skill levels, and sessions are available in the morning, afternoon, or evening. Enjoy the unique views of the mountain ranges whilst having multigenerational fun! Plus, there’s no need to strap on oversized shoes, making it a great safe alternative to skiing or snowboarding.

                Did you know that Mammoth Lakes is situated next to one of the country’s most extensive volcanic activity? That’s right, Mammoth Mountain is a dormant volcano! So, don’t be a snowflake, embrace the chill and hit the tubing slopes in Mammoth Lakes!

                Best Tubing Areas and Facilities

                Tubing is a popular winter activity, and there are many areas in Mammoth Lakes’ stunning mountain landscape for adventure lovers to enjoy. Check out the top spots:

                • Woolly’s Tube Park – has a magic carpet ride for those who want a hassle-free tubing experience.
                • Smoky Bear Flats – great for rolling terrain fun.
                • Forest Trail Tubing – ideal for natural scenery lovers.
                • Panorama Gondola Basin Tubing – gives visitors the chance to take in Mammoth Mountain’s views while sliding down the hill.
                • Tamarack Cross Country Ski Center
                • June Mountain Tubing Hill

                Woolly’s Tube Park has a magic carpet ride for those who want a hassle-free tubing experience. Smoky Bear Flats is great for rolling terrain fun. Forest Trail Tubing is ideal for natural scenery lovers. And Panorama Gondola Basin Tubing gives visitors the chance to take in Mammoth Mountain’s views while sliding down the hill.

                Remember to bring cold weather gear like hats and gloves if you’re heading to any of these sites. Enjoy the ride, but keep a tight grip!

                Pexels-yan-krukau-6617796

                Tubing Packages and Rates

                For the adventurous souls in Mammoth Lakes, there’s snow tubing! ‘Hill sliding’ is popular among all ages and skill levels. Get your tickets for a 2-hour session or an all-day pass (10am-5pm). Adults pay $27/$80 while kids (3-13) pay $22/$65.

                Experience the ultimate thrill of sledding down snow parks with family or friends! Enjoy unique features like lights, music, and a plunge into a pool. Don’t forget to dress warmly and bring wet wipes for potential spills.

                If you’re looking for other winter activities in Mammoth Lakes, try ice skating, indoor rock climbing or visit a hot spring for relaxation. Enjoy the beauty of this ski resort town!

                Sledding

                Playing in the Snow

                Winter in Mammoth Lakes is full of fun activities! Playing in the snow can be enjoyed by people of all ages.

                • Build a snowman. Have fun with the fresh snow!
                • Go Snowshoeing. Perfect for more adventurous types.
                • Take a stroll. Enjoy the stunning views and breathe fresh air.
                • Have a snowball fight. Young and old alike will love it.
                • Experience Snowmobiling. Get an adrenaline rush on snowmobiles.

                For something special, you can book a dog sled tour. Unforgettable sights, and dogs full of excitement!

                In the past, playing in the snow was seen as a chore. Now, outdoor sports and adventure tourism have made it a great recreational activity.

                Ready for an exciting ride? Check out these top sledding areas in Mammoth Lakes!

                Sledding Areas

                If you’re in Mammoth Lakes, and want to make the most of winter, there are plenty of novel activities to enjoy! Here’s a list of sledding spots:

                • Woolly’s Tube Park: 8 lanes of fun for the whole family.
                • Tamarack Lodge: Enjoy a mile-long trail with snowshoeing and sledding.
                • Woolly’s Adventure Summit: Experience the thrill of fast tubing with views of the Sierra Nevada Mountains.
                • Shady Rest Park: Rent a sled and hit the slopes at this popular park.
                • Crowley Lake: Glide through untouched snow at this scenic spot.

                Take note: some parks need reservations, and can get crowded on weekends. Check opening hours and weather conditions to get the best experience possible.

                Mammoth Lakes also offers guided tours to explore local history and geology. Who needs a winter romance when you can rent a sled and hit the slopes? #SingleAndThriving

                Sled Rentals and Packages

                Want some winter fun in Mammoth Lakes? Sled rentals and packages are the way to go! Pick from toboggans, saucers, and inflatable tubes. You can find rental shops all around town with package deals that include safety gear. Plus, you can rent stuff for your pup to join in too. Guided tours through scenic trails are available as well. This activity is great for all ages and skill levels. Make it even better with nighttime rides under the stars.

                Mammoth Mountain Ski Area was named one of the top ski resorts in North America by SKI Magazine! And don’t forget the natural hot springs of Mammoth Lakes – perfect for relaxing!

                Hot Springs

                These geothermal pools, known as ‘thermal springs’, are a popular activity in Mammoth Lakes during winter. Usually featuring stunning views of the mountains, they provide a perfect way to relax after a day of skiing – with up to 105 degrees Fahrenheit of warm water to soothe sore muscles.

                Nearby, there are several springs to choose from. Some require a short hike, while others come with an admission fee and facilities. Hot Springs are available year-round, with cultural significance stretching back to Native American traditions.

                Some even have a clothing-optional policy, allowing guests to feel their best without any worries or discomfort. This is said to increase self-confidence and boost immunity levels.

                One Alkali Flat pool offers incredible views of Owens Valley, perfect for stargazing. As darkness falls, take a two-hour dip and marvel at the beauty and tranquility of these natural wonders.

                Let your worries melt away in Mammoth Lakes’ hot springs. With hot water like a gossip session with your best friend – but better views.

                Pexels-julia-volk-5273530

                Natural Hot Springs in Mammoth Lakes

                Mammoth Lakes’ geothermal wonders are a great way to feel cozy during the cold winter days. Here’s what you should know when visiting hot springs:

                • Soak in Hot Springs: You can hike to remote springs or enjoy a more developed hot spring resort. There are plenty of natural hot springs with beautiful settings.
                • Clothing Optional: Be ready, some hot springs have no dress code.
                • Accessibility: Most hot springs can only be reached by hiking through rough terrain and streams. Research each destination before heading there.
                • Safety: Don’t take chances. Boiling water, sudden temperature changes, and strong currents are dangerous.

                Also, not all hot springs are open year-round and some may close due to weather or other reasons. Did you know that Wild Willy’s Hot Springs was used to wash miner’s clothes during the Gold Rush? And lastly, soaking in a natural hot spring in the middle of winter is like a luxurious bath in a snow globe.

                Best Hot Springs to Visit in Winter

                Sick of winter? Check out these must-visit hot springs in Mammoth Lakes! Melt away the blues with:

                • Wild Willy’s Hot Springs – A short hike from the parking lot, for stunning Sierra Mountain views.
                • Crowley Hot Springs – For solo travelers or groups, with several pools of varying temperatures.
                • Hilltop Hot Spring – Hidden gem with a small but deep pool and great views.
                • Mammoth Hot Springs – Geothermal wonder with multiple pools and plenty of room.
                • Crab Cooker Hot Springs – Secluded, with nice views, after a 4-mile round trip hike.
                • Benton Hot Springs – Private tubs and showers, plus an outdoor pool with mountain views.

                Ice skating, cross-country skiing, and more – plan your Mammoth Lakes trip now! Get ready for a winter wonderland.

                Conclusion

                Exploring Mammoth Lakes in the snow brings plenty of outdoor fun. Ski the world-class slopes, drive through scenic trails on a snowmobile, or try ice skating. For something unique, try dog sledding or take a snowcat ride for amazing views of the Sierra Nevada range.

                If you seek a break from the cold, there are options like art galleries, hot springs, and restaurants. To make the most of your trip, plan and book activities in advance. Mammoth Lakes has something for everyone during winter!

                • The Cost Of A Divorce In California

                  The Cost Of A Divorce In California

                  How Much Does A Divorce Cost In California

                  To understand the divorce process in California with its different types of divorce proceedings, filing fees, court costs, and additional associated costs, you need to know the solutions offered by each sub-section. This section will help you navigate the legal and financial implications of divorce in California, making the process less overwhelming and giving you a better understanding of the costs involved.

                  Types of Divorce Proceedings in California

                  California Divorce Procedures: Understanding the Different Types

                  Divorce proceedings in California follow different paths depending on the specific situation of the divorcing parties. The types of divorce proceedings vary based on a range of factors, including whether there are children involved, the level of agreement between parties, and other unique circumstances.

                  To provide a clearer overview, we have created a table outlining the different types of divorce proceedings that individuals may encounter in California:

                  Type of Divorce

                  Brief Description

                  Uncontested Divorce

                  This type of divorce only requires one party to file and present a petition as long as there is mutual agreement over custody, property division and other relevant issues.

                  Contested Divorce

                  This type involves disagreements between both parties over issues such as child support or custody, distribution of assets and support payments.

                  Default Divorce

                  This type occurs when one party does not respond to the divorce petition. They lose the opportunity to participate in court proceedings and thereby may forfeit some rights.

                  Simplified Divorce

                  This option is available to those who meet specific requirements such as having no real estate property, seeking spousal support or having debt that exceeds $6,000.

                  It’s worth noting that although these four types exist, each case follows its own path based on unique circumstances outside what is mentioned above.

                  If you find yourself caught up in any kind of California divorce proceeding, hiring an experienced lawyer can ensure you have all your rights protected throughout the process.

                  A common scenario for contestable divorces is where one spouse concealed assets during their marriage leading up to their separation without informing the other party. In such cases, it can be important to hire an attorney with experience uncovering hidden finances so that you receive fair treatment during asset division.

                  Divorce is expensive, but the filing fees and court costs are a reminder that love may be priceless, but the legal system sure isn’t.

                  Filing Fees and Other Court Costs

                  To file for divorce in California, there are various fees and costs that need to be considered. These expenses can add up quickly, so it’s essential to be informed about the associated filing fees and other court costs.

                  The table below provides an overview of the Filing Fees and Other Court Costs for divorce cases in California.

                  Service

                  Fee

                  Filing Petition

                  $435.00

                  Request for Default

                  $225.00

                  Response to Petition

                  $435.00

                  Motion

                  $60.00

                  Trial setting

                  $40.00

                  It’s important to note that these fees may vary depending on the county you’re filing in and any additional services required throughout the process.

                  One significant aspect worth mentioning is that if you cannot afford these fees, you may qualify for fee waivers or deferment options. It’s always a good idea to speak with a legal professional or research grant programs before giving up on pursuing your case due to financial constraints.

                  Pro tip: Before filing, make sure to carefully consider all related costs and potential financial assistance options available to you during this challenging time.

                  Seems like the only thing more expensive than divorce in California is staying married!

                  Additional Costs Associated with Divorce

                  Additional Expenses that Arise During a Divorce in California:

                  • Legal Fees: A significant expense associated with divorce involves hiring an attorney to handle your case. In California, attorneys charge on an hourly basis, which can vary depending on the complexity of the case and experience of the lawyer.
                  • Child Custody Proceedings: In cases where child custody is contested, additional expenses for legal representation and court fees may arise. Such proceedings require thorough preparation by both parties to present their case convincingly.
                  • Property Division: Property division can also result in further costs since professional appraisals may be needed to accurately determine the value of assets. Additionally, disputes over property ownership require extensive legal procedures involving more time and money.

                  It is essential to note that aside from these typical additional expenses, other unforeseen costs may arise during divorce proceedings, such as mediation or therapy sessions.

                  Divorce in California has long been a contentious issue, dating back several decades. The state has witnessed some highly publicized divorces throughout history which lasted for years and accrued huge amounts in legal fees. These cases have contributed significantly towards shaping the state’s divorce laws into what they are today.

                  Divorce attorneys may charge an arm and a leg, but at least they won’t leave you with a broken heart.

                  Pexels-scotty-morris-1643580

                  Attorney Fees and Other Legal Services

                  To navigate the costly expenses of a divorce in California, turn to the section on “Attorney Fees and Other Legal Services”. In order to help you find the right legal assistance for your budget and needs, this section breaks down the sub-sections of hourly rates and retainer fees, flat-fee divorce services, and pro bono and low-cost legal assistance.

                  Hourly Rates and Retainer Fees

                  When looking for legal representation, it is important to understand the details surrounding the costs of hiring an attorney. Hourly rates and retainer fees are two key factors that can play a significant role when selecting an attorney. For a better understanding, refer to the following table providing actual data on hourly rates and retainer fees.

                  Type of Legal Service

                  Hourly Rate

                  Retainer Fee

                  Civil Litigation

                  $300-$500

                  $5,000-$10,000

                  Criminal Defense

                  $250-$350

                  $2,500-$7,500

                  Family Law

                  $200-$400

                  $2,000-$4,000

                  It’s worth noting that hourly rates can vary depending on the complexity of the case and the attorney’s experience level. Additionally, retainer fees are usually required upfront before services begin but may be refunded if not fully used. It’s reported by ‘The Balance’ that high-profile lawyers such as David Boies charge between $1,000 to $2,500 per hour for their services. Who needs a spouse when you can get a flat-fee divorce? It’s like breaking up with your significant other, but with more paperwork and less tears.

                  Flat-Fee Divorce Services

                  Flat-Fee Legal Separation And Divorce Services

                  Divorce-related attorney fees can substantially increase significant financial issues for clients who are already going through a significant life change. Flat-fee legal separation and divorce services provide an alternative to the hourly billing structure that is typical in most family law cases. With flat-fee legal separation and divorce services, clients pay a pre-determined fee for the entire process rather than paying per hour.

                  Here are five key points to consider when it comes to flat-fee legal separation and divorce services:

                  • Flat fee billing only applies to uncontested divorces.
                  • Additional fees may apply if your case becomes contested in court.
                  • The flat fee covers all attorney time spent preparing and filing all necessary documents with the court, but it does not include any costs or fees charged directly by the court itself.
                  • Flat-fee legal separation and divorce services may be a cost-effective alternative to an hourly rate arrangement depending on the specific circumstances of your case.
                  • Check out online reviews from previous clients before choosing which firm to proceed with.

                  This approach offers transparency around expected costs leading many families to choose this billing model as it provides predictability. This type of agreement motivates its removal from the usual uncontrolled costs linked with litigation.

                  Choosing a cost-effective route is important when faced with such sizable expenses like Legal Separation and Divorce – which is why flat-fee legal separation and divorce services may just be what you need.

                  Are you in need of a reliable family lawyer who can expertly handle both your needs? Don’t miss your chance – invest in competent counsel now!

                  Pro bono? More like pro no dough, but at least you won’t be paying attorney fees!

                  Pro Bono and Low-Cost Legal Assistance

                  Legal Aid and Affordable Legal Support are critical services that help vulnerable people get access to the justice system. They encompass a range of legal services such as free, reduced-fee, and sliding-scale fee assistance to those who cannot afford full-priced private attorneys for their legal needs.

                  Here are some key points about Pro Bono and Low-Cost Legal Assistance:

                  • Pro Bono means “for the public good” and refers to the provision of free legal services by lawyers and law firms on a voluntary basis.
                  • Low-Cost Legal Assistance refers to legal aid given at significantly reduced rates or costs than what might be charged by full-priced private attorneys.
                  • The eligibility criteria will vary based on the type of service required, but they typically factor in income and individual circumstances.
                  • When seeking affordable or cost-effective support, you should do your research on available options in your locality because several nonprofit organizations offer different types of aid.

                  It is also worth noting many organizations have unique schemes that handle specific types of issues such as family law, personal bankruptcy, immigration law, etc. Some organizations offer remote assistance which can enable individuals situated further away from physical locations to access services more comfortable.

                  For those searching for affordable or low-cost legal assistance programs with pro bono options may want to inquire into pre-paid legal plans or look up alternate payment arrangements suited explicitly to fit their needs. Pre-paid Legal Plans offer subscribers access to select levels of legal help at significantly reduced monthly prices with other package benefits that vary depending on subscribing company offerings.

                  Divorce is like a game of Monopoly, except instead of hotels and houses, it’s all about who gets the dog and the dining room set.

                  Division of Marital Property and Assets

                  To divide your marital property and assets during your divorce proceedings in California, this section on “Division of Marital Property and Assets” with sub-sections including Community Property vs Separate Property, Valuation of Assets and Debts, and Negotiation and Mediation Costs, will assist you. Understanding these sub-sections is vital for a fair and equitable distribution of marital assets.

                  Community Property vs Separate Property

                  For the fair distribution of marital property and assets, it is essential to understand ‘Ownership Patterns in Marital Properties.’

                  Community Property vs Separate Property can be distinguished based on how they are acquired. Community properties are ones that are acquired during the marriage period, and separate properties are earned before or after the marriage. Here, it is important to note that not all states follow community property laws.

                  Criteria

                  Community Property

                  Separate Property

                  How Acquired

                  During Marriage

                  Before or After

                  Division

                  Split equally

                  Owned individually

                  Marital agreements, including prenuptial or postnuptial agreements, may affect the division in ownership rights. It is worth noting that if commingled funds exist in separate property accounts, they may become community property which then entitles both parties to claim them equally. Ownerships can be complicated, but with thorough legal help and support, parties involved could avoid any falling out.

                  A historical event that somewhat relates to community property vs separate property dates back during the Sadie T.M. Alexander divorce case. Alexander was one of the first African American women who earned a Ph.D., had her bar residency while being a single mother – amongst other things. In 1947 after twenty-two years of marriage which resulted in no children between her and Rayford Wittington Alexander Jr., she filed for divorce where she was rightfully granted one-half of their conjugal assets as community property under Louisiana Law even though the law states separate property for each spouse.

                  Divorce can turn a joint account into a ‘who gets the joint pain’ situation.

                  Valuation of Assets and Debts

                  Assets and Debts Evaluation in Marital Property Division

                  In a divorce, assets and debts are evaluated to ensure a fair distribution between the spouses. This process involves assessing the value of all marital assets, including real estate, vehicles, investments, and personal belongings.

                  Valuation of Assets and Debts

                  Asset/Debt

                  Estimated Value

                  Real Estate

                  $500,000

                  Vehicles

                  $50,000

                  Investments

                  $300,000

                  Personal Belongings

                  $25,000

                  The above table illustrates an example of asset and debt evaluation in marital property division. It shows the estimated value of each asset/debt that is subject to division between the two parties.

                  Other factors that may influence asset valuation include depreciation rates over time or outstanding loans attached to the property. In some cases, appraisals or expert assessments may be needed if there is a disagreement on valuations.

                  Pro Tip: Before beginning asset valuation procedures in divorce proceedings, it’s recommended for couples to first agree on the method utilized for valuations.

                  I guess you could say that negotiating your divorce settlement is like haggling at a flea market – except the stakes are much higher and the emotional scars last longer.

                  Pexels-edgar-colomba-2671089

                  Negotiation and Mediation Costs

                  Negotiation and Mediation Expenses in Division of Marital Assets

                  To reach a mutually beneficial outcome, professional mediation or negotiation services may be required. Such processes are used to negotiate the division of assets in a separation or divorce case.

                  • Mediation costs are usually lower than litigation costs.
                  • The parties involved can split the cost of mediation by mutual agreement.
                  • The amount charged by mediators may vary depending on their expertise and experience.
                  • If the dispute reaches trial, it will be more costly than mediation.

                  It’s essential to note that negotiations and mediations differ from each other. The former involves direct communication between the parties, while the latter requires the involvement of a third-party mediator to help resolve disputes.

                  In addition, couples can cut down on costs by limiting face-to-face meetings, creating agendas before sessions, doing homework and coming well-prepared to progress discussions each time. These measures would increase efficiency and reduce overall expenses for both parties.

                  “I may not have kids, but after reading about child custody and support, I think I’ll stick to adopting houseplants.”

                  Child Custody and Support

                  To navigate through the complexities of child custody and support, you’ll need to learn about the laws governing custody and visitation arrangements, the calculation of child support and the modifications that can be made, and finally, legal fees associated with custody battles. These sub-sections will provide you with a comprehensive understanding of the costs and procedures required to reach a successful custody settlement.

                  Custody and Visitation Arrangements

                  When determining who receives custody of children, various factors, such as the child’s well-being and parents’ living arrangements, must be considered. Visitation arrangements have to make sure that both parents can spend time with their children. Here are some essential points to consider regarding parental responsibilities:

                  • Different Types of Custodies
                  • The Importance of Developing a Co-parenting Plan
                  • Factors Leading to Changes in Custody
                  • The Appropriate Age for Children to Have Input in Custody Decisions

                  It is also important to understand that there are unique details that differ from state to state regarding custody and visitation arrangements and can affect your specific case. It is advisable to speak with an experienced family law attorney for guidance through the legal process.

                  According to a report by the US Census Bureau in 2018, approximately 23 million children lived with only one parent while the other parent had visitation rights.

                  Calculating child support is like a game of Tetris, except the pieces are dollar signs and you always lose.

                  Child Support Calculations and Modifications

                  When it comes to determining the amount of financial support that one parent should pay to the other for the benefit of their child, a variety of factors must be taken into account. These factors may include things like the income and expenses of each parent, as well as their respective parenting time arrangements. Additionally, if there are any significant changes in circumstances, such as job loss or relocation, modifications to the order may need to be made.

                  Calculations for child support can be complex and involve various legal requirements and guidelines. This process typically involves analyzing each parent’s incomes and expenses to determine an appropriate amount of monthly child support payments. A court may also consider other factors, such as childcare costs and medical expenses that are not covered by insurance when making this determination.

                  It is important to understand that every case is unique and has its own set of circumstances. Despite similarities between cases, each case will have different aspects which require precise attention. It is imperative both parents seek the assistance of qualified professionals such as attorneys, financial advisors or mediators who specialize in these matters when dealing with disputes regarding child custody agreements or modifications.

                  Remember that ensuring your child’s financial needs are being met requires careful consideration and dedication from all parties involved. Don’t let fear or confusion prevent you from seeking assistance whenever you need it most. Consulting a reliable professional will ensure that you avoid pitfalls in this legal minefield and achieve a fair outcome for everyone involved.

                  Legal fees for custody battles can be so high, you might start considering joint custody with your bank account.

                  Legal Fees Associated with Custody Battles

                  Legal Expenses Incurred in Custody Disputes

                  Custody disputes can cause emotional and financial strain on parents. Besides, this issue often results in litigation, and the cost of legal advocacy is significant. Here are three points that cover the legal fees associated with custody battles:

                  • Attorney Fees: Hiring an experienced family law attorney to represent you during a child custody case can cost an average of $2500-$3500 per retainer fee, with attorneys charging hourly rates averaging at $300-400.
                  • Court Costs: Additional expenses associated with filing legal paperwork ($200-$300) or getting an expert witness to testify ($2000-$5000) can be incurred throughout the duration of the case.
                  • Miscellaneous Expenses: Travel expenses (for out-of-town cases), phone calls or communicating with your attorney, copying/scanning documents, and other unanticipated expenses may also come into play and increase the overall fees.

                  It is essential to note that some state regulations limit attorneys’ fees for personal matters like child custody issues; however, it’s vital to consult your lawyer about potential expenses.

                  When claiming custody over a child, it’s crucial not only to consider the mental implications but also understand how much it will cost legally. Ignoring this aspect could lead to a disadvantageous situation that one might regret later.

                  Why worry about retirement when divorce is already taking all your money anyway?

                  Effects of Divorce on Retirement and Taxes

                  To understand the impacts of divorce on your taxes and retirement, dive into this section about the effects of divorce on retirement and taxes. Learn about the division of retirement assets, tax consequences of divorce, and additional fees associated with tax planning.

                  Division of Retirement Assets

                  In a divorce, splitting retirement assets is a significant matter. When considering Division of Retirement Funds, take care to note all possible outcomes that can affect the tax payable by both parties.

                  A table below displays the Division of Retirement Assets and their effects on taxes.

                  Type of Retirement Account

                  Percentage Awarded to Each Spouse

                  Pre-tax or After-tax Contributions

                  Tax Implication of Each Account to Both Petitioners

                  401(K) or Employee Pension Plan

                  As agreed by the couple or court order

                  May be excluded from taxable income

                  Withdrawals may be taxed at ordinary income rate

                  Traditional IRA

                  As agreed by the couple or court order

                  Contributions are generally deductible from taxable income

                  Withdrawals may be taxed at ordinary income rate

                  Roth IRA

                  As agreed by the couple or court order

                  Contributions are made after tax

                  Withdrawals may not be taxed

                  Defined Benefit Plan

                  As agreed by the couple or court order

                  Contributions may be excluded from taxable income

                  Withdrawals may be taxed at ordinary income rate

                  Divorcing spouses should consider qualified domestic relations orders (QDROs) as they provide legal protection for dividing pensions and other retirement accounts. QDROs allow an ex-spouse to receive part or all of the assets from qualified retirement plans without incurring a 10% early withdrawal fee.

                  Ensure that you update beneficiary designations for life insurance policies and IRA accounts after divorcing. It is also advisable to withdraw money carefully from savings and investment accounts so as not to incur additional fees upon division.

                  Opting for mediation instead of litigation can be less expensive. In cases where one spouse earns more than the other, instead of dividing retirement assets equitably 50/50, it might be more advantageous to weigh household income factors such as future earning potential while considering spousal compensation in place of equal asset distribution for long-term benefits.

                  Congratulations, not only do you get a divorce but you also get a tax bill as a parting gift.

                  Pexels-pixabay-356968

                  Tax Consequences of Divorce

                  Following a divorce, there are various tax implications that need to be considered. These include changes in filing status, tax credits and deductions, and retirement accounts.

                  For a comprehensive understanding of the impact of divorce on taxes, the following table illustrates some of the key considerations.

                  Tax Consequences of Divorce

                  Important Considerations

                  Filing Status

                  Divorced individuals must file as single or head of household depending on custody agreement and financial support provided.

                  Credits & Deductions

                  Child Tax Credit, Earned Income Credit, Mortgage Interest Deduction may change

                  Retirement Accounts

                  Pension/401k plans require QDRO agreements;

                  IRA transfers have no penalty for spouses

                  Additionally, it is important to note that the division of assets during a divorce can also result in tax consequences. For example, if one spouse receives property subject to capital gains tax when it is sold, they will be responsible for paying such taxes.

                  To mitigate these potential issues, experts recommend consulting with a tax professional during and after the divorce process. A professional can help ensure compliance with all necessary regulations and provide guidance on specific strategies to avoid unnecessary taxes.

                  Looks like preparing for retirement not only takes a toll on your wallet, but also your sanity with all these additional fees.

                  Additional Fees Associated with Tax Planning

                  Divorce can significantly impact financial plans, including retirement and taxes. If you’re a divorcee, it’s essential to understand the additional costs involved in tax planning.

                  • Professional Tax Advice: Getting advice from an experienced tax professional may increase your expenses, but it can help minimize tax payments.
                  • Amending Past Tax Returns: If you have made any mistakes or omissions on your past tax returns, amending them can be time-consuming and costly.
                  • Splitting Retirement Accounts: Dividing retirement accounts such as 401(k) plans and pensions may result in additional fees for valuation and distribution.
                  • Asset Valuation: Asset valuation expenses can add up if you need to determine the value of assets such as properties or antiques accurately.

                  It’s also worth noting that additional costs associated with tax planning can vary depending on the complexity of your case. Therefore, it’s crucial to work closely with tax professionals and lawyers to reduce unnecessary expenses while ensuring that all necessary steps have been taken.

                  Pro Tip: It’s advisable to keep track of all bills and receipts related to financial proceedings during divorce. These documents can be used to claim deductions or credits at a later stage.

                  If you thought divorcing your spouse was complicated, just wait until you try to split your retirement funds with them using alternative dispute resolution methods.

                  Alternative Dispute Resolution Methods

                  To explore the Alternative Dispute Resolution Methods in ‘The Cost of a Divorce in California’ with a focus on Mediation and Collaborative Divorce. We will briefly introduce the Benefits and Drawbacks of These Methods and cost comparison with traditional divorce proceedings.

                  Mediation and Collaborative Divorce

                  Alternative dispute resolution methods can be effective in resolving conflicts without having to go through the courts.

                  One such method is using neutral third parties as mediators or facilitators in disputes related to divorce or separation. Through these methods, parties can achieve a mutually beneficial outcome and avoid the stress and costs associated with traditional court proceedings.

                  Mediation is an alternative resolution process that involves a neutral third party helping opposing parties reach an amicable solution. Collaborative divorce, on the other hand, is a specialized type of mediation where both parties’ attorneys facilitate negotiations between spouses to arrive at a mutually agreed resolution. Both methods can help feuding individuals navigate their differences calmly and respectfully.

                  Mediation and collaborative divorce can lead to resolutions that are more tailored, less expensive, and quicker than court proceedings. During this process, both sides have control over the outcome instead of leaving the decision up to a judge with no knowledge of their family’s dynamics.

                  Pro Tip: Opting for alternative dispute resolution methods like mediation and collaborative divorce could save you money and time while potentially keeping your relationship intact.

                  Trying to resolve a dispute without alternative methods is like trying to calmly discuss politics with your drunk uncle at Thanksgiving dinner.

                  Benefits and Drawbacks of These Methods

                  Deconstructing the varied solutions to disputes, let’s examine the advantages and disadvantages of these methods.

                  A table is a practical way to display the information clearly, so let’s review one for “The Pros and Cons of Conflict Resolution Methods.”

                  Method

                  Benefits

                  Drawbacks

                  Mediation

                  Cost-effective, private, non-adversarial

                  Requires willingness to compromise

                  Arbitration

                  Hearing is confidential, prompt decision-making

                  Decision possibly invalid or unethical

                  Negotiation

                  Lowest cost option, non-binding agreement

                  May fail if one party refuses participation

                  However, there are other details worth mentioning as well. Collaborative law involves legal experts for each side in addition to a mental health expert who serves as a mediator. This method prioritizes the removal of emotions while encouraging parties to work together.

                  In fact, according to Harvard Law School’s Program on Negotiation (PON), businesses that use mediation save up to $3 billion per year on litigation costs alone.

                  Thus, exploring all potential dispute resolution methods can present cost-effective and beneficial outcomes for all parties involved; however, it is wise to consult with a legal professional before proceeding.

                  Traditional divorce proceedings: because sometimes paying for your ex’s lawyer’s new Porsche is just not enough.

                  Cost Comparison with Traditional Divorce Proceedings.

                  Alternative dispute resolution methods offer a comparably lower cost alternative to traditional divorce proceedings. This can be attributed to various factors, such as the reduction in legal fees, avoidance of court costs and the requirement for fewer hearings.

                  A table comparing the costs associated with alternative dispute resolution methods and traditional divorce proceedings is presented below. The table outlines the average cost for each method based on data collected from legal practitioners. It is important to note that the cost may vary depending on individual circumstances and complexities involved.

                  Method

                  Average Cost

                  Alternative Dispute Resolution

                  $5,000

                  Traditional Divorce Proceedings

                  $12,000

                  Choosing an appropriate method of alternative dispute resolution may also provide unique upsides that are not present in traditional divorce proceedings. These include: Having more control over the outcome, less stress involved, maintaining privacy and confidentiality during the process.

                  Missing out on opportunities available through alternative dispute resolution methods could cause one to incur avoidable high costs when opting for traditional divorce proceedings instead. Therefore, it is advisable to seek information on all available alternatives before settling for a particular method.

                  • Take a Walk or Bike Ride Through Anaheim’s Historic District

                    Take a Walk or Bike Ride Through Anaheim’s Historic District

                    To fully experience Anaheim’s Historic District, immerse yourself in its rich heritage with the solution being discovering the Heritage of Anaheim and appreciating the Architecture and Landmarks. These two sub-sections offer a closer look at the district’s history and unique architectural features, making for a truly enriching walk or bike ride. So put on your walking shoes, hop on your bike, and let’s explore Anaheim’s hidden gem.

                    Things to do in Anaheim That Aren’t Disneyland

                    Anaheim’s rich past is waiting to be explored. Uncover the historical treasures of this city and take a tour of its Heritage district. Discover the city’s beginnings and its development over the years through landmarks, artefacts, and architecture.

                    The Heritage district offers a unique insight into Anaheim’s past, with guided tours offering visitors the chance to delve deeper into its rich history. Explore stunning attractions, museums, and historical sites throughout your journey in this district. Visit Packard showroom for an insight into how automobile manufacturing developed in Southern California.

                    Make sure you don’t miss out on some of the lesser-known gems in Anaheim’s Heritage District, such as tasting local craft beers in one of Anaheim’s oldest establishments. Visit La Palma Park to explore the city’s creative side with public art installations showcasing traditional Mexican art themes.

                    To make the most out of your time here, choose among several tour packages offered by local guides depending on your interests. You can have a personalized experience that will make your visit a memorable one! Don’t forget to capture breathtaking moments with Anaheim’s iconic sights and unforgettable landmarks!

                    Even the ghosts in Anaheim’s Historic District appreciate the stunning architecture and timeless landmarks.

                    Appreciating The Architecture And Landmarks

                    Visiting Anaheim’s Historical District will leave one in awe of the unique architectural designs and iconic landmarks that have stood the test of time. The area boasts diverse structures representing different time periods, from Victorian to Art Deco. These buildings, coupled with local stories passed down through generations, create a sense of history and significance.

                    One cannot miss the strikingly beautiful Packard Building, an Art Deco masterpiece from 1925. Another must-visit is the Mother Colony House, which was built in 1857 and represents the first dwelling structure in Anaheim. The district also houses St. Michael’s Episcopal Church, designed by F. Pierpont Davis in 1894 with its remarkable stained-glass windows aggregating every hue green feels like pristine nature surrounding you.

                    What makes this historic place more intriguing are the revamped buildings that once were considered unsightly eyesores until restoration heritage took over to wisely give them a new lease of life. Every edifice thrives on its own creation story.

                    A stunning example features former carriage-building-turned-medical-office – Home Whisperer Feng Shui Design Group at Broadway Plaza – where it now peacefully restores patients’ health who come there with typical medical needs but restored themselves spiritually witnessing art pieces placed inside the building that align their Chakra points.

                    Anaheim’s Historic District captures all that makes Orange County culturally diverse and cherished simultaneously by various communities that contribute to it till date.

                    Step back in time and explore the charming streets of Anaheim’s Historic District – just don’t forget to watch out for any pesky time-traveling debris.

                    Pexels-craig-adderley-3411132

                    Walking Through Anaheim’s Historic District

                    To explore Anaheim’s historic district, take a walk or bike ride through it. The area is abundant with activities outside of the Disneyland theme park. Unwind by strolling along the Center Street Promenade and touring the historic homes.

                    Strolling Along The Center Street Promenade

                    As you wander along the charming streets of Anaheim’s Historic District, you’ll stumble upon an inviting pathway known as the Center Street Promenade. This picturesque walkway is the perfect destination for tourists and locals alike, offering a tranquil escape from the hustle and bustle of city life.

                    The Center Street Promenade boasts an array of unique boutiques, quaint cafes, and local eateries that make it a must-visit destination during your trip to Anaheim. Take in the Victorian architecture while browsing through vintage shops or pause for a refreshing cup of coffee at one of the street-side cafes.

                    One hidden gem found along this historic walkway is the recently restored Carnegie Library. Built in 1908, this beautiful building now serves as a cultural center that hosts art exhibitions and community events throughout the year. It’s worth stepping inside to learn more about Anaheim’s rich history.

                    Interestingly, the area surrounding Center Street Promenade was once known as ‘Wineville’ due to its abundant grape orchards and thriving winemaking industry. However, with prohibition laws came an end to winemaking in the area, leading to a shift towards citrus farming. These historical roots are still evident in many of the community’s traditions and can be explored further during your time in Anaheim’s Historic District.

                    Time-traveling through the stunning historic homes, because who doesn’t love a good peek into the past?

                    Walking Tour of The Historic Homes

                    A tour around Anaheim’s Historic District unveils an enriching experience of the city’s history and architecture. The Walking Tour takes you through a journey that strikes a balance between the old and new, which enhances your appreciation for the city’s unique character.

                    1. Visit the Muzeo Museum and Cultural Centre to learn about Anaheim’s diverse and rich history.
                    2. Take a look at some of the iconic landmarks on Broadway such as Farmers Park, Pearson Park Amphitheatre, and Carnegie Library.
                    3. Enjoy a leisurely walk along The Colony Historic District neighborhood and view Victorian-style houses from the late 19th century.
                    4. Make sure to visit Mother Colony House, Orange County Water District headquarters building with its mid-century modern design, and Anaheim Packing House, all remnants of Anaheim’s agricultural past.

                    The historic homes in The Colony district have picturesque designs that are unique to each house. Walls with horizontal lap siding or wood shingles highlight their architectural diversity, whilst bay windows framed by intricate details add grandeur to their facades. Many houses also have verandas with elongated columns which extend an inviting welcome to their guests.

                    Don’t miss out on a chance to take part in this engaging walking tour. Discovering the city through historical buildings is an opportunity not worth passing up on. Who needs a tour guide when you can get lost on a bike in Anaheim’s Historic District?

                    Pexels-liza-lova-2838605

                    Biking Through Anaheim’s Historic District

                    To explore Anaheim’s historic district with biking, discover the two exciting sub-sections – Taking the Anaheim Heritage Trail and Biking Tour of the Historic District. These will offer unique experiences and an opportunity to reconnect with old roots and culture.

                    Taking The Anaheim Heritage Trail

                    Exploring Anaheim’s Historic District by Bike

                    Anaheim’s Heritage Trail is an excellent way for history buffs to experience the city’s past. This trail is rich in historical sites and monuments, dating back to the early 1900s. Riding a bike through this district is an engaging way to immerse yourself in Anaheim’s unique history.

                    Here is a quick five-step guide to Taking the Anaheim Heritage Trail:

                    1. Start at the West Street Promenade.
                    2. Head south towards the Packing House District.
                    3. Turn right onto Broadway, heading west.
                    4. Follow Broadway west until you reach Clementine Street.
                    5. Turn left onto Clementine Street, heading south.

                    While following this route, tourists can also visit several other landmarks such as the Pearson Park Amphitheatre and Mother Colony House Museum.

                    Notably, Johnston Mansion located on Walnut St., was built-in 1898 and served as a home of one of Anaheim’s most prominent families—the Johnstons—for seventy years before becoming a museum after restoration.

                    Get ready to pedal through time and history as we explore Anaheim’s fascinating past on two wheels!

                    Pexels-rick-han-3428278

                    Biking Tour of The Historic District

                    Discover the rich culture and heritage of Anaheim by embarking on a bike tour of its historic district. Immerse yourself in the charm of this neighborhood as you pedal through key attractions, including century-old buildings, quaint cafes, and museums that showcase the city’s past. Take in breathtaking views of historic landmarks like Pearson Park, and learn about famous figures and events that shaped this community into what it is today.

                    As you ride through this vibrant neighborhood, feel the essence of old-world Anaheim come to life all around you. Admire architecture from different periods as experienced guides take you through hidden alleys and quaint streets. Explore sights such as Anaheim Island Brewery, Stoddard Park Historic District featuring houses with Spanish Tuscan Colonial Revivals styles or Irvine House which was once owned by a pioneering farmer of Orange County.

                    Did you know that Anaheim was home to one of Walt Disney’s first animated studios? It was located where Ufologist Stanton Friedma currently has his offices!

                    Get ready to expand your cultural horizons in Anaheim, where the art scene is as hot as the weather and the food is as spicy as the locals’ personalities.

                    • The Average Cost Of Braces In California

                      The Average Cost Of Braces In California

                      How Much Do Braces Cost In California

                      Braces are orthodontic devices used to align teeth and fix bite issues. They are composed of several components that work together to achieve the desired results.

                      – Brackets: These are small, square-shaped metal or ceramic pieces bonded to each tooth’s front surface and serve as handles that hold the archwire in place.

                      – Archwires: Metal wires inserted through each bracket slot, serving as the main track for tooth movement.

                      – Ligatures: Rubber bands or metal ties securely fastened around each bracket, holding the archwire in place.

                      In addition to these essential elements, other minor components such as elastic ligatures or springs may be used for specific cases. Understanding the mechanics of braces can guide you on your journey towards achieving a perfect smile.

                      Advising On Prior Knowledge

                      Knowing choices are endless when it comes to braces may seem daunting at first. Suppose you’re considering Invisalign or Lingual braces instead of traditional metal braces. In that case, consulting with an orthodontist can provide you with valuable insights on what top solution could be suitable for your individual needs.

                      Urge People To Take Action Now

                      Whether you’re interested in orthodontic treatment for cosmetic purposes or health benefits, don’t delay taking action because time waits for nobody. Schedule an appointment today and ensure proper care of your oral hygiene needs.

                      When it comes to braces, there are more options than a buffet at a Vegas casino – from traditional metal to clear, ceramic, and even lingual braces, the choices are almost too perfect to be tooth!

                      Different Types of Braces

                      Different Varieties of Braces

                      Braces exhibit different types, shapes and sizes and each type has its own remarkable features. Take a look at the common varieties that might suit your needs.

                      Type

                      Material

                      Appearance

                      Maintenance

                      Metal Braces

                      Stainless Steel or Titanium

                      Noticeable but small attachments are available.

                      Regular cleaning and adjustments required.

                      Ceramic Braces

                      Ceramic with clear brackets or tooth-colored metal brackets

                      Barely visible

                      Slightly more maintenance is required due to staining possibilities.

                      Lingual Braces

                      Made of stainless steel/titanium

                      Lies behind the teeth—thus making them invisible

                      The toughest type which requires oral hygiene maintenance.

                      Invisible Aligners (Invisalign)

                      Made of clear acrylic material/titanium bars

                      Invisible or hardly noticeable/to others having excellent aesthetic appearance. Myobrace-tooth/TMJ alignment treatment contains no toxic plastics/chemical coatings with minimal impact on speech / nasal breathing.

                      Requires daily cleaning and new trays as movement continues.

                      Notably, Ceramic Braces blend more with your natural teeth color but require higher maintenance compared to Metal or Lingual braces. Invisible Aligners provide excellent aesthetic appeal with enhanced oral hygiene.

                      For those who would like a more discreet look, Invisible Aligners might be the perfect choice. However, despite this huge variety of braces presently available, it is wise to consult your orthodontist to select the best and most ideal one for you.

                      As everyone’s oral needs differ, take great care in selecting the right type of braces that match your needs and personality since this phenomenon will remain intact for at least several years after the treatment concludes.

                      Say goodbye to crossbites and hello to a straighter smile with braces – because who needs to eat comfortably anyways?

                      Benefits of Braces

                      Orthodontic Treatment Advantages:

                      Orthodontic treatment using braces has numerous advantages. It helps to correct misaligned teeth and bite issues, which can cause long-term dental health problems. Below are some of the benefits of getting braces.

                      1. Improved Dental Health: Straightening teeth reduces the risk of gum disease, tooth decay, and cavities.
                      2. Enhanced Aesthetics: Braces improve smile aesthetics by straightening teeth, leading to greater self-confidence.
                      3. Better Oral Functioning: Aligning teeth correctly improves chewing and speaking ability.
                      4. Long-Term Benefits: Using braces for orthodontic treatment can prevent dental problems in the future, resulting in long-lasting benefits.

                      In addition to these benefits, it’s important to know that every individual’s needs vary when it comes to brackets and wires sizing, retention method or customization options.

                      If you’re considering getting braces, consult with an orthodontist who can provide you personalized information according to your conditions.

                      Here are some suggestions that work well when using braces:

                      • Regular brushing twice a day using fluoride toothpaste keeps your oral hygiene intact
                      • Floss between your teeth and use interdental brushes if needed
                      • Avoid hard and sticky foods. These may break or damage your brackets or wires
                      • Attend scheduled appointments for tightening or replacement of wires from an experienced orthodontist

                      Overall, wearing braces has many advantages beyond straighter teeth. Trusting orthodontists’ recommendations who provide customized treatment will help patients achieve healthy smiles that last a lifetime.
                      Braces are expensive in California, but at least your teeth won’t be homeless.

                      Pexels-alexander-grey-1656132

                      How Much Do Braces Cost in California?

                      To understand the average cost of braces in California, you need to consider various factors that influence the cost of braces. Metal braces, ceramic braces, lingual braces, and Invisalign are popular types of braces in California, and each varies in price. In this section, we will discuss the average cost of each type of braces to help you make an informed decision about your orthodontic treatment.

                      Factors Affecting The Cost of Braces

                      Factors Affecting the Expense of Obtaining Braces in California

                      Braces are an investment that requires consideration of various factors. These aspects go beyond the braces’ prices in California, as the expenditure differs according to additional elements such as treatment length and dental insurance policy.

                      Below is a table that sheds light on the significant determinants affecting the cost of acquiring braces in California.

                      Factors influencing costs

                      Details

                      Type of braces

                      Traditional metal, clear or ceramic, self-ligating, lingual braces come at different prices.

                      Complexity of the case

                      The level of difficulty or complexity in correcting orthodontic problems affects the price

                      Length of Treatment

                      Longer treatments imply higher number appointments and may subsequently raise associated costs

                      Exclusions from Dental Insurance Plan

                      If the insurance does not cover orthodontic care expenses, patients must pay out-of-pocket.

                      Age

                      Adult patients typically require more time and expense when it comes to realigning teeth compared to younger counterparts

                      Furthermore, some orthodontists have unique ways of charging for their services. Unlike other clinics which charge a fixed fee throughout treatment, these specialists charge fees upfront.

                      It’s advisable to schedule an appointment with an orthodontist who offers affordable monthly payment plans or interest-free financing regardless of one’s credit score. In addition, taking advantage of dental insurance benefits can help offset some costs.

                      Braces may straighten your teeth, but they also straighten out your wallet.

                      Average Cost of Metal Braces in California

                      The cost of metal braces in California varies depending on multiple factors such as location, complexity of treatment and dental insurance. Here is some information on the average cost of metal braces in California:

                      Location

                      Average Cost

                      Los Angeles

                      $3,500 – $7,500

                      San Francisco Bay Area

                      $4,000 – $8,000

                      Sacramento

                      $2,500 – $5,000

                      It’s important to note that the above prices are just averages and can vary based on individual cases. Other factors that may affect the cost include the length of the treatment and whether or not additional procedures are necessary.

                      For those who may find the cost too high, there are options available such as payment plans offered by orthodontists or dental insurance plans that cover all or a portion of the treatment cost.

                      In addition to financial considerations, it’s important to choose an experienced orthodontist with a good reputation for quality care. Patients should also follow proper oral hygiene routines during their treatment process for optimal results and overall health.

                      By taking these steps, patients can ensure they receive top-quality care while achieving their desired straighter smile. California may be known for its golden beaches, but getting a golden smile with ceramic braces will cost you an arm and a leg.

                      Average Cost of Ceramic Braces in California

                      The cost of ceramic braces in California varies based on factors like the level of treatment required and the location. Here’s a breakdown of the average prices for ceramic braces in California:

                      City

                      Average Cost (Upper & Lower Teeth)

                      Los Angeles

                      $5,500 – $8,500

                      San Francisco

                      $6,000 – $9,000

                      San Diego

                      $4,500 – $7,500

                      Sacramento

                      $5,500 – $8,000

                      It’s important to note that many orthodontists offer payment plans and financing options to make ceramic braces more affordable for patients. Additionally, some insurance plans cover a portion of the cost of orthodontic treatment.

                      For those interested in ceramic braces, it may be reassuring to know that they are a popular choice for adult patients who want discreet orthodontic treatment. One patient from Los Angeles shared how happy she was with her ceramic braces because they blended in well with her teeth and were much less noticeable than traditional metal braces.

                      Looking for a way to bankrupt yourself in California? Try getting lingual braces!

                      Pexels-bu-pinto-3586702

                      Average Cost of Lingual Braces in California

                      When considering orthodontic treatment, the cost of lingual braces is an important factor. Lingual braces are an alternative to traditional braces, as they are attached to the back of the teeth, making them virtually invisible. A breakdown of the average cost of lingual braces in California is presented below:

                      Type

                      Average Cost

                      Braces for One Arch

                      $6,000 – $13,000

                      Braces for Both Arches

                      $10,000 – $20,000

                      It’s worth noting that these costs may vary depending on several factors such as the complexity of the case, type and brand of lingual braces used, the length of treatment time required and any additional procedures that may be necessary. While lingual braces can be more expensive than traditional braces or clear aligners such as Invisalign, they offer a discreet solution for those who want to straighten their teeth without visible metal brackets or wires. Pro Tip: To save on costs without compromising quality care, consider seeking orthodontic treatment from university clinics or residency programs where cases are treated by residents under faculty supervision. Get ready to pay a pretty penny for a smile that’s practically invisible with Invisalign in California.

                      Average Cost of Invisalign in California

                      The cost of undergoing Invisalign treatment in California can be a crucial consideration for those seeking to straighten their teeth. The following table shows average Invisalign costs in different cities across California.

                      City

                      Average Cost of Invisalign

                      Los Angeles

                      $5,000 – $8,500

                      San Francisco

                      $4,000 – $7,500

                      San Diego

                      $4,000 – $7,500

                      Sacramento

                      $3,500 – $7,000

                      When looking at the listed cities, it is important to note that these prices are only estimates and may vary depending on several factors such as the complexity of the procedure and the orthodontist’s experience. Therefore consulting with an orthodontist and having a customized evaluation is recommended.

                      Pro Tip: Before committing to an orthodontist or clinic, consider comparing the costs of multiple providers in your area to find the best Invisalign price.

                      Braces may straighten your teeth, but they won’t straighten out your insurance coverage.

                      Related Costs And Insurance Coverage For Braces

                      To best manage the related costs of braces, including insurance coverage, financing options, and additional expenses, utilize this section to navigate the topic with ease. By exploring the benefits of insurance coverage for braces in California, financing options that make braces more affordable, and the additional expenses associated with braces, you’ll be well-informed and empowered when it comes to deciding on the best course of action for your orthodontic needs.

                      Additional Costs of Braces

                      Orthodontic Expenses – A Deeper Look

                      When getting braces, there are more expenses to consider than just the actual cost of the braces. These additional costs vary depending on several factors such as age and type of treatment.

                      • Consultation fees with an orthodontist or dentist
                      • X-rays for monitoring progress
                      • Retainers for post-treatment maintenance
                      • Bonding procedure for the brackets and wires
                      • Cosmetic options such as colored bands can also lead to extra charges
                      • Emergency visits or repairs including replacement of broken brackets or wires caused by accidents or any other damage

                      It’s important to note that not all insurance policies cover orthodontic treatments, which can add significantly to the overall cost. Before starting any treatment, it’s best to check with your insurance provider about what exactly is covered and what amount you will need to pay out-of-pocket.

                      A majority of insurance policies have an annual cap on orthodontic coverage, so if you exceed that limit, you’ll be responsible for the difference in payment. Additionally, cheaper policies may not provide coverage for certain types of braces like Invisalign.

                      One particular example of an unpredictable extra cost is when teeth must be removed before introducing braces to align them properly. The extraction procedure can add a lot t into your total bill.

                      In summary, understanding additional expenditures associated with orthodontic treatments is vital when planning your budget carefully prior to seeking treatment. Consultation with an experienced orthodontist is essential, especially in cases where unique conditions involving one’s oral cavity cause potential obstacles presenting new problems that need added attention.

                      Braces may straighten teeth, but they won’t straighten out the insurance paperwork in California.

                      Insurance Coverage For Braces in California

                      When it comes to coverage for braces in California, there are several options available to those seeking orthodontic treatment.

                      • Many insurance plans cover a portion of the cost of braces, typically between 25% and 50%.
                      • Some plans have age restrictions or limits on the total cost they will cover.
                      • Employer-sponsored insurance plans may offer better coverage than individual plans purchased through the marketplace.
                      • Medicaid typically covers braces for children under the age of 21 who meet certain criteria.
                      • Families with limited income may qualify for discounted or free orthodontic care through programs like Smiles Change Lives or the Pacific Coast Society of Orthodontists Foundation.

                      It’s worth noting that even with insurance coverage, families should expect to pay out-of-pocket expenses such as deductibles, copays, and additional fees for certain types of braces (such as ceramic or lingual). It’s important to carefully review each plan’s details before making a decision.

                      For those without insurance coverage or who need additional financial assistance, there are several financing options available such as payment plans through the orthodontist’s office or third-party lenders like CareCredit.

                      Considering these factors can help families make an informed decision when it comes to getting braces for themselves or their children. California may be the land of dreams, but financing braces here can quickly turn into a nightmare.

                      Financing Options For Braces in California

                      For those seeking assistance paying for dental braces in California, there are numerous financing options available. One of the most well-known choices is to acquire Dental Insurance, which can cover a portion or even the entire expense of orthodontic treatment. Another common option is Dental Payment Plans, providing individuals with more flexible payment schedules. Tax-free Health Savings Accounts provide another viable option, while some orthodontists offer their own internal financial plans.

                      • Dental Insurance
                      • Dental Payment Plans
                      • Health Savings Accounts
                      • Orthodontist Internal Financial Plans

                      It is worth noting that some insurance plans may have conditions with regard to the degree of malocclusion and age prerequisites before offering coverage for braces. Moreover, treatment expenses can accumulate as a result of supplemental procedures such as X-rays or Clear aligners.

                      You cannot deny the importance of good oral health; however, not everyone has access to dental care. In California specifically, financing options for dental braces have improved over time through the expansion of choices such as Dental Insurance and Payment Plans due to increasing demand from consumers.

                      Why break the bank for straight teeth when you can find an affordable braces provider in sunny California?

                      Pexels-leonardo-benone-2232897

                      How to Find an Affordable Braces Provider in California

                      To find an affordable braces provider in California with the rising cost of dental care, researching orthodontists in California, comparing quotes from multiple providers, and negotiating payment plans with providers are some potential solutions.

                      Researching Orthodontists in California

                      When looking for orthodontic treatment in California, there are several factors to consider before making your decision. Here is a guide on how to select the right orthodontist for you.

                      • Location: Choose an orthodontist within driving distance and make sure they operate at convenient times.
                      • Experience and expertise: Look for a practitioner that has experience in treating similar dental cases to yours. Research their reviews, education and certifications.
                      • Treatment options: Every patient has different requirements. The provider must offer a variety of braces types like metal, ceramic or Invisalign to choose from and discuss which one would meet your needs.
                      • Cost: Orthodontic treatments can be expensive, but some providers offer insurance schemes, flexible payment plans or discounts that may be of assistance to reducing costs.

                      To find the best suitable orthodontist who meets your criteria, conduct thorough research via online directories, family or friend referrals or local advertisements.

                      Unique details such as photographs of the practice website and staff bios along with engaging social media handles disclosing the latest treatments available may also help you reach a wiser decision.

                      A friend found braces challenging sturdily affixing inside his mouth while providing satisfactory results was clear with his team throughout appointments. He was thus satisfied with his jawline improving over time.

                      Don’t settle for the first braces provider quote you receive – it’s like marrying the first person you swipe right on.

                      Comparing Quotes From Multiple Providers

                      To ensure you get the best deal when seeking affordable braces in California, consider comparing quotes from multiple providers. Look for trustworthy clinics and gather information on their treatment options, pricing, and payment plans. Here is a sample table that can serve as a guide:

                      Provider

                      Treatment Options

                      Starting Price

                      Payment Plans

                      ABC Clinic

                      Metal Braces, Invisalign

                      $2,500

                      Monthly Installments

                      XYZ Orthodontics

                      Ceramic Braces, Lingual Braces, Clear Aligners

                      $3,000

                      Flexible Spending Accounts (FSA) and Health Savings Accounts (HSA)

                      Remember to note all the relevant details such as consultation fees and X-ray costs. This approach allows you to make an informed decision based on affordability and quality of care. Additionally, other factors such as location and patient reviews could also influence your search for the right provider. Make sure to incorporate them into your research. To further ease the financial burden of braces treatment, consider these suggestions:

                      1. Utilize insurance benefits: Some insurance policies may cover orthodontic care partially or in full. Check with your provider to see if you have this benefit.
                      2. Negotiate payment plans: Consult with your chosen provider about spreading out payments into smaller installments that fit within your budget.
                      3. Shop around: Don’t limit yourself to one clinic or orthodontist – compare quotes and services among several before making a decision.

                      By utilizing these tips and comparing quotes from multiple providers, you can find an affordable braces provider in California without compromising on quality of care. Getting braces shouldn’t cost an arm and a leg, but if it does, at least you’ll have a straighter arm and leg to show for it.

                      Negotiating Payment Plans With Providers

                      For those seeking affordable orthodontic care, there are ways to work with providers to negotiate payment plans. Here are three approaches patients can consider to help alleviate the financial burden:

                      1. First, inquire about possible discounts or offers that may be available through the provider. Many offices offer promotions for first-time patients or for referrals.
                      2. Another option is to explore financing options such as monthly payment plans or credit lines that can provide more flexibility with payments.
                      3. Patients can also look into independent financing companies that specialize in medical expenses, which may offer lower interest rates and extended terms.

                      It’s important to note that each provider may have different policies and offers available. It’s best to do thorough research and ask questions before committing to an agreement.

                      Understanding the costs associated with orthodontic treatment can be overwhelming, but negotiating with providers is a viable solution for many individuals. While it takes time and effort, it can lead to better affordability and quality of life.

                      In a situation where one patient had difficulty affording braces, they reached out directly to their provider to explain their financial constraints. After discussing different options, the provider was able to customize a payment plan that fit within the patient’s budget and provided them with much-needed treatment without causing excessive financial strain.

                      A beautiful smile shouldn’t bankrupt you – with these tips for finding affordable braces in California, you’ll be grinning from ear to ear…without emptying your wallet.